
ChevyMan.ru
Mazda Mitsubishi Toyota Land Rover Honda Kia Nissan
English Русский
Български
Беларускі
Український
Српски
Hrvatski
Română
Polski
Slovenský
Magyar
|
Articles | Sitemap | Contacts |


Home   Aveo   Captiva   Cruze   Lacetti   Lanos   Niva   Tahoe   Others  
Lanos T150 (2002-2009)
  • Home
  • Lanos
  • T150 (2002-2009)
  • Chassis
  • Brake system
  • Removal the brake booster

Removal the brake booster (Chevrolet Lanos T150)

            0

We remove the brake booster for replacement in case of its failure.

Disconnect the wiring harness from the fluid level sensor and unscrew the two nuts securing the master brake cylinder (see Removal the master brake cylinder).

In the cabin, under the dashboard..
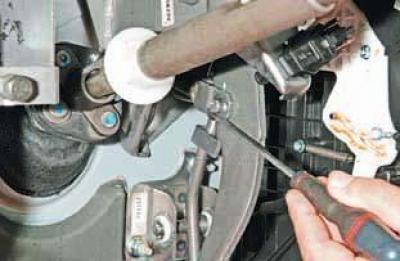
...we use a screwdriver to pry up the spring retainer of the finger that attaches the vacuum…


...we use a screwdriver to pry up the spring retainer of the finger that attaches the vacuum booster pushrod to the brake pedal (for clarity, the instrument panel and steering column have been removed)…
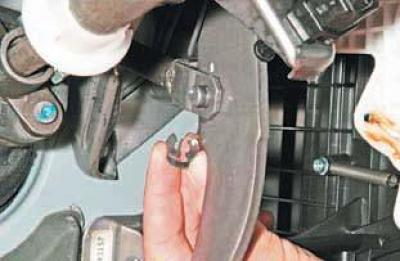
…and we take it off.
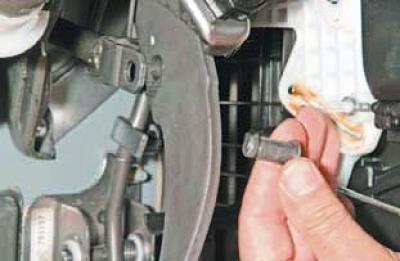

…and we take it off.

We remove the finger from the pedal holes and the pusher eye.

We remove the finger from the pedal holes and the pusher eye.


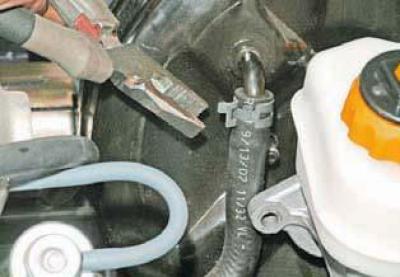
Using pliers, loosen the clamp securing the vacuum supply hose from the intake manifold to the…


Using pliers, loosen the clamp securing the vacuum supply hose from the intake manifold to the vacuum booster..
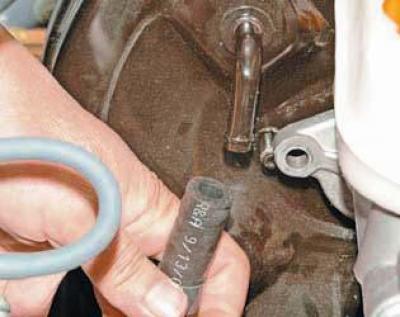
…and remove it from the fitting.


…and remove it from the fitting.

Carefully bend the brake pipes without disconnecting them from the master cylinder, so that air does not get into the hydraulic drive of the brake system..
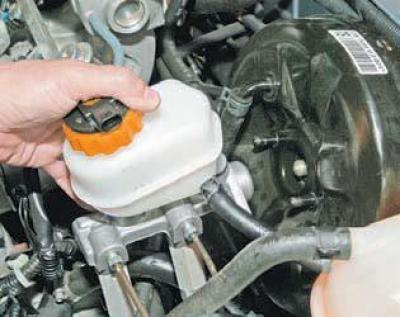
…we move the main brake cylinder (complete with tank) from the vacuum booster housing.


…we move the main brake cylinder (complete with tank) from the vacuum booster housing.


The connection between the master cylinder and the brake booster is sealed with a rubber gasket (see Removal the master brake cylinder).

We remove the rubber gasket from the vacuum booster hole and check its technical condition.

If necessary, replace the gasket with a new one.
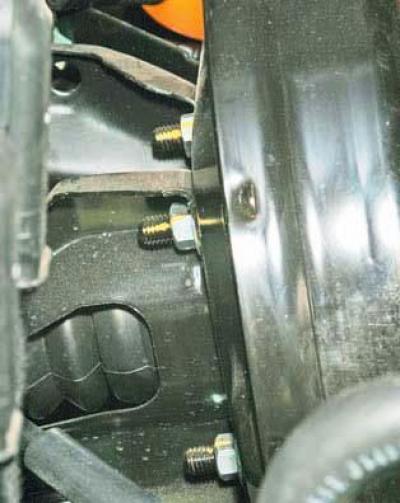
Using a 12 mm spanner, unscrew the four nuts securing the vacuum booster housing to the brackets…


Using a 12 mm spanner, unscrew the four nuts securing the vacuum booster housing to the brackets (the fourth nut is not visible in the photo).
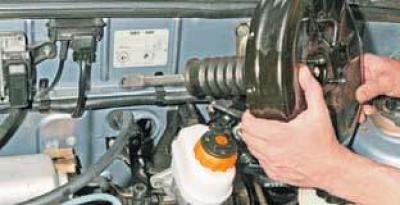
We remove the booster pusher from the hole in the front shield... ...and remove the vacuum booster…


We remove the booster pusher from the hole in the front shield... ...and remove the vacuum booster from the engine compartment.

We remove the corrugated protective cover from the pusher.
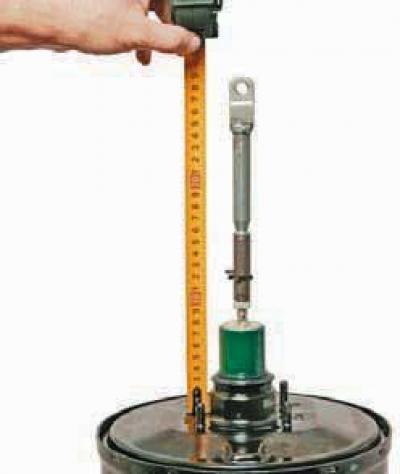
We check the size between the axis of the pusher hole and the mating surface of the vacuum booster,…


We check the size between the axis of the pusher hole and the mating surface of the vacuum booster, which should be 278.5 mm.


To get the right size…
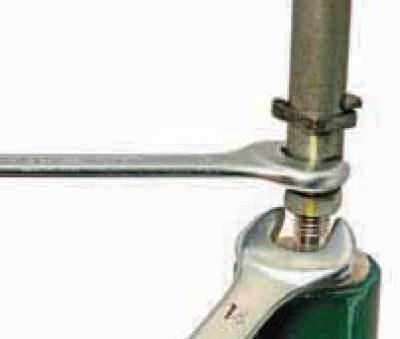
…with a 14 mm wrench, unscrew the lock nut while holding the adjusting sleeve of the pusher with a…


…with a 14 mm wrench, unscrew the lock nut while holding the adjusting sleeve of the pusher with a 13 mm wrench.

By rotating the sleeve we achieve the required size, after which we tighten the lock nut.

If there is a need to inspect or replace the tappet…
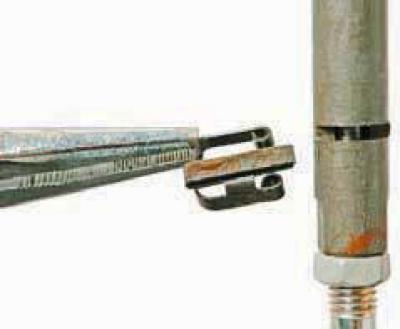
... using pliers we remove the spring retainer from the groove of the sleeve..
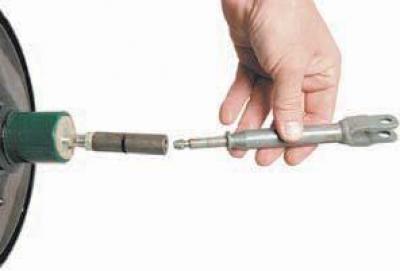

... using pliers we remove the spring retainer from the groove of the sleeve..

…and we take out the pusher.


…and we take out the pusher.

We install the brake booster in the reverse order.

The article was checked: Vladimir Romannikov
This article is available at russian, bulgarian, belarusian, ukrainian, serbian, croatian, romanian, polish, slovak, hungarian

Share information:

Previous articles
Lanos T150: Brake system
Next articles

Removal the master brake cylinder
Replacing the brake pads of the rear wheels
Replacing the protective cover and sealing ring of the front wheel brake piston
Replacing the brake pads of the front wheels
The structure of the braking system
Replacing the front brake hose
Replacing the front wheel brake disc
Replacing the rear wheel brake cylinder
Replacing the rear wheel brake hose
Removal the parking brake system components


See similar articles on the topic of Chevrolet cars:
Checking the operation of the brake booster Chevrolet Aveo T300 (2012-2018)
Parking brake Chevrolet Captiva 1 (2006-2018)
Checking the operation of the brake booster Chevrolet Cruze 1 (2008-2016)
Removal the brake booster Chevrolet Lacetti 1 (2002-2009)
Vacuum brake booster Chevrolet Niva 1 (2002-2016)
Brake booster vacuum sensor Chevrolet Tahoe 2 and 3 (2000-2014)
Checking, removing and installing the brake booster Chevrolet Lumina 1 (1989-1994)
Link in different formats to this page


Visitor comments

No comments yet


How much will 41 + 44 =


Lanos T150 (2002-2009) 
  • General information
  • User manual
  • Maintenance
  • Troubleshooting
  • Power unit
  • Engine repair
  • Control system
  • Supply system
  • Cooling system
  • Exhaust system
  • Transmission
  • Clutch
  • Car gearbox
  • Front wheel drives
  • Chassis
  • Front suspension
  • Rear suspension
  • Steering
  • Brake system
  • Body
  • Repair of body elements
  • Heating and air conditioning
  • Electrical equipment
  • Engine electrics
  • Lighting and lamps
  • Equipment and devices
  • Electrical circuits


ChevyMan.ru © 2017-2026 · Mobile version · Feedback · Site search · Interesting to read · Sitemap: EN BG BY UA RS HR RO PL SK HU

Aveo 2003-2008 · Aveo 2006-2011 · Aveo 2012-2018 · Captiva 2006-2018 · Cruze 2008-2016 · Lacetti 2002-2009 · Lanos 2002-2009 · Niva 2002-2016 · Tahoe 1992-2000 · Tahoe 2000-2014 · Lumina 1 1989-1994 · Trailblazer 1 2001-2008 · Orlando 1 2010-2018 ·
🛡️ For your security and to improve our service, this site uses cookies. You can disable them in your browser.