
ChevyMan.ru
Mazda Mitsubishi Toyota Land Rover Honda Kia Nissan
English Русский
Български
Беларускі
Український
Српски
Hrvatski
Română
Polski
Slovenský
Magyar
|
Articles | Sitemap | Contacts |


Home   Aveo   Captiva   Cruze   Lacetti   Lanos   Niva   Tahoe   Others  
Lanos T150 (2002-2009)
  • Home
  • Lanos
  • T150 (2002-2009)
  • Chassis
  • Brake system
  • Removal the parking brake system components

Removal the parking brake system components (Chevrolet Lanos T150)

            0

Parking brake cables are replaced if they break, stretch, or become jammed inside the casings, when adjusting the parking brake does not allow the vehicle to remain stationary on a slope of up to 23% inclusive.

We remove the parking brake lever for replacement.

We show the replacement of the left cable.

The cables should be replaced simultaneously - left and right.

Remove the rear trim of the floor tunnel (see Removal the floor tunnel lining).

Lower the parking brake lever to its lowest position.

We loosen the tension of the front cable..
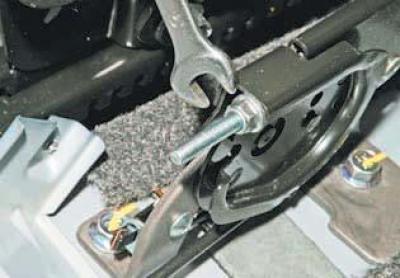
…with a 10 mm wrench, unscrewing the adjusting nut but not all the way.


…with a 10 mm wrench, unscrewing the adjusting nut but not all the way.

From below the car…
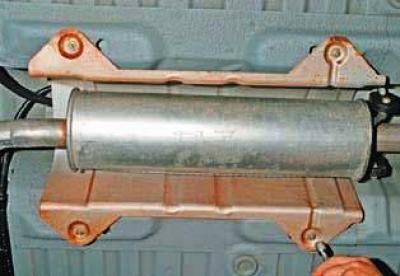
…using a 10 mm socket head, unscrew the four nuts securing the heat shield.

…using a 10 mm socket head, unscrew the four nuts securing the heat shield.


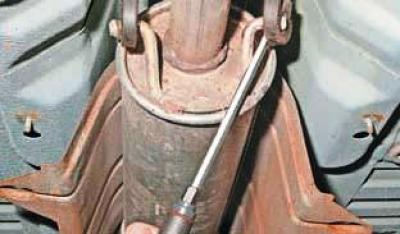
We use a screwdriver to pry up the exhaust system suspension cushion and, leaning the screwdriver…


We use a screwdriver to pry up the exhaust system suspension cushion and, leaning the screwdriver on the bracket of the additional muffler..

…we take it out of the hole in the pillow.

We remove the bracket from the other pillow in the same way.
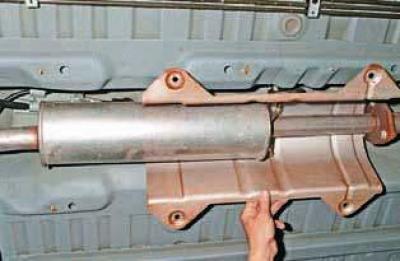
We lower the heat shield onto the additional muffler and move it forward enough so that the front…


We lower the heat shield onto the additional muffler and move it forward enough so that the front parking brake cable and equalizer are visible.
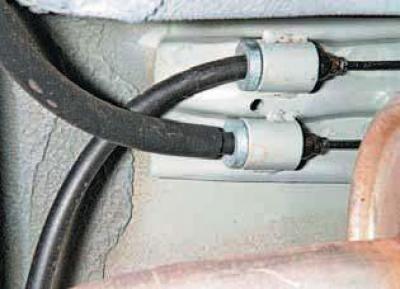
The cables in front of the guide bushings welded to the body bottom bracket are crossed.
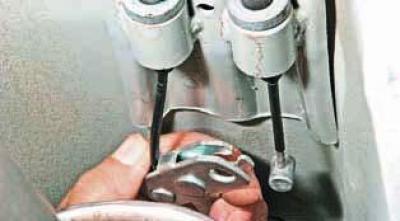

The cables in front of the guide bushings welded to the body bottom bracket are crossed.


We remove the front end of the cable from the equalizer slot.
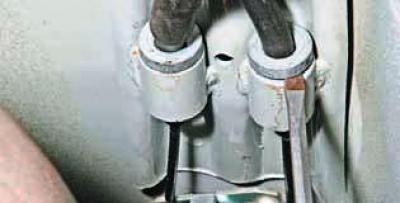

We remove the front end of the cable from the equalizer slot.

Using a screwdriver, pry up the flange of the cable sheath tip…
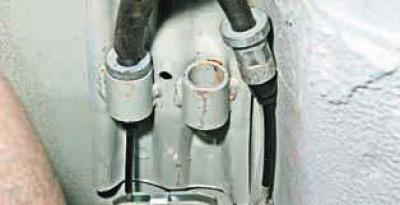

Using a screwdriver, pry up the flange of the cable sheath tip…

…and we remove it from the guide bushing.
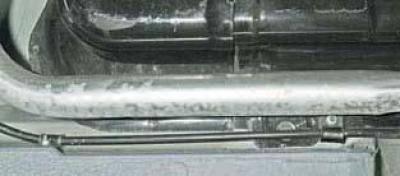

…and we remove it from the guide bushing.

Using a 10 mm spanner, unscrew the nuts securing the two brackets that support the cable.
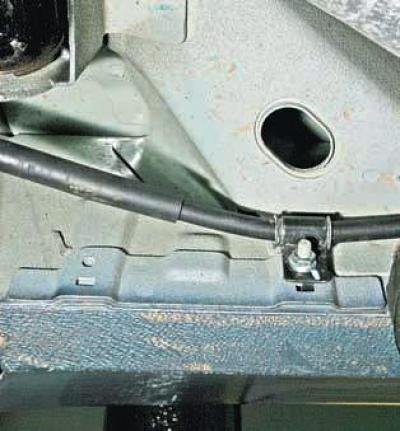

Using a 10 mm spanner, unscrew the nuts securing the two brackets that support the cable.


Using the same tool, unscrew the nut securing the bracket to the inside of the left threshold.
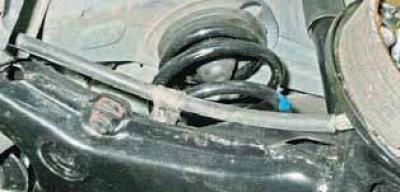

Using the same tool, unscrew the nut securing the bracket to the inside of the left threshold.

Using the same tool, unscrew the nut securing the bracket to the rear suspension arm.


Using the same tool, unscrew the nut securing the bracket to the rear suspension arm.

Remove the brake drum (see Replacing the brake pads of the rear wheels).
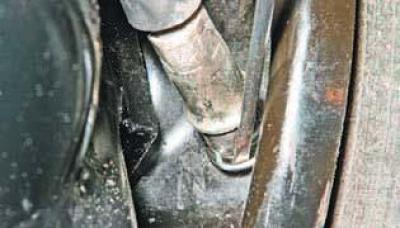
From the inside of the brake mechanism shield, use a screwdriver to pry up the retaining clip of…


From the inside of the brake mechanism shield, use a screwdriver to pry up the retaining clip of the rear end of the cable sheath..
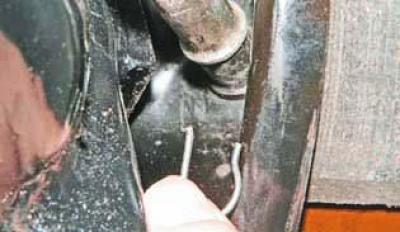


…and we take it out.
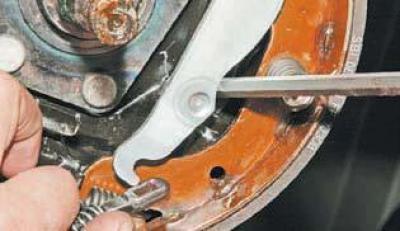

…and we take it out.

Using a screwdriver, press the parking brake lever forward and disconnect the rear end of the left…


Using a screwdriver, press the parking brake lever forward and disconnect the rear end of the left cable from it.
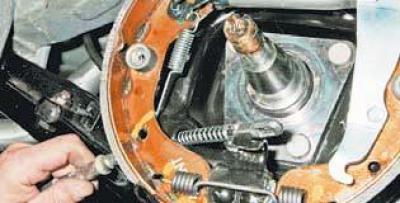
We remove the cable tip from the hole in the brake mechanism shield..
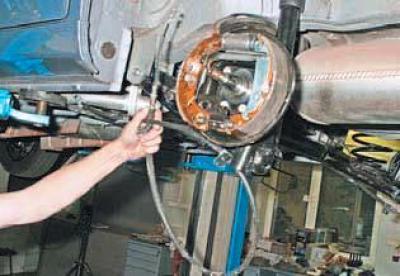

We remove the cable tip from the hole in the brake mechanism shield..

…and we take it off.


…and we take it off.


Similarly, we remove the right cable of the parking cable.

We install the cables in the reverse order.

After replacing the cables, adjust the parking brake (see Adjusting the parking brake).

To remove the parking brake lever, remove the rear floor tunnel trim (see Removal the floor tunnel lining).

Lower the parking brake lever to its lowest position.

With a 10 mm wrench (see above)…
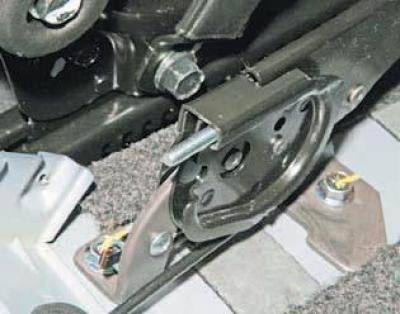
…completely unscrew the adjusting nut from the front cable end…
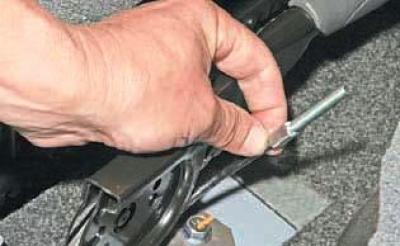

…completely unscrew the adjusting nut from the front cable end…

…and we take it out of the lever hole…


…and we take it out of the lever hole…

We unscrew the screw securing the parking brake indicator switch.
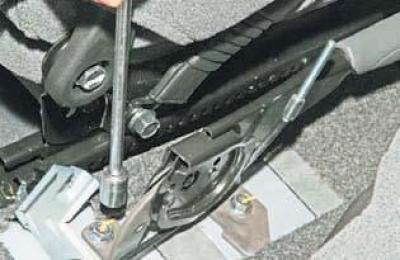
Using a 12 mm socket head, unscrew the two bolts securing the base of the lever to the body…
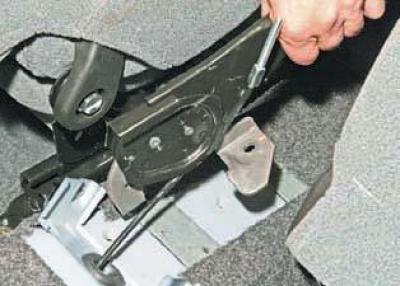

Using a 12 mm socket head, unscrew the two bolts securing the base of the lever to the body…

…and remove it from the floor tunnel.


…and remove it from the floor tunnel.

Turning the lever..
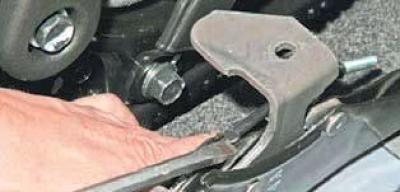
…we use a large screwdriver to bend back the antenna and pull the cable out from underneath it.
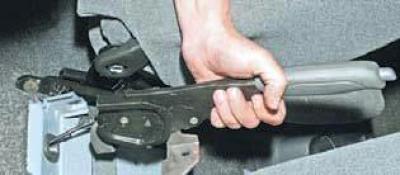

…we use a large screwdriver to bend back the antenna and pull the cable out from underneath it.

Remove the parking brake lever.


Remove the parking brake lever.

We install the parking brake lever in the reverse order.

Adjust the parking brake (see Adjusting the parking brake).

To remove the front cable, remove the parking brake lever (see above).

Disconnect the front cable ends from the equalizer (see above).
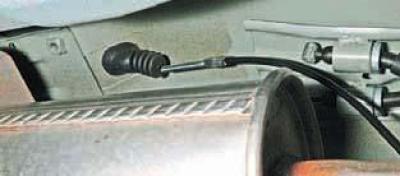
We remove the front cable through the mudguard in the floor tunnel.


We remove the front cable through the mudguard in the floor tunnel.

We install the removed parts in the reverse order.

Adjust the parking brake (see Adjusting the parking brake).

(The original source of the article is the website ChevyMan)

The article was checked: Vladimir Romannikov
This article is available at russian, bulgarian, belarusian, ukrainian, serbian, croatian, romanian, polish, slovak, hungarian

Share information:

Previous articles
Lanos T150: Brake system
Next articles

Replacing the rear wheel brake hose
Replacing the rear wheel brake cylinder
Replacing the front wheel brake disc
Replacing the front brake hose
Removal the brake booster
Removal the fluid pressure regulators in the rear wheel brake mechanisms


See similar articles on the topic of Chevrolet cars:
Bleeding the brake system Chevrolet Aveo T300 (2012-2018)
General description and operation of the parking brake system Chevrolet Captiva 1 (2006-2018)
Features of the brake system Chevrolet Cruze 1 (2008-2016)
Removal the parking brake system components Chevrolet Lacetti 1 (2002-2009)
Brake system Chevrolet Niva 1 (2002-2016)
Hydraulic part of the brake system — location of components Chevrolet Tahoe 2 and 3 (2000-2014)
Parking brake — adjustment of the mechanism Chevrolet Trailblazer 1 (2001-2008, petrol)
Link in different formats to this page


Visitor comments

No comments yet


How much will 12 + 22 =


Lanos T150 (2002-2009) 
  • General information
  • User manual
  • Maintenance
  • Troubleshooting
  • Power unit
  • Engine repair
  • Control system
  • Supply system
  • Cooling system
  • Exhaust system
  • Transmission
  • Clutch
  • Car gearbox
  • Front wheel drives
  • Chassis
  • Front suspension
  • Rear suspension
  • Steering
  • Brake system
  • Body
  • Repair of body elements
  • Heating and air conditioning
  • Electrical equipment
  • Engine electrics
  • Lighting and lamps
  • Equipment and devices
  • Electrical circuits


ChevyMan.ru © 2017-2026 · Mobile version · Feedback · Site search · Interesting to read · Sitemap: EN BG BY UA RS HR RO PL SK HU

Aveo 2003-2008 · Aveo 2006-2011 · Aveo 2012-2018 · Captiva 2006-2018 · Cruze 2008-2016 · Lacetti 2002-2009 · Lanos 2002-2009 · Niva 2002-2016 · Tahoe 1992-2000 · Tahoe 2000-2014 · Lumina 1 1989-1994 · Trailblazer 1 2001-2008 · Orlando 1 2010-2018 ·
🛡️ For your security and to improve our service, this site uses cookies. You can disable them in your browser.