


Remove the front wheel drive (see Removal the front wheel drives).
We clean the hinge from the outside and clamp the shaft in a vice with soft metal jaw pads.
The operations for replacing the outer joint boot of the left wheel drive are similar to the operations for replacing the outer joint boot of the right wheel drive.
We cut the large clamp that secures the cover with side cutters..
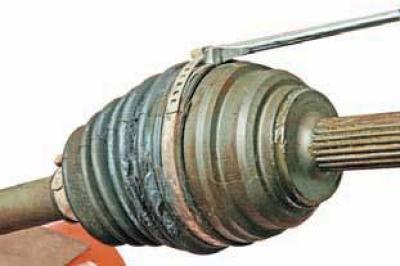
or, by inserting a screwdriver blade into the clamp lock, we loosen it..
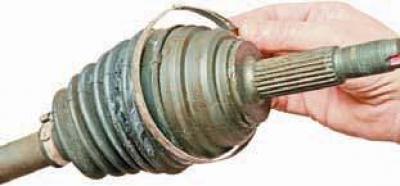
…we disconnect and remove the clamp.
We remove the small clamp in the same way.
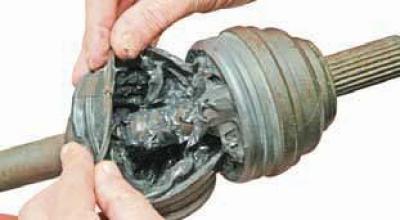
We remove the cover from the outer hinge and move it along the shaft.
Using a rag, remove the grease from the end of the hinge sleeve in the area of the retaining ring "antennae".
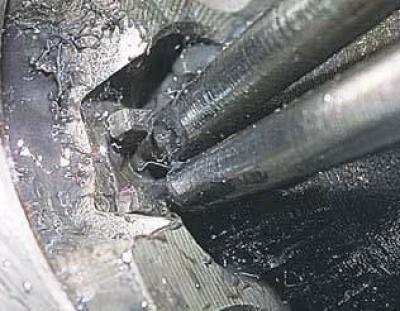
We insert the tweezers between the antennae.
It is more convenient to knock the joint off the shaft with an assistant.
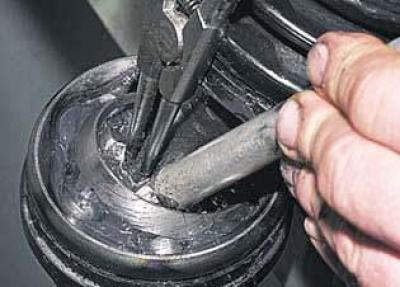
While loosening the retaining ring, we use a soft metal punch to strike the end of the hinge sleeve with a hammer..
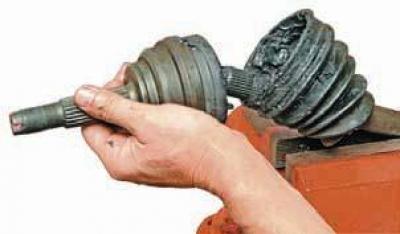
…and knock the outer joint off the shaft.
The punch must not transmit impacts to the separator or balls to avoid damaging them.
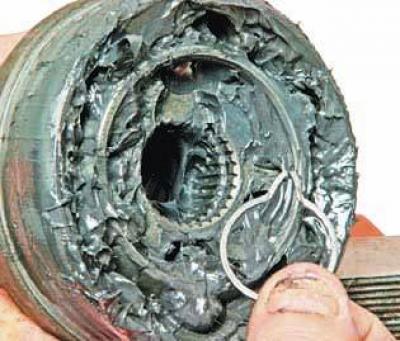
For clarity, the removed retaining ring is shown.
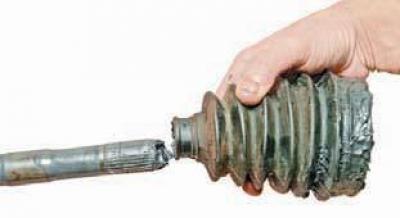
We remove the mudguard from the shaft.
If the joint is removed only to replace the boot, when it is known that it was damaged recently and the CV joint has retained its functionality, then, without disassembling the joint, we remove the maximum possible amount of grease from it and wash it in kerosene.
We wipe the joint with a rag and blow it with compressed air.
We inspect the balls, separator, cage and internal cavity of the housing.
Scores, dents, cracks, and traces of corrosion are not allowed - such a joint is replaced.
We clean the shaft from old grease and apply a thin layer of new grease to it.
We put the hinge cover on the shaft and put new grease into the cavities of the hinge housing and cover, a total of 120–140 g.
We put the hinge on the shaft, ensuring that the retaining ring is fixed in the groove of the shaft.
We check the mobility of the hinge - it should move without jamming.
We pull the cover onto the hinge housing so that the cover belts under the clamps are located in the corresponding seats of the shaft and the hinge housing.
Using a thin-bladed screwdriver, move the edge of the cover away from the hinge housing to equalize the air pressure inside and outside the cover.
We secure the hinge cover with new clamps.
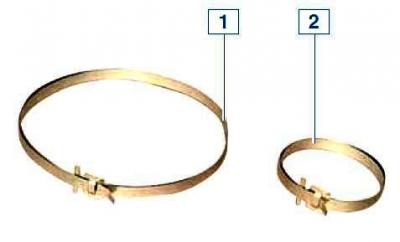
Universal band clamps for fastening the CV joint boot: 1 - clamp for fastening the boot to the joint body; 2 — clamp for fastening the cover on the drive shaft
To install the original clamps supplied as spare parts, you will need special pliers.
If they are not available, you can use universal band clamps for fastening CV joint covers, which are available commercially.
We show the installation of a universal tape clamp that secures the cover to the hinge body.
Having installed the clamp into the groove of the cover..
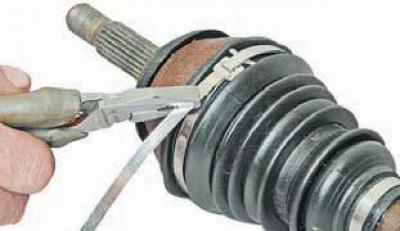
…we use pliers to pull out the tape, squeezing the clamp.
At the same time, you need to use other pliers to press against the clamp lock or the clamp tabs, holding the clamp from turning.
Tightly tightening the clamp..
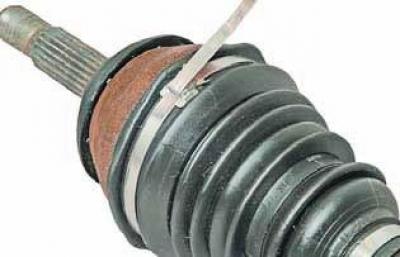
…we bend the extended end of the ribbon in the opposite direction.
Keeping the tape taut, we check the tightness of the clamp by trying to move the clamp by its lock along the groove of the cover.
If the clamp shifts, it is not tightened enough and it is necessary to tighten the clamp again.
Tightly tightening the clamp..
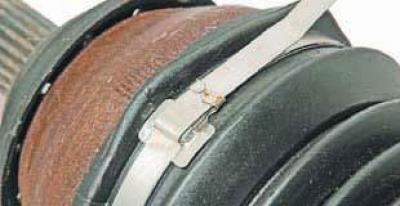
…we bend the clamp tabs onto the tape.
In the same way, we secure the cover with a clamp on the drive shaft.
We check the reliability of the hinge cover fastening with clamps.
During angular movements of the hinge housing relative to the shaft, the cover should not shift from the housing and move along the drive shaft, or rotate on them.
Excess end of clamp tape (behind the tape retainer tabs) we bite off with side cutters.
We carry out further assembly of the drive in the reverse order.
[The original article can be found on the resource ChevyMan.ru]