ChevyMan.ru
Mazda Mitsubishi Toyota Land Rover Honda Kia Nissan
English Русский
Български
Беларускі
Український
Српски
Hrvatski
Română
Polski
Slovenský
Magyar
|
Articles | Sitemap | Contacts |


Home   Aveo   Captiva   Cruze   Lacetti   Lanos   Niva   Tahoe   Others  
Orlando 1 (2010-2018) Trailblazer 1 (2001-2008, petrol) Lumina 1 (1989-1994)
  • Home
  • Chevrolet
  • Orlando 1
  • Transmission
  • Drive shafts
  • Removal, replacing the protective cover and installing the outer drive joint

Removal, replacing the protective cover and installing the outer drive joint (Chevrolet Orlando 1)

            0

To complete the job, you will need special pliers for installing the cover mounting clamps, nippers or side cutters, a snap ring puller, a new outer hinge snap ring, and a new hub nut. The new protective cover comes complete with mounting clamps and CV joint grease in the required quantity.

We carry out the work in the following order.

1. Remove the drive assembly (see above).

2. Using side cutters, cut off the lock of the large clamp...
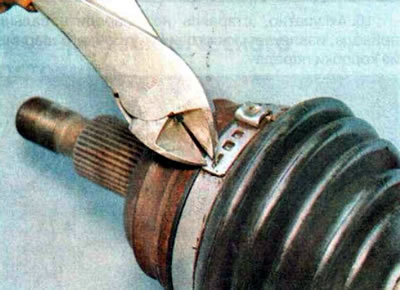
2. Using side cutters, cut off the lock of the large clamp...


...and using a slotted screwdriver, we release the end of the clamp from engagement.
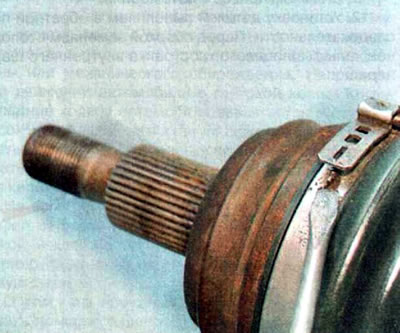
...and using a slotted screwdriver, we release the end of the clamp from engagement.


3. Remove the large clamp.
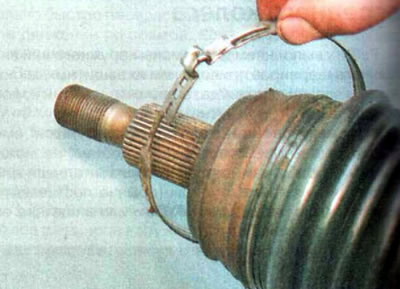
3. Remove the large clamp.


4. In the same way, remove the small clamp of the outer hinge protective cover.
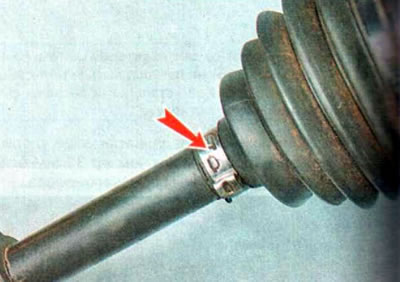


4. In the same way, remove the small clamp of the outer hinge protective cover.


5. Secure the drive shaft in a vice. We move the protective cover along the shaft from the outer hinge housing (or cut the cover with a knife).

Warning! If the joint is to be reused, do not strike the separator or the joint housing during the following operation.


6. Using a snap ring plier, loosen the snap ring and remove the outer joint from the shaft.
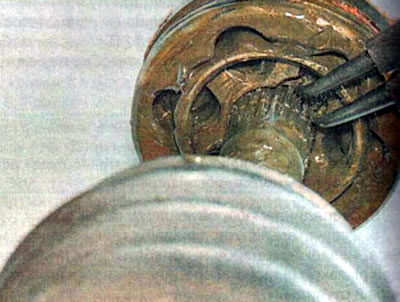
6. Using a snap ring plier, loosen the snap ring and remove the outer joint from the shaft.


7. Remove the cover from the shaft (or remove its remains).
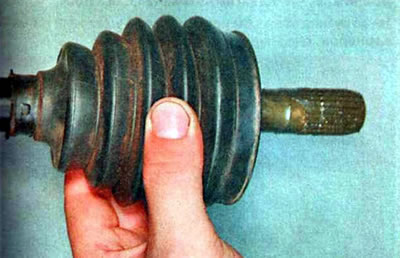
7. Remove the cover from the shaft (or remove its remains).


8. Remove the retaining ring.
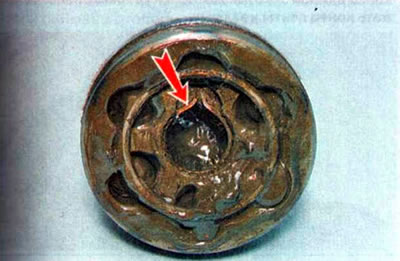


8. Remove the retaining ring.


9. Wash the joint in kerosene, wipe with a clean cloth and let dry.

10. To avoid damaging the new cover during installation, wrap the shaft splines with tape or insulating tape. We put a small diameter clamp and a protective cover on the shaft, moving them towards the center of the shaft.

Recommendation.
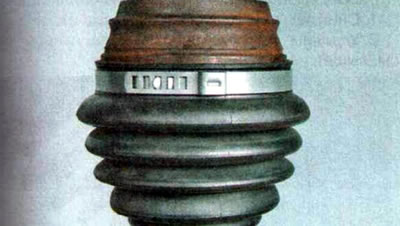
  • The cover mounting clamps are installed taking into account the direction of rotation of the drive. The outer end of the clamps must be directed in the direction opposite to the rotation of the drive when the vehicle is moving forward. The photo shows the correct location of the clamps on the outer joint of the left wheel drive.
  • The cover mounting clamps are installed taking into account the direction of rotation of the drive.…
  • On the right wheel drive, the ends of the clamps should be directed in the opposite direction.
  • Do not use the removed retaining ring to install the joint.

11. Install a new retaining ring into the joint.


12. Remove the insulating tape and cover the shaft splines with a thin layer of CV joint grease.

13. Using a puller, spread the retaining ring and install the hinge on the splined end of the shaft. This ensures that the retaining ring has entered the groove of the shaft.

14. Fill the joint with CV joint grease. Place the remaining grease in the joint boot.

15. Move the protective cover towards the hinge so that the large sealing belt of the protective cover is completely placed on the hinge housing, and the small sealing belt is located on the annular grooves of the shaft.
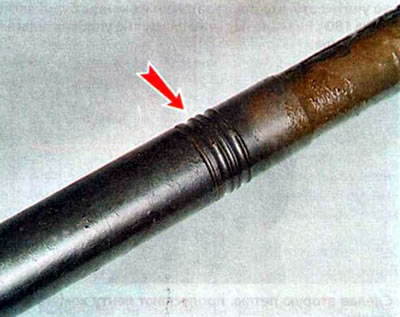
15. Move the protective cover towards the hinge so that the large sealing belt of the protective…


Note: A properly fitted cover should cover the annular grooves on the shaft except for the outer one located on the side of the inner hinge.


16. By lifting the large diameter sealing belt with a slotted screwdriver, we release excess air from the inner cavity of the cover.
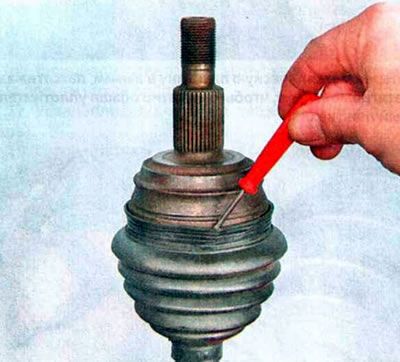
16. By lifting the large diameter sealing belt with a slotted screwdriver, we release excess air…


17. Fix the protective cover with clamps.


Comment.
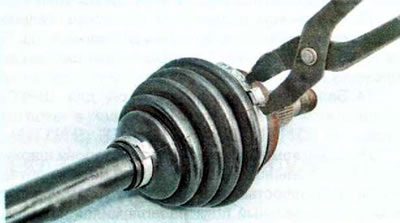
  • Clamps with a lock are tightened using special clamp installation pliers.
  • Clamps with a lock are tightened using special clamp installation pliers.
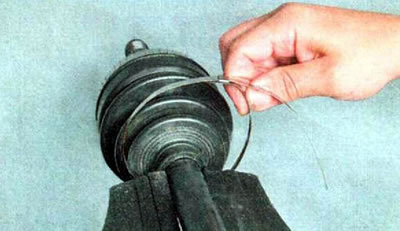
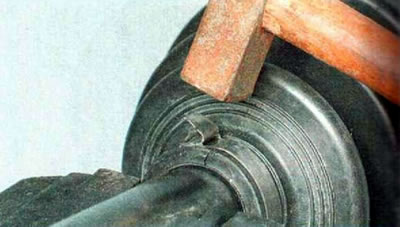
  • When using tape clamps, it is necessary to take into account that after tightening their ends will be bent by 180°. First, put the clamp on the sealing belt of the cover.
  • When using tape clamps, it is necessary to take into account that after tightening their ends will…
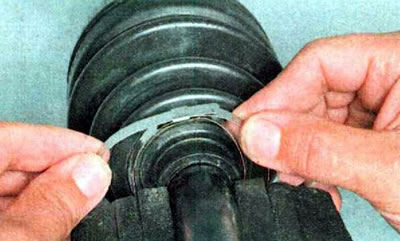
  • Having made the second loop, pass the clamp tape through the clamp.
  • Having made the second loop, pass the clamp tape through the clamp.
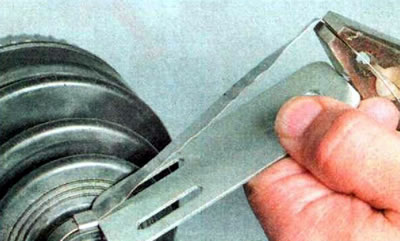
  • After placing the metal plate against the clamp, use pliers to tighten the clamp so that it tightly compresses the sealing belt of the cover.
  • After placing the metal plate against the clamp, use pliers to tighten the clamp so that it tightly…
  • It is advisable to perform the next two operations with an assistant so that the clamp does not loosen.
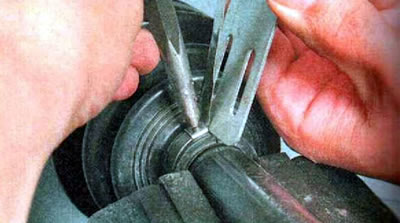
  • Without releasing the clamp, bend the tape at the clamp by 90° and use a center punch to make a dent and compress the clamp.
  • Without releasing the clamp, bend the tape at the clamp by 90° and use a center punch to make a…
  • Use side cutters to cut off the excess tape from the clamp, leaving an end 5-10 mm long and using light hammer blows, press the end of the tape to the clamp.
  • Use side cutters to cut off the excess tape from the clamp, leaving an end 5-10 mm long and using…

18. Install the drive on the car.

(Original version of the article on the website: CHEVYMAN.ru)

The article was checked: Vladimir Romannikov
This article is available at russian, bulgarian, belarusian, ukrainian, serbian, croatian, romanian, polish, slovak, hungarian

Share information:

Previous articles
Orlando 1: Drive shafts
Next articles

Removal and installation the front wheel drive
Front Wheel Drives — Checking Technical Condition
Front Wheel Drives — General Information
Removal, replacing the protective cover and installing the inner drive joint
Seals — replacement


See similar articles on the topic of Chevrolet cars:
Replacing the outer CV joint boot Chevrolet Aveo T250 (2006-2011)
Rear cover of the drive belt of the gas distribution mechanism Chevrolet Captiva 1 (2006-2018)
Replacing the front suspension ball joint Chevrolet Cruze 1 (2008-2016)
Replacing the cylinder head cover gasket Chevrolet Lacetti 1 (2002-2009)
Replacing the protective cover and sealing ring of the front wheel brake piston Chevrolet Lanos T150 (2002-2009)
Clutch release hydraulic drive Chevrolet Niva 1 (2002-2016)
Cover and outer CV joint Chevrolet Tahoe 2 and 3 (2000-2014)
Link in different formats to this page


Visitor comments

No comments yet


How much will 32 + 48 =


Orlando 1 (2010-2018) 
  • General information
  • Introduction to manual
  • User manual
  • Maintenance
  • Troubleshooting
  • Power unit
  • Engine repair
  • Fuel and control system
  • Cooling and lubrication system
  • Ignition system
  • Transmission
  • Clutch
  • Gearbox
  • Drive shafts
  • Chassis
  • Car suspension
  • Steering
  • Brake system
  • Body
  • Exterior (external elements)
  • Doors, locks and windows
  • Electrical equipment
  • Equipment and devices
  • Windscreen wipers
  • Power devices
  • Electrical diagrams


Trailblazer 1 (2001-2008) 
  • General information
  • User manual
  • Troubleshooting
  • Maintenance
  • Power unit
  • Engine in a car
  • Engine overhaul
  • Cooling and heating
  • Fuel and exhaust system
  • Engine electrical equipment
  • Engine control
  • Transmission
  • Automatic gearbox
  • Transfer case
  • Drive shafts and cardan
  • Chassis
  • Brake system
  • Car suspension
  • Steering
  • Body
  • Exterior (external elements)
  • Interior (internal elements)
  • Doors, locks and windows
  • Electrical equipment
  • Equipment and devices
  • Electrical circuits


Lumina 1 (1989-1994) 
  • General information
  • Maintenance
  • Power unit
  • Engine 3.1L V6
  • Engine 3.8L V6
  • Engine overhaul
  • Cooling system
  • Power and exhaust system
  • Fuel injection
  • Engine electrical equipment
  • Reduced exhaust gas toxicity
  • Transmission
  • Automatic gearbox
  • Drive shafts
  • Chassis
  • Brake system
  • Car suspension
  • Steering
  • Body
  • Heating and air conditioning
  • Repair of body elements
  • Doors, covers and windows
  • Interior (internal elements)
  • Electrical equipment
  • Equipment and devices
  • Electrical circuits


ChevyMan.ru © 2017-2026 · Mobile version · Feedback · Site search · Interesting to read · Sitemap: EN BG BY UA RS HR RO PL SK HU

Aveo 2003-2008 · Aveo 2006-2011 · Aveo 2012-2018 · Captiva 2006-2018 · Cruze 2008-2016 · Lacetti 2002-2009 · Lanos 2002-2009 · Niva 2002-2016 · Tahoe 1992-2000 · Tahoe 2000-2014 · Lumina 1 1989-1994 · Trailblazer 1 2001-2008 · Orlando 1 2010-2018 ·
🛡️ For your security and to improve our service, this site uses cookies. You can disable them in your browser.