


Contents: Removal ↧ Installation ↧
Removal
1. Remove the drive shaft.
2. Cut off the stamped ring (2). Do not damage the surface of the CV joint housing (1).
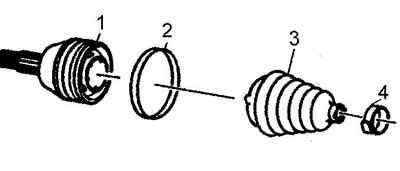
3. Cut off the small clamp (4).
4. Slide the cover (5) along the shaft rod (4).
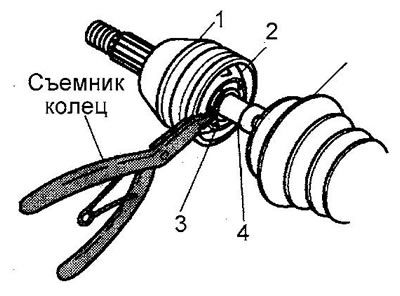
5. Remove all available grease.
6. Locate the retaining ring (3) that is installed on the inner race (2).
7. Using a snap ring plier, remove the snap ring.
8. Remove the CV joint and its boot.
9. Throw away the old cover.
10. Install a copper drift on the end of the CV joint separator (1).
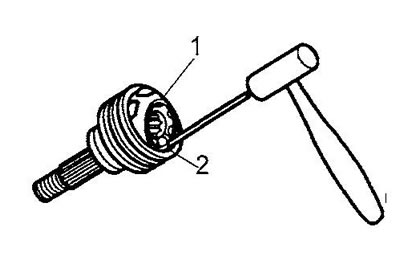
11. Tilt the separator with a light hammer blow.
12. Remove the accessible ball (2) from the separator.
13. Tilt the separator in the opposite direction and remove the second ball.
14. Repeat the entire process until all six balls have been removed.
15. Turn the separator (4) and the inner race at an angle of 90 degrees to the outer race (1). At the same time, align the windows (3) of the separator with the cutouts (2) of the outer race.
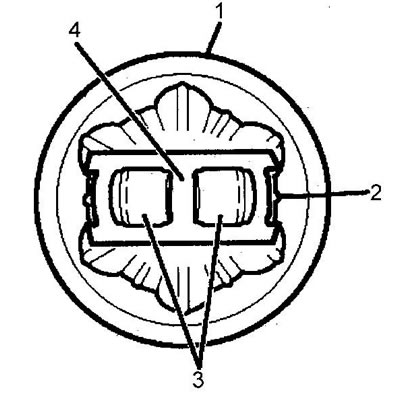
16. Remove the separator and inner race.
17. Turn the inner race (1) in the separator (2), remove the race with an upward movement.
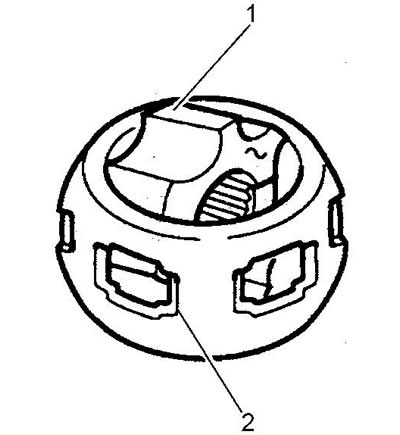
18. Wash all CV joint parts.
19. Dry the parts.
20. Inspect the parts for signs of wear, cracks or other damage.
21. Replace defective parts.
22. Wash the shaft rod. Use a wire brush to remove dirt and rust, especially in the area where the boot is installed.
Installation
1. Assemble the CV joint in the reverse order of disassembly.
2. Place the small clamp on the boot and slide the boot onto the shaft rod.
3. Fill the CV joint boot and CV joint with grease from the repair kit (the entire volume of lubricant supplied in the kit).
4. Tighten the small clamp and stamped ring, see the operations described when installing similar parts inner CV joint.
(The article was reprinted from the website: ChevyMan.ru)