


Contents: Removal procedure ↧ Installation procedure ↧
Necessary equipment
KM-470-B Angular Torque Indicator
Removal procedure
1. Disconnect the negative battery cable.
2. Remove the timing belt. Follow step "Gas distribution mechanism drive belt" in this section.
3. Remove the camshaft gears. Follow step "Camshaft gears" in this section.
4. Remove the timing belt automatic tensioner screw.
5. Remove the automatic timing belt tensioner.
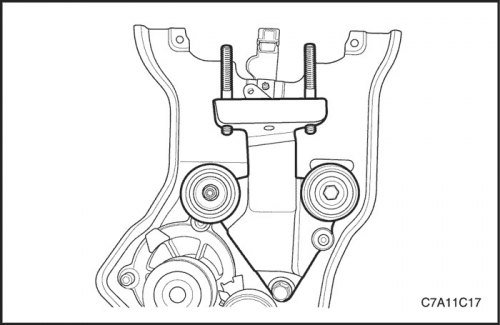
6. Loosen the locking bolt and nut of the idler pulley of the timing belt drive.
7. Remove the timing belt idler pulleys.
8. Loosen the engine mount adapter support bracket mounting bolts.
9. Remove the engine mount adapter support bracket.
10. Remove the camshaft position sensor. See Section 1F2, Engine Controls - FAM II 2.4D.
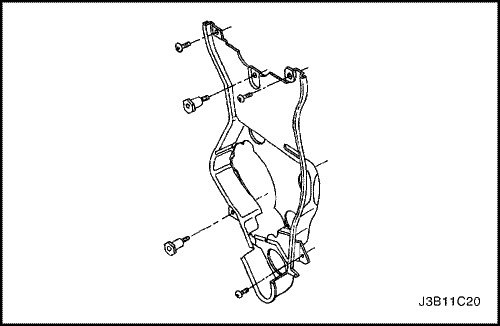
11. Remove the crankshaft gear.
12. Remove the timing belt cover screws.
13. Remove the rear timing belt cover.
Installation procedure
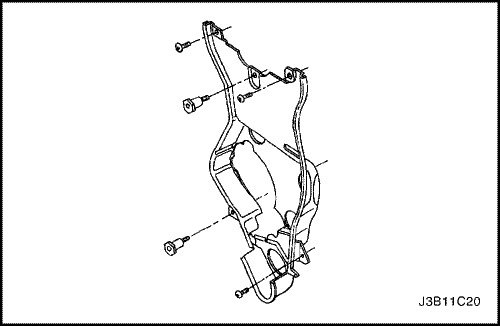
1. Install the rear timing belt cover.
Tighten
Tighten the timing belt rear cover bolts to 7 Nm (62 lbs.in).
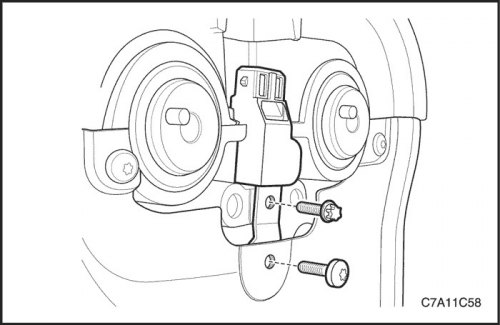
2. Install the camshaft position sensor.
Tighten
Tighten the camshaft position sensor bolt to 8 Nm (71 lbs.in).
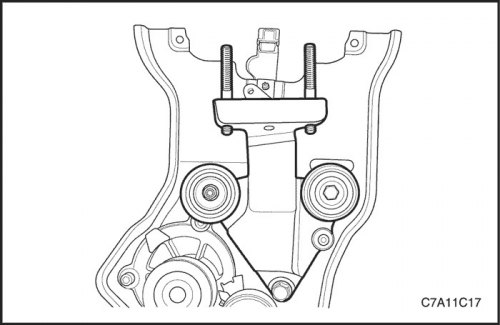
3. Install the engine mount adapter support bracket.
Tighten
Tighten the engine mount adapter support bracket bolts to 45 N·m (33 ft·lbs).
4. Install the timing belt idler pulleys.
Tighten
Tighten the timing belt idler pulley bolt and nut to 25 Nm (18 ft·lbs).
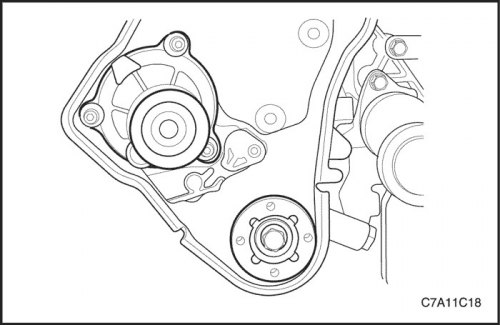
5. Install the timing belt drive gear.
Tighten
Tighten the crankshaft gear bolt to 135 Nm (100 ft·lbs) plus 30° plus 10° using the KM-470-B angular torque indicator.
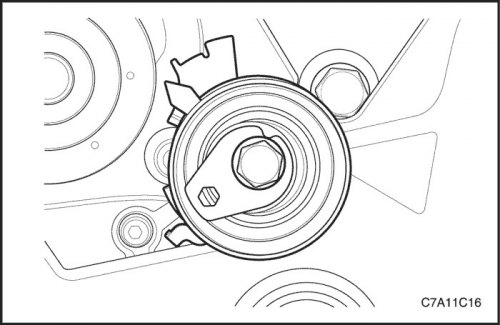
6. Install the automatic timing belt tensioner.
Tighten
Tighten the automatic timing belt tensioner to 25 Nm (18 ft·lbs).
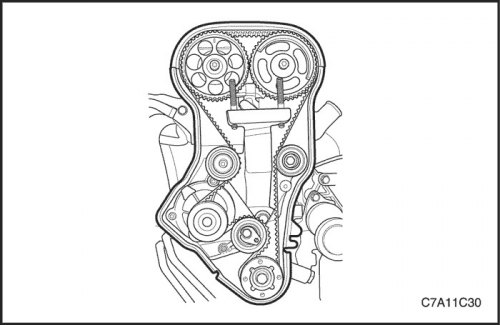
7. Install the camshaft gears. Follow step "Camshaft gears" in this section.
8. Install the timing belt. Follow step "Gas distribution mechanism drive belt" in this section.
9. Connect the negative battery cable.
