
1. The serpentine drive belt is located in front of the cylinder block. Its normal condition and proper adjustment are among the determining factors for the proper operation of the engine and attachments. Over time, the degree of wear increases due to the high loads that drive belts made of rubber are subjected to. This makes periodic inspection necessary. The belt transmits rotation to such elements as the generator, power steering pump, coolant pump and air conditioning compressor.
2. With the engine off, open the hood. Using a flashlight, feel the belt and determine if the rubber base is peeling away from the cords on both sides. Make sure there are no excessively worn areas that have a characteristic matte finish (see illustration). The belt should be inspected from both sides.
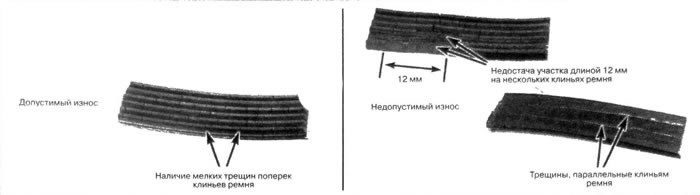
12.2. Inspect the poly V-belts (serpentine drive belts) - if they have the indicated defects, replace them
3. The depth of the grooves between the belt ribs located on the reverse side must be the same.
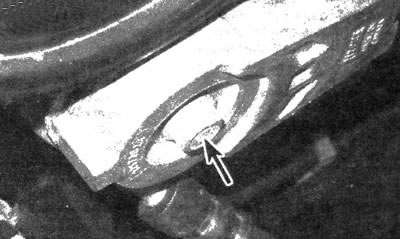
4. The belt tension is automatically maintained by a spring mechanism and is not subject to adjustment. Alignment of the tensioner marks indicates the need to replace the belt (see illustration).
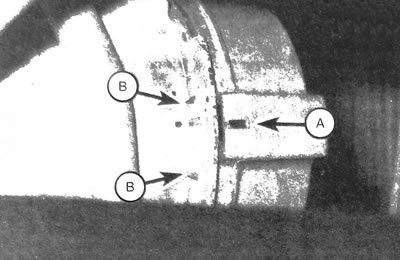
12.4. The mark on the drive belt tensioner indicator (A) must be aligned with the mark located on the tensioner mechanism (B)
5. To replace the belt, you must first loosen it by turning the tensioner clockwise (see illustration).
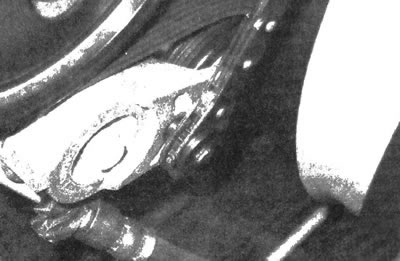
12.5. Using a special tool, turn the tensioner clockwise and remove the belt (there may not be enough space to use a regular pry bar or ratchet wrench)
6. Remove the belt from the tensioner and attachment pulleys, then slowly release the tension roller.
7. After matching the length of the removed belt and the new belt, place the new belt on the serpentine drive pulleys, holding the tensioner. Release the tensioner.
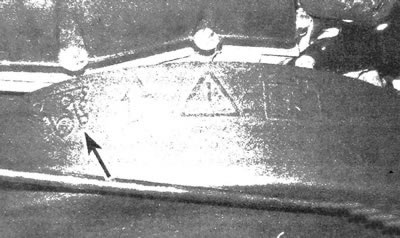
12.7. The belt tension diagram is applied to the radiator support
Note: The belt tensioning route plate is located on the radiator support - please pay attention to it (see illustration).
Replacing the tensioner
See illustration 12.8
8. When replacing a tensioner that is jammed or has a worn pulley/bearing, it is necessary to remove the belt and unscrew the mounting bolt (see illustration).
12.8. Bolt that secures the drive belt tensioner
9. Installation is carried out in the reverse order of removal.
Note: It is necessary that the tensioner indicator pin enters the hole located on the tensioner support surface.