


Warning: Certain precautions must be taken when inspecting and servicing the battery. The battery contains hydrogen, so do not expose it to open flames or sparks from a burning cigarette or ignition system. The electrolyte in the battery has the dissolving properties of sulfuric acid and causes serious injury if it comes into contact with the skin or eyes; The electrolyte is also aggressive towards clothing fabrics and paint coatings. When disconnecting the battery, disconnect the negative cable first, and when reconnecting, connect it last.
1. Carrying out timely preventive maintenance of the battery allows you to ensure a quick and confident engine start in any weather. Before working with the battery, make sure you have the necessary tools and materials (see illustration).
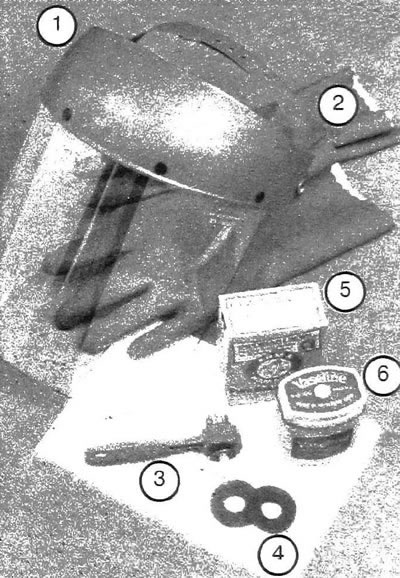
11.1 Tools and materials required for battery maintenance: 1. Eye and face mask - When cleaning battery terminals from corrosion with a wire brush, acid crystals may get into your eyes. 2. Rubber gloves Another safety measure when servicing a battery. Remember that the battery is filled with acid 3. Battery Terminal and Cable Cleaner - This tool can remove corrosion deposits from battery terminals and cables 4. Battery Washers - Placing washers on the battery terminals under the cable clamps reduces the formation of corrosion deposits 5. Baking Soda - A solution of baking soda and water is used to neutralize acid crystals 6. Petroleum Jelly - Applying a layer of petroleum jelly to the battery terminals prevents them from becoming covered with corrosion deposits
Note: Some of the models described are equipped with an additional battery. In this case, the safety requirements and maintenance procedures described below apply to both batteries.
2. There are several safety requirements that must be followed when working with a battery. Before servicing the battery, stop the engine and turn off all electrical sources on the vehicle, then disconnect the cable from the negative terminal.
3. The battery produces hydrogen-containing gas, which is both flammable and explosive. Do not allow sparks from the ignition system to come into contact with the battery, and do not smoke or allow open flames near the battery. Charge the battery in a well-ventilated area.
4. The electrolyte contains poisonous and corrosive sulfuric acid. Do not allow electrolyte to come into contact with your skin, eyes or clothing, or allow it to penetrate into your body. Wear eye and face protection when handling the battery. Keep the battery out of the reach of children.
5. Inspect the battery. If there is a protective rubber boot on the positive terminal, make sure it is intact. The casing must completely cover the terminal. Inspect the terminals for signs of corrosion or looseness, and make sure there are no cracks in the housing. Check the reliability of the battery clamp. Inspect the cables along their entire length for chafing or cracking of their insulation (see illustration).
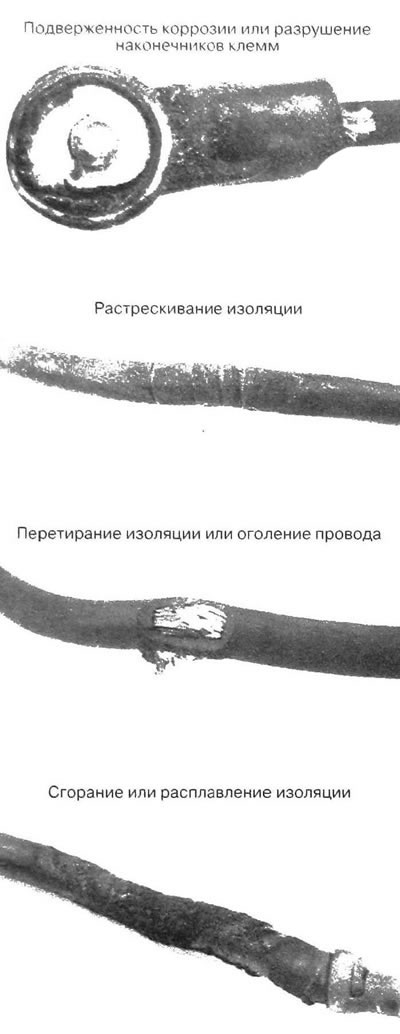
11.5. Typical defects of battery cables
6. If there are signs of corrosion in the form of white loose deposits around the terminals, the battery should be removed for cleaning. Loosen the cable terminal bolts with a wrench and, disconnecting the negative terminal first, remove the cables from the battery terminals. Then unscrew the retaining clip fastener, remove the clip and remove the battery from the engine compartment.
7. Clean the battery terminals with a special brush or tool and a warm water solution of baking soda. Wash the contacts and the top panel of the battery with the same solution, preventing the solution from getting inside the battery. When cleaning the terminals, contacts and top panel of the battery, wear a protective mask and rubber gloves to protect your eyes, face and hands from electrolyte and corrosion deposits. To perform these procedures, wear old work clothes, as the electrolyte will burn holes if it gets on the fabric. If the contact terminals are highly corroded, use a special cleaning device to clean them (see illustrations). Wash all cleaned areas and parts thoroughly with plain water.
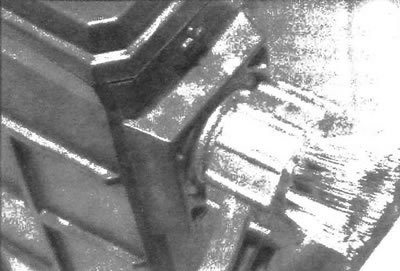
11.7a. The device shown (available in auto shops) used to clean contacts on batteries with side contact terminals
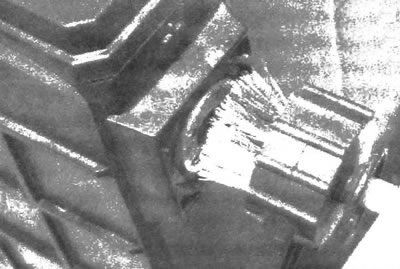
11.7b. For finishing, a brush is used, located on one side of the device
11.7c. When using any type of device, it is necessary to thoroughly clean the battery contacts until their surface shines
8. Make sure the battery tray is in good condition and the battery clamp bolts are tight. If the battery is to be removed from the tray, make sure there are no tools or parts on the bottom of the tray when reinstalling it. Do not apply excessive force when tightening the battery retainer bolts.
9. Metal battery mounting brackets to the body that have been exposed to corrosion should be treated with sandpaper, coated with a zinc or copper based primer, and painted.
10. A detailed description of the procedure for removing and installing the battery is given in chapter 5. The procedure for starting the engine from an additional battery is given at the beginning of this manual.
Charger
Warning: When charging the battery, hydrogen gas is released, which is flammable and explosive. Do not smoke near a battery that is being charged or has recently been charged, and do not allow open flames near the battery. Being near a charging battery is only permitted if you wear a protective mask or glasses. Before connecting or disconnecting the battery from the charger, make sure that the charger is disconnected from the mains.
Note: Manufacturers recommend that the battery is always removed from the vehicle when charging, as the gas released during charging can damage the paintwork. Emergency charging without disconnecting the battery cables may result in damage to the electrical system.
11. Slow current charging is the best way to restore a battery that is so discharged that it has lost its ability to start the engine. This method is also recommended for charging the battery of a car that is used for short trips. Maintaining the battery at a proper level of charge is especially important in winter, when more energy is required to start the engine and the vehicle's electrical equipment is used more intensively.
12. The most suitable are chargers with a current of two amperes (sometimes called "trickle"). Such devices are safe and produce a uniform charge of the battery with a low current. These chargers are also relatively cheap. For fast charging, you can use devices with higher current intensity, but do not charge the battery with devices with a current intensity of more than 10 Ah. Forced charging, which restores the battery voltage in 1-2 hours, has a strong effect on the battery and can damage an old or worn-out battery. Charging in this mode should only be used in emergency situations.
13. The average time required to fully charge a battery is usually specified in the charger instructions. Typically, "jet" devices charge the battery in 12-16 hours.
14. Remove the caps from all the jars (if their presence is provided for by the design) and cover the holes with a clean cloth to prevent electrolyte from splashing. Disconnect the negative battery cable and connect the charger electrodes to the battery terminals (positive electrode to positive terminal, and negative to negative), then turn on the device. Make sure the charger switch is in the 12 Volt position.
15. When using the device with a charging intensity of more than 2 Ah, it is necessary to constantly monitor the battery for overheating. When using a jet device, it is permissible to monitor the battery for overheating during the first two hours of the process, after which the battery can be left to charge overnight.
16. If the battery has removable caps, the density of the electrolyte should be monitored with a hydrometer during the last hours of the charging process. A hydrometer is an inexpensive and readily available device that can be purchased at most auto stores (when using, follow the accompanying instructions). Charging is considered complete if the density does not change for two hours and the electrolyte in the jars boils. The density of the electrolyte after charging the battery should be almost the same in all cans. If this condition is not met, the battery banks may be damaged.
17. Some batteries do not have can caps, but their design provides for the presence of a built-in charge indicator. As a rule, the indicator of a fully charged battery is brightly colored. If the indicator is dark, the battery still needs charging.
18. If the battery design does not provide for the presence of can plugs and a built-in charge indicator, then to assess the degree of charge it is necessary to connect to the contact terminals of a voltmeter. The voltage of a fully charged battery is more than 12.5V.
19. Additional information about the battery and the method of starting the engine from an additional battery is given in chapter 5, as well as at the beginning of this guide.