


Note: The vehicles described have a function that causes a signal indicator to turn on on the instrument panel when an oil change is required. Determining the suitability of oil for further use in a given system is based on a comparison of many factors. As a rule, the indicator does not turn on before the set oil change interval during maintenance, but it is not recommended to increase this interval, since its reduction has a positive effect on the engine life. If it is decided to carry out this type of maintenance in accordance with the system indicator readings, after it is turned on, the mileage should not exceed 16,000 km before changing the oil.
1. Regularly changing the engine oil and filter is the best preventative measure an amateur mechanic can take when servicing an engine, as over time engine oil loses viscosity and becomes saturated with foreign particles, which leads to premature failure of powertrain components.
2. Although some maintenance methods recommend replacing the filter every second oil change, the authors of the manual recommend replacing it with every oil change, which is due to the comparative cheapness of this element, as well as the ease of replacing it.
3. Before starting this procedure, make sure you have all the necessary tools and equipment (see illustration).
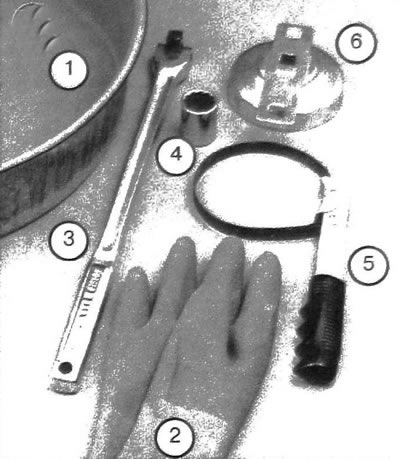
8.3. To change the engine oil and filter, you will need the following tools and safety equipment: 1. Receiving container - A shallow but large enough tray should be selected to prevent oil spills; 2. Rubber gloves - When unscrewing the drain plug and oil filter, protect your hands from oil. The gloves also protect against scalding; 3. Extension Lever - Sometimes the drain plug is extremely tight and an extension lever has to be used to ease the tightening force; 4. Socket head - Used to unscrew the drain plug in combination with an extension or regular lever. The size of the head must match the size of the plug; 5. Oil filter unscrewing tool - This is a lever with a metal strip that covers the filter around the circumference; 6. Oil filter unscrewing attachment - Installed on the filter base and used in combination with a regular or extension lever. Different attachments are used to unscrew different types of filters
4. Also, stock up on enough rags and old newspapers to absorb spilled oil. Access to the bottom of the car will be significantly improved if the car is raised on a lift, installed on inclined planes or special supports used after lifting the car with a jack.
Warning: Do not perform this procedure under a vehicle that is supported solely by a hydraulic or conventional jack.
5. Before changing the oil yourself for the first time, locate the oil pan drain plug and the oil system filter.
6. Warm up the engine to operating temperature. If necessary, prepare new engine oil or accessories for use while the engine is warming up. At the end of this chapter, in the section "Recommended lubricants and fluids", the required type of engine oil is given.
7. Warming up the engine oil (heated oil with sediment effectively flows out of the system), raise and support the vehicle securely. Make sure that the raised vehicle is securely fixed.
8. Remove the mudguard located on the underside of the vehicle. Place the necessary tools, as well as rags and newspapers, under the car to absorb the oil. Place a collecting container under the drain plug of the pan. Position the pan accurately, taking into account that oil will start to flow out after unscrewing the plug under some pressure, which can change the direction of the stream.
9. Without touching the hot elements of the exhaust system, use the appropriate wrench to unscrew the drain plug, which is located at the bottom of the oil pan (see illustration). The last few turns of the drain plug when unscrewing it from the pan should be done with protective gloves to avoid scalding with hot oil.
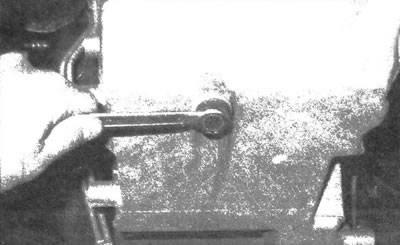
8.9. To unscrew the sump plug without rounding its edges, use the appropriate open-end wrench or socket head
10. Drain the oil from the engine system into a sump, which may need to be moved as the procedure progresses, as the oil flow becomes a thin stream at the final stage.
11. After draining the oil, wipe the drain plug with a clean cloth. Even those metal and foreign particles that have accumulated on the plug can immediately contaminate the new oil.
12. Clean the area around the hole and install the drain plug, then tighten it securely. If you have a torque wrench, use it to ensure the required tightening torque is achieved.
13. Move the collecting container under the oil filter.
14. Loosen the oil filter tightening force using a special tool.
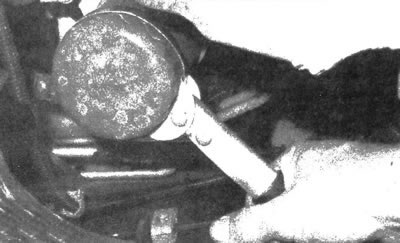
8.14. Since the filter is tightened with high force, you will have to use a special device to unscrew it; DO NOT use this tool to tighten the new filter during installation
15. Unscrew the filter completely. It should be noted that it is completely filled with oil, which should be carefully drained into the receiving container, after which the filter should be lowered onto the supporting surface.
16. Compare the removed and new filters to ensure that they are the same type.
17. Wipe the oil filter mounting surface on the cylinder block with a clean cloth. The remains of the old oil will smoke when the engine is running and will also prevent the new filter from being installed properly. Make sure that the old filter gasket is not stuck to the cylinder block surface (use a flashlight if necessary). The stuck gasket can be removed using a scraper.
18. Lubricate the rubber gasket of the new filter with clean engine oil (see illustration).
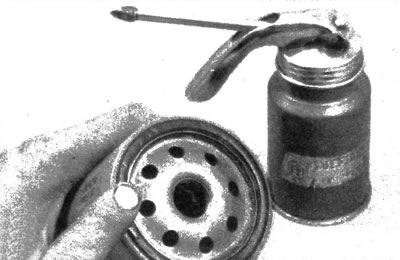
8.18. Before installing a new filter, lubricate its seal with clean engine oil
19. Place the new filter on the cylinder block according to the tightening direction indicated on the filter housing or packing box. Most manufacturers do not recommend using a tool when tightening the filter, as this can cause damage to the gasket.
20. Remove any used tools, rags, etc. from under the vehicle, being careful not to spill any used oil from the drain pan, then lower the vehicle onto a supporting surface.
21. Go to the engine compartment and locate the oil filler cap.
22. Fill the engine with new oil through the oil filler neck in the valve cover. When doing this, use a funnel to prevent spillage.
23. Fill the system with oil in the volume given in the specifications of this chapter (at the end), using a funnel. Wait a few minutes to allow the oil to drain into the pan, then check the level on the dipstick (see subsection 4). If the level is near the upper mark, start the engine to start circulation in the system.
24. Run the engine for one minute, then turn it off. Make sure that no oil is leaking from the oil pan drain plug and filter.
25. After the poured oil has started to circulate and the filter has filled, recheck the level using the dipstick and top up if necessary.
26. After the first trips made after changing the oil and filter, it is necessary to check the level and inspect for leaks every time.
27. Used motor oil is not suitable for use for its intended purpose and must be disposed of. Disposal is carried out by special organizations after the used oil is delivered there. After the used oil has cooled, drain it into a plastic container and dispose of it. It is prohibited to dump used oil into the ground or into the sewer.
Function of quality control of oil in the system
28. This function is provided in the microprocessor of the control system. Based on a comparison of engine speed and temperature, the system control unit determines the required oil change period. At the same time, the indicator on the instrument panel turns on "Change engine oil".
29. After changing the oil and filter, regardless of the accepted intervals: in accordance with the service schedule given in this manual or when the indicator comes on, it is necessary to reset the system function.
30. To reset, you must place the ignition key in the "RUN" position (without starting the engine) and within five seconds quickly press/release the accelerator pedal three times. Flashing of the indicator for five seconds indicates that the system has been reinstalled correctly. If the indicator does not blink, you should repeat the reinstallation procedure.
31. If the vehicle has a driver alert display (DIS), the engine oil quality monitoring system should be reset by pressing the information access button so that the alert is displayed "ENGINE OIL LIFE". After this, you need to press and hold the selection button until the system is reinstalled.