
2. The tires that are fitted to cars at the factory have a 12.7 mm (1/2") wide indicator strip that appears when the tread wears to a critical depth of 1.6 mm (1/16"). The degree of tire wear can be assessed using a simple and inexpensive device known as a tread depth gauge (see illustration).
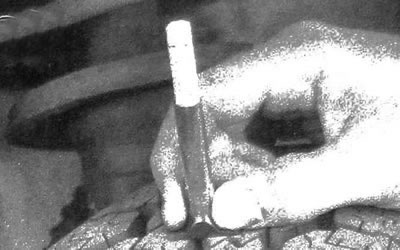
5.2. To assess the degree of wear on your tires, use an inexpensive tread depth gauge, which can be purchased at most auto stores
3. Look for signs of abnormal tread wear (see illustration). Wear on one edge of the tread, worn areas and uneven wear on the tires installed on different sides of the vehicle indicate incorrect wheel alignment or an imbalance in the tires and/or wheels. If there are signs of abnormal wear, you should go to a service station or tire repair shop to fix the problem.
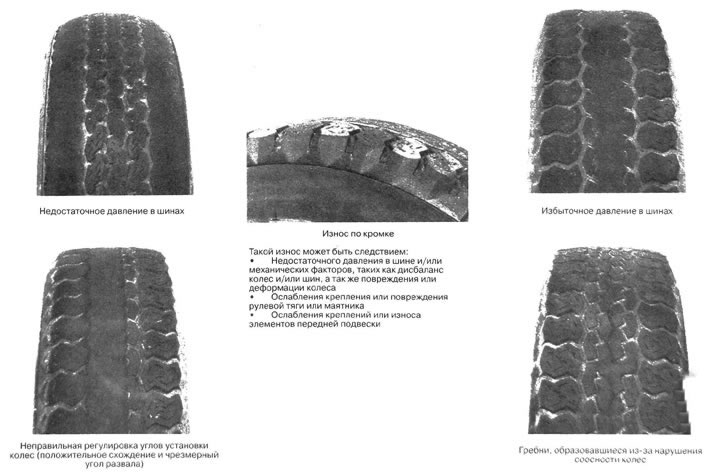
5.3. This diagram will help to assess the condition of the tires, determine the probable cause and the necessary repair measures
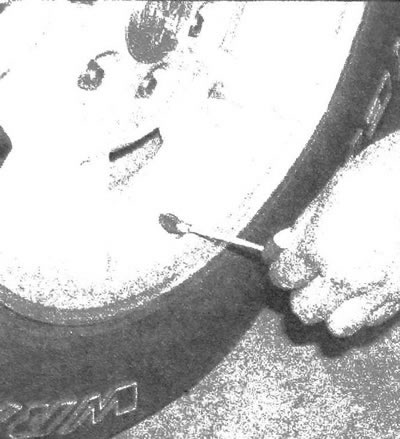
4. Make sure there are no cuts or punctures, and that there are no sharp objects stuck in the tread. Sometimes a tire punctured by a nail stuck in the tread may retain pressure for some time while slowly deflating. If the tire installed on the vehicle is slowly deflating, check the valve core for leaks (see illustration). Make sure that there are no sharp objects stuck in the tread, and also check the tightness of the vulcanization patches if punctures were previously repaired by installing them. A puncture can be easily detected by applying a soapy water solution to the tire (see illustration). Blisters will form at the puncture site. In most cases, a punctured tire can be repaired in a workshop.
5.4a. When deflating a tire, first of all, make sure that its valve is tight (for this purpose, you can purchase an inexpensive device)
5.4b. If the valve is in good condition, jack up the vehicle on the side of the flat tire. Rotate the wheel slowly while spraying the soap solution onto the tread. The puncture site is determined by the presence of small air bubbles
5. Carefully inspect the inside end surface of each tire for signs of brake fluid leakage. If there are any leaks, immediately check the condition of the brake system components.
6. Maintaining the required tire pressure extends their service life, increases mileage and improves vehicle handling. During an inspection, it is impossible to correctly assess whether the tire pressure is in compliance with the norm, especially when it comes to radial tires. It is necessary to use a pressure gauge. Purchase this device and store it in your dashboard drawer. Tyre inflation compressor pressure gauges often have a high measurement error.
7. Check the pressure only on cold tires, after at least three hours of driving. In warmed-up tires, the pressure is usually 0.3-0.5 atmospheres higher.
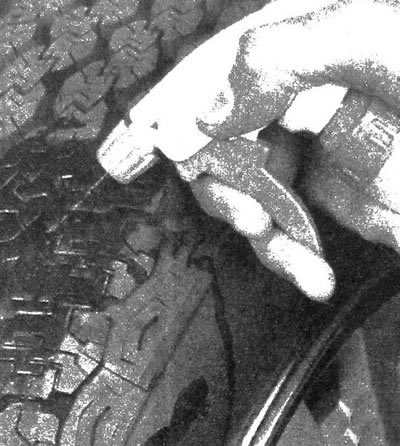
8. Unscrew the protective cap of the valve located on the wheel rim and connect the pressure gauge (see illustration). Measure the pressure and compare the results with the specification values shown in the table on the driver's door. Do not forget to install protective caps, the presence of which prevents dirt and moisture from entering the valve spools. Check all four wheels and inflate tires to proper pressure if necessary.
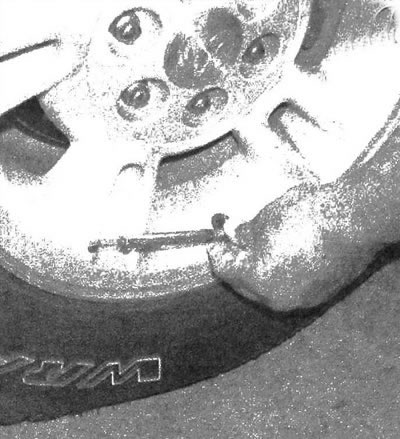
5.8. To extend the life of your tires, check the pressure with a pressure gauge weekly
9. Remember to maintain the required pressure in the spare tire (see user manual). It should be noted that the inflation pressure of the spare tire is significantly higher than the inflation pressure of a regular tire.