ChevyMan.ru
Mazda Mitsubishi Toyota Land Rover Honda Kia Nissan
English Русский
Български
Беларускі
Український
Српски
Hrvatski
Română
Polski
Slovenský
Magyar
|
Articles | Sitemap | Contacts |


Home   Aveo   Captiva   Cruze   Lacetti   Lanos   Niva   Tahoe   Others  
Cruze 1 (2008-2016)
  • Home
  • Cruze
  • J300 (2008-2016)
  • Chassis
  • Steering
  • Replacing the outer tie rod end

Replacing the outer tie rod end (Chevrolet Cruze J300)

            0

You will need: keys "8", "21", "18", a key for wheel nuts, a ball joint puller.

Note: It is more convenient to perform the work on a lift. It can also be performed on a car installed on reliable supports.


The replacement of the tip is shown using the example of the right steering rod; replace the tip of the left rod in the same way.


1. Raise and support the front of the vehicle on the side of the end being replaced.

2. Remove the wheel.

Warning: Brake the vehicle with the parking brake and install the anti-rollback stops ("shoes") under the rear wheels.

Warning: Brake the vehicle with the parking brake and install the anti-rollback stops («shoes»)…


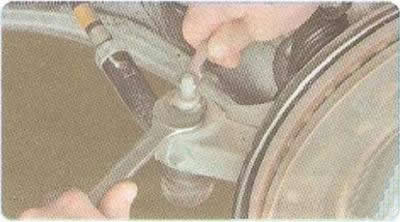
3. Loosen the tie rod end lock nut.

3. Loosen the tie rod end lock nut.


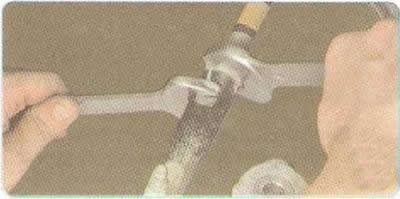
4. Holding the ball joint by the edges to prevent it from turning, loosen the nut securing the ball joint to the steering knuckle arm.


Helpful Hint: If fasteners are very dirty, clean them with a wire brush and treat them with a penetrating lubricant.

Helpful Hint: If fasteners are very dirty, clean them with a wire brush and treat them with a…


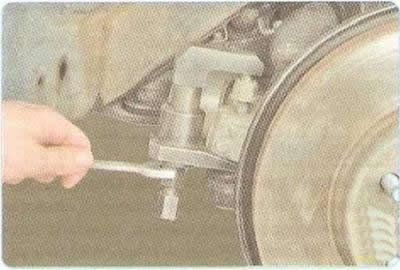
5. Install the ball joint puller and press the pin out of the steering knuckle boss.
5. Install the ball joint puller and press the pin out of the steering knuckle boss.


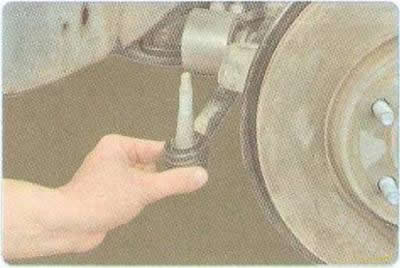
6. Finally, loosen the ball joint mounting nut and remove the joint from the hole in the steering knuckle arm.

Warning: Replace the self-locking nuts securing the steering rod joint pins with new ones each time the joint is disassembled.
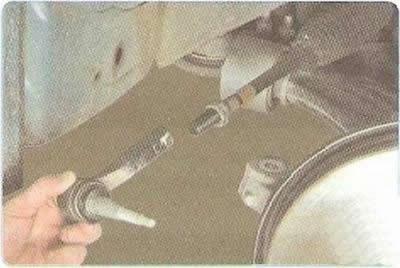

Warning: Replace the self-locking nuts securing the steering rod joint pins with new ones each time…


7. Unscrew the tip from the steering rod.


Note: When loosening the tie rod end, count the number of turns to ensure that the wheel alignment does not change when installing a new end.


8. Install the new tip in the reverse order of removal, screwing it onto the steering rod by the number of turns counted during removal, and tighten the lock nut to a torque of 12.5 N·m.

9. Check and, if necessary, adjust the front wheel alignment angles (see "Checking and adjusting wheel alignment angles").

[The original text can be found on the website: chevyman]

The article was checked: Vladimir Romannikov
This article is available at russian, bulgarian, belarusian, ukrainian, serbian, croatian, romanian, polish, slovak, hungarian

Share information:

Previous articles
Cruze 1: Steering
Next articles

Removal and installation the steering column
Removal and installation the steering column cover
Removal and installation the steering wheel
Checking the free play (play) of the steering wheel
Inspection and testing of the steering system on the vehicle
Replacing the steering rod
Replacing the working fluid and bleeding the power steering system
Replacing the power steering fluid reservoir
Replacing the steering gear
Checking and replacing the power steering pump drive belt


See similar articles on the topic of Chevrolet cars:
Replacing the outer tie rod end Chevrolet Aveo T300 (2012-2018)
Replacing windshield wiper blades Chevrolet Captiva 1 (2006-2018)
Replacing windshield and tailgate glass wiper blades Chevrolet Lacetti 1 (2002-2009)
Replacing the outer tie rod end Chevrolet Lanos T150 (2002-2009)
Replacing fuses Chevrolet Niva 1 (2002-2016)
Replacing a worn tire Chevrolet Tahoe 1 (1992-2000)
Removal, replacing the protective cover and installing the outer drive joint Chevrolet Orlando 1 (2010-2018)
Link in different formats to this page


Visitor comments

No comments yet


How much will 23 + 38 =


Cruze 1 (2008-2016) 
  • General information
  • User manual
  • Troubleshooting
  • Maintenance
  • Power unit
  • Engine repair
  • Lubrication system
  • Cooling system
  • Exhaust system
  • Supply system
  • Control system
  • Transmission
  • Clutch
  • Car gearbox
  • Front wheel drives
  • Chassis
  • Front suspension
  • Rear suspension
  • Steering
  • Brake system
  • Body
  • Exterior (external elements)
  • Interior (internal elements)
  • Doors, covers and windows
  • Heating and air conditioning
  • Security systems
  • Electrical equipment
  • Equipment and devices
  • Power devices
  • Lighting and signaling
  • Electrical circuits


ChevyMan.ru © 2017-2026 · Mobile version · Feedback · Site search · Interesting to read · Sitemap: EN BG BY UA RS HR RO PL SK HU

Aveo 2003-2008 · Aveo 2006-2011 · Aveo 2012-2018 · Captiva 2006-2018 · Cruze 2008-2016 · Lacetti 2002-2009 · Lanos 2002-2009 · Niva 2002-2016 · Tahoe 1992-2000 · Tahoe 2000-2014 · Lumina 1 1989-1994 · Trailblazer 1 2001-2008 · Orlando 1 2010-2018 ·
🛡️ For your security and to improve our service, this site uses cookies. You can disable them in your browser.