
ChevyMan.ru
Mazda Mitsubishi Toyota Land Rover Honda Kia Nissan
English Русский
Български
Беларускі
Український
Српски
Hrvatski
Română
Polski
Slovenský
Magyar
|
Articles | Sitemap | Contacts |


Home   Aveo   Captiva   Cruze   Lacetti   Lanos   Niva   Tahoe   Others  
Tahoe 2 and 3 (2000-2014) Tahoe 1 (1992-2000)
  • Home
  • Tahoe
  • 1 (1992-2000)
  • General information
  • User manual
  • Replacing a worn tire

Replacing a worn tire (Chevrolet Tahoe 1)

            0

If the tire is worn, avoid further damage to the tire and wheel by moving the vehicle to a level place. Turn on the hazard warning lights.

Warning: Changing a tire can cause injury. The vehicle may slip off the jack and injure you.


Find a level area to change the tire to prevent the vehicle from moving during the change:
  • 1. Set the parking brake
  • 2. Place the gearshift lever in the PARK (P) position
  • 3. If the vehicle has all-wheel drive, set the transfer case to NEUTRAL (N)
  • 4. Turn off the engine

To be on the safe side, place stones under the front and rear wheels that you will not be changing.
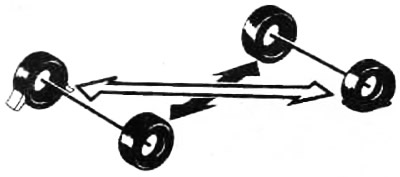
To be on the safe side, place stones under the front and rear wheels that you will not be changing.


Removal the spare tire and tools


The necessary equipment in the two-door and Suburban variants is located in the rear cargo area. The spare tire is also located there.

To remove it, you must first lift the spare wheel cover, unscrew the locking nut counterclockwise, then remove it and the adapter from the bolt. Remove the spare wheel from the car and close the cover.

The jack and tools are also stored at the back in a compartment closed with a lid marked JACK.

The tools you will use include: jack (A), jack handle extension (B), jack handle (C), wheel lug wrench (D), and ratchet lever (E).
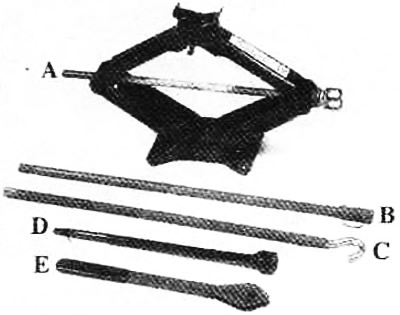
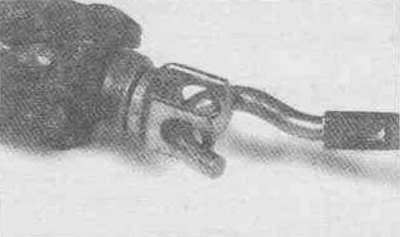

The tools you will use include: jack (A), jack handle extension (B), jack handle (C), wheel lug…


The tools you will use include: jack (A), jack handle extension (B), jack handle (C), wheel lug…


Use the jack handle extension when changing the rear wheel.
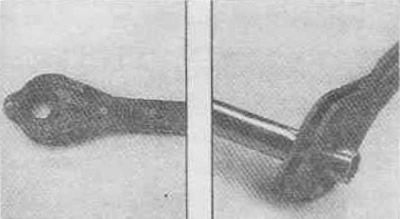
Use the jack handle extension when changing the rear wheel.


On one side of the ratchet lever there is a mark UP, on the other - DOWN.
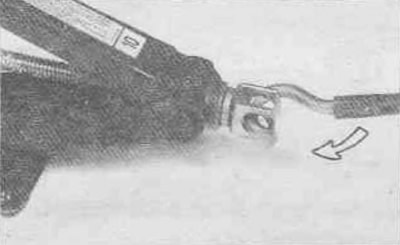
On one side of the ratchet lever there is a mark UP, on the other - DOWN.


Turn the lever with the UP mark towards you, rotate the lever clockwise, this will raise the jack head.


If your vehicle has lug nuts or wheel trims, remove them using a wheel wrench and pry bar.
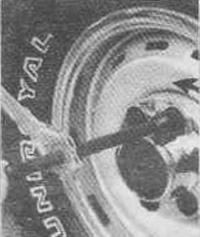
If your vehicle has lug nuts or wheel trims, remove them using a wheel wrench and pry bar.

The article was checked: Vladimir Romannikov
This article is available at russian, bulgarian, belarusian, ukrainian, serbian, croatian, romanian, polish, slovak, hungarian

Share information:

Previous articles
Tahoe 1: User manual
Next articles

How to add coolant to the reservoir
Cooling system of a gasoline engine
Overheating of gasoline engine
Towing a car
Starting the engine from an external source
Removal the worn wheel and installing the spare
If you are stuck in sand, mud or snow
Refueling a car
Checking the engine compartment
Motor oil (petrol engine)


See similar articles on the topic of Chevrolet cars:
Tire puncture Chevrolet Aveo T300 (2012-2018)
Replacing windshield wiper blades Chevrolet Captiva 1 (2006-2018)
Replacing the powertrain suspension mounts Chevrolet Cruze 1 (2008-2016)
Replacing windshield and tailgate glass wiper blades Chevrolet Lacetti 1 (2002-2009)
Replacing Windshield Wiper Blades Chevrolet Lanos T150 (2002-2009)
Tire care Chevrolet Niva 1 (2002-2016)
Check tire condition and pressure (every 250 miles or weekly) Chevrolet Lumina 1 (1989-1994)
Link in different formats to this page


Visitor comments

No comments yet


How much will 47 + 48 =


Tahoe 2 and 3 (2000-2014) 
  • General information
  • Vehicle characteristics
  • Vehicle device
  • Manual
  • Maintenance
  • Power unit
  • Engine repair
  • Engine overhaul
  • Cooling system
  • Injection and control system
  • Exhaust system
  • Engine electrical equipment
  • Transmission
  • Automatic gearbox 4L60, 4L65, 4L70
  • Automatic gearbox 6L50, 6L80, 6L90
  • Transfer case
  • Drive shafts and cardan
  • Front drive axle
  • Rear drive axle
  • Chassis
  • Car suspension
  • Steering
  • Brake system
  • Body (until 2007)
  • Exterior (external elements)
  • Interior (internal elements)
  • Doors, locks and windows
  • Heating and air conditioning
  • Security System (SRS)
  • Body (since 2007)
  • Exterior (external elements)
  • Doors, locks and windows
  • Interior (internal elements)
  • Electrical equipment
  • Electrical appliances (until 2007)
  • Lighting and lamps (until 2007)
  • Audio system (until 2007)
  • Electrical appliances (since 2007)
  • Lighting and lamps (since 2007)
  • Audio system (since 2007)
  • Wiring diagrams (2000-2005)
  • Wiring diagrams (2005-2007)
  • Wiring diagrams (since 2007)


Tahoe 1 (1992-2000) 
  • General information
  • User manual
  • Maintenance
  • Power unit
  • Engine in a car
  • Engine removed
  • Cooling system
  • Heating and air conditioning
  • Fuel and exhaust systems
  • Decreased toxicity
  • Transmission
  • Manual gearbox
  • Automatic gearbox
  • Transfer case
  • Clutch and drive shafts
  • Chassis
  • Brake system
  • Car suspension
  • Steering
  • Body
  • Repair of body elements
  • Electrical equipment
  • Engine electrics
  • Equipment and devices
  • Electrical circuits


ChevyMan.ru © 2017-2026 · Mobile version · Feedback · Site search · Interesting to read · Sitemap: EN BG BY UA RS HR RO PL SK HU

Aveo 2003-2008 · Aveo 2006-2011 · Aveo 2012-2018 · Captiva 2006-2018 · Cruze 2008-2016 · Lacetti 2002-2009 · Lanos 2002-2009 · Niva 2002-2016 · Tahoe 1992-2000 · Tahoe 2000-2014 · Lumina 1 1989-1994 · Trailblazer 1 2001-2008 · Orlando 1 2010-2018 ·
🛡️ For your security and to improve our service, this site uses cookies. You can disable them in your browser.