
2. Original tires (i.e. tires fitted by the vehicle manufacturer) have 1/2" wide stripes that appear when the tread depth drops to 1/16", indicating tire wear. Tread wear can be checked using a simple, inexpensive device known as a tread depth indicator (see illustration).
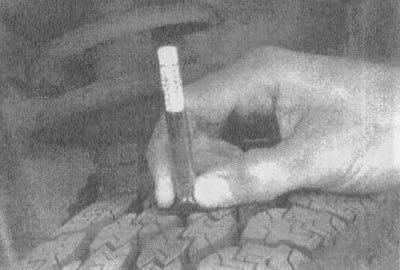
5.2. Use the tread depth indicator to check tire wear (they are available from spare parts stores and service stations)
3. Pay attention to any abnormal tire wear (see illustration). Incorrect tread pattern (flat spots, nicks, or more wear on one side than the other) indicate incorrect camber and toe angles and/or incorrect balancing. If at least one of the indicated signs is noticed, eliminate the malfunction by contacting a service station or tire shop.
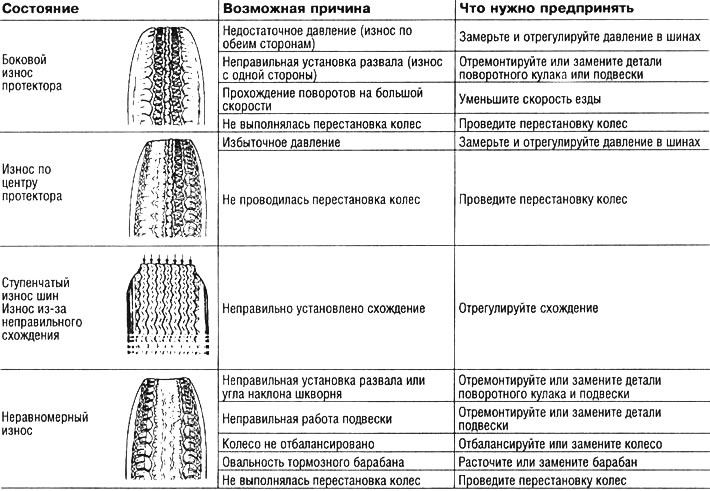
5.3. With the help of this table you will be able to determine the condition of the tires, the probable cause of abnormal wear and the necessary actions in these cases
4. Check for cuts, punctures, or embedded nails or other objects in the tread. Sometimes a tire is able to hold air pressure for a short time or deflate very slowly after a nail has entered its tread. If a small air leak persists, check that the valve spool is firmly seated (see illustration). Check the tread for objects that could dig into the tire, or "plugs", that can lead to bloating (radial tire punctures are repaired with plugs inserted into the puncture). If a puncture is suspected, it can be easily checked by spraying a solution of soapy water onto the suspected area (see illustration). If there is a leak, the soap solution will bubble. If the puncture is small, the tire can be repaired at a tire shop or workshop.
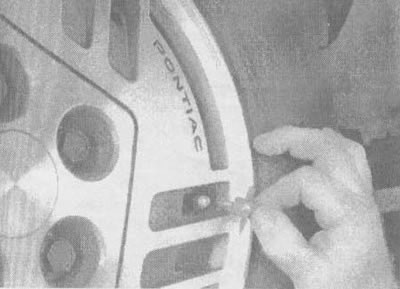
5.4a. If there is a constant air leak from the tire, first check the valve spool to make sure it is tight (auto parts stores usually have inexpensive attachments designed for this purpose) | 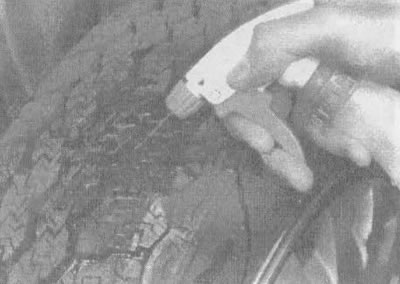
5.4b. If the valve spool is leaking, raise the car on the side of the flat tire and spray a solution of soapy water onto the tread while slowly turning the wheel - if there is a leak, air bubbles will form |
5. Carefully inspect the inside side of each tire for signs of brake fluid leakage. If you see any marks, check your brakes immediately.
6. Tire pressure adjustment increases tire mileage and also improves ride comfort. It is impossible to accurately estimate the pressure in tires by appearance, especially if they are of a radial type. Be sure to use a manometer. Keep an accurate pressure gauge in your car at all times. Pressure sensors attached to air hose nipples at gas stations are often inaccurate.
7. Check tire pressure only when they are cold. "Cold" in this case means that the vehicle has not been driven for the previous three hours before the tire pressure check. When the tires are warm, the pressure can rise from 4 to 8 pounds.
8. Attach the pressure gauge firmly to the valve (see illustration). Read the pressure gauge and compare with the recommended tire pressures on the label affixed to the inside of the glove compartment lid. Be sure to install the cap to keep dirt out of the valve. Check all four tires and, if necessary, inflate them to the recommended pressure.
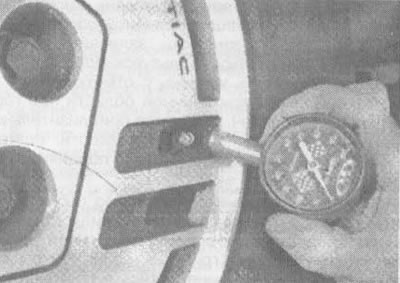
5.8. To prolong tire life, check tire pressure at least once a week with an accurate pressure gauge (don't forget to do the same with the spare tire!)
9. Don't forget to inflate the spare tire to the recommended pressure (see the owner's manual or on the side of the tire).