
Contents: Motor oil ↧ Engine coolant ↧ Windshield washer fluid ↧ Battery electrolyte ↧ Brake fluid ↧
Note: The following checks should be performed at 250 mile intervals or weekly. Additional fluid level checks can be found in the specific maintenance procedures below. Regardless of the maintenance intervals, you should constantly pay attention to fluid leaks, which indicate faults that need to be corrected immediately.
1. Fluids are an important part of lubrication, cooling, braking and windshield washer systems. As liquids gradually become contaminated and unusable, their level must be replenished periodically. Before adding fluid, review the list of recommended lubricants and fluids at the beginning of this chapter. Note: When checking fluid levels, the vehicle must be on a level surface.
Motor oil
2. The oil level in the engine is checked using a special dipstick (see illustration). The dipstick is located in a metal tube lowered into the oil pan.

4.2. The dipstick is installed on the front side of the engine
3. The oil level should be checked either before the engine is started for the first time or approximately 15 minutes after the engine has been turned off. If you check the oil level immediately after stopping the vehicle, some oil will remain in the upper part of the engine, resulting in an inaccurate reading on the dipstick.
4. Pull the dipstick out of the tube and wipe the oil from the end of the dipstick with a clean rag or paper towel. Insert the cleaned dipstick all the way into the tube and pull it out again. Note the oil level at the end of the dipstick. If necessary, add oil to maintain the level above the "ADD" mark in the shaded area of the dipstick (see illustration).
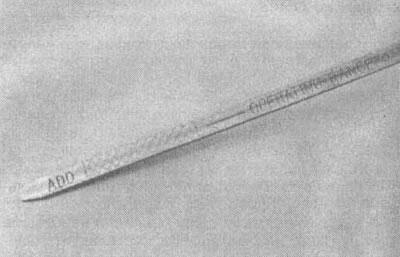
4.4 The oil level must be within the shaded area. If it is below the "ADD" line, add enough oil to bring the level into the shaded area
5. Do not overfill the engine by adding large amounts of oil, as this may result in oily spark plugs, oil leaks or damage to the seals.
6. Oil is added to the engine after removing the oil filler cap (see illustration). To avoid spilling oil, use a funnel.
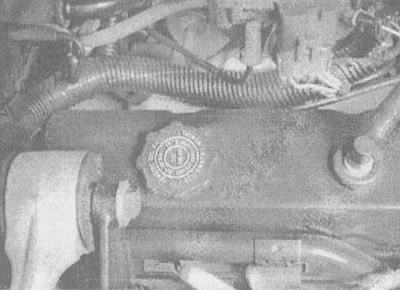
4.6. The engine oil filler cap is clearly marked and is located on the valve cover
7. Checking the oil level is an important maintenance operation. A persistently low oil level indicates leakage through damaged seals, defective gaskets, worn piston rings or valve guides. If the oil has a milky color or water droplets are visible in it, this may be due to a blown cylinder head gasket or a crack in the cylinder head or block. In this case, the engine should be checked immediately. You also need to check the condition of the oil. Whenever you check the oil level, run your thumb and forefinger across the dipstick before wiping off the oil. If you see small particles of dirt or metal stuck to the dipstick, the oil should be changed (see section 12).
Engine coolant
Caution: Do not allow antifreeze to come into contact with your skin or painted surfaces of your vehicle. Rinse contaminated areas immediately with plenty of water. Do not store new coolant or leave old coolant in places accessible to children or animals. Wipe up any spilled liquid on your garage floor or drain pan immediately. Keep containers of antifreeze closed and eliminate the causes of cooling system leaks immediately.
8. All vehicles described in this manual have a closed cooling system. The white plastic expansion tank, located on the front side of the engine compartment, is connected by a hose to the radiator filler neck. As the engine warms up, the coolant expands and escapes through a valve in the radiator cap, passing through a hose into the expansion tank. When the engine cools down, coolant is automatically refilled into the cooling system to maintain the proper level.
9. The coolant level in the reservoir should be checked regularly.
Caution: Do not remove the radiator cap to check the coolant level when the engine is hot.
The fluid level in the tank changes depending on the engine temperature. When the engine is cold, the coolant level should be at the mark "FULL COLD" ("Full when engine is cold") or slightly higher than it (see illustration). When the engine warms up, the liquid level should be at "FULL NOTES". ("Full when the engine is hot"). If this is not the case, allow the engine to cool down, then remove the tank cap and top up the liquid.
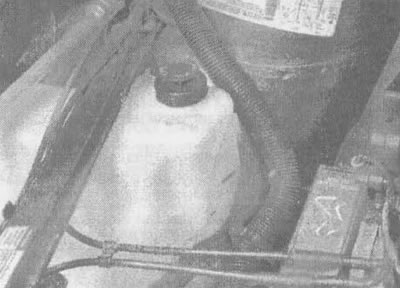
4.9. The expansion tank is located on the right ("passenger") side of the engine compartment. Coolant can be added to the reservoir after removing the cap
10. After using the vehicle, recheck the coolant level. If only a small amount of fluid is required to set the required level, distilled water can be used. The increase in freezing temperature must be taken into account. Do not use any additives or rust inhibitors.
11. If the coolant level continues to drop, there may be a leak in the system. Check the radiator, hoses, filler caps, drain plug and coolant pump (see section 9). If no leaks are noticed, the radiator cap should be checked for leaks at a service station.
12. If you have to remove the radiator cap, wait until the engine has cooled completely, then wrap the cap in a thick layer of cloth and turn it to the first stop. If coolant or steam leaks, allow the engine to cool for a while and then remove the cap.
13. Also check the condition of the coolant. It should be relatively transparent. If the fluid is brown or rust colored, it should be drained, the cooling system flushed, and the fluid refilled. The coolant must be replaced at the intervals specified in the technical specifications.
Windshield washer fluid
14. The windshield washer fluid is located in a plastic tank on the left side of the engine compartment (see illustration). In milder climates, plain water can be used, but the tank should be filled no more than 2/3 full to allow for expansion when the water freezes. In colder climates, use a special windshield washer fluid.
4.14. To add fluid, remove the cap from the windshield washer reservoir
15. To prevent icing in freezing weather, warm up the windshield using a heater.
Battery electrolyte
16. All vehicles described in this manual are equipped with a battery that is sealed and has no holes for filling (excluding ventilation holes).
You never need to add water to these batteries. However, if the vehicle was equipped with a wet type battery, remove the battery cell covers located on the top of the battery (usually there are two covers, each for three elements). If the electrolyte level is low, add enough distilled water to bring the level above the plates. Typically, each element has an indicator that allows you to judge whether enough water has been added. Add water until the electrolyte level reaches the bottom of the indicator. Do not overfill the battery, otherwise electrolyte will leak out after charging.
Brake fluid
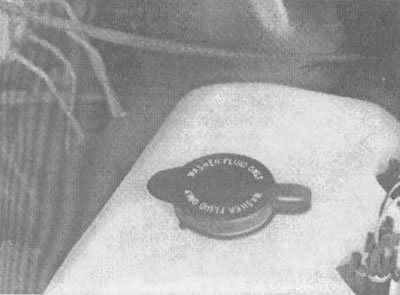
17. The master brake cylinder is installed in front of the brake booster unit in the engine compartment (see illustration).
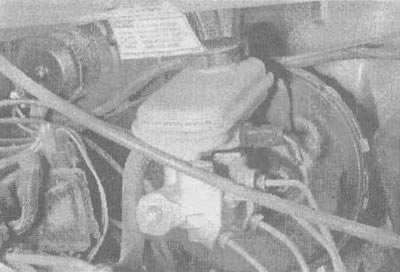
4.17. The level in the transparent brake fluid reservoir can be checked without removing the plug, however, it is recommended to remove the plug to check the exact level and assess the condition of the brake fluid
18. Remove the reservoir cap and make sure that the fluid level is level with the bottom of the filler neck opening.
19. Pour the liquid into the tank carefully to avoid spilling on painted surfaces. Make sure that the recommended fluid is used, as mixing different types of brake fluid may result in brake system failure (see subsection "Recommended oils and fluids" at the beginning of this chapter or read the operating manual).
Caution: Brake fluid may cause eye damage or damage painted surfaces, so take precautions when handling or pouring it. Do not use brake fluid that has been open or is more than one year old. Brake fluid absorbs moisture from the air. Excess moisture can cause dangerous loss of braking performance.
20. At the same time, you should check the brake fluid and the master cylinder for contamination. Brake fluid should be replaced if it contains deposits (sediment), dirt particles or water droplets.
21. After adding fluid to the required level, check that the cap is tightly seated on the neck to prevent fluid leakage.
22. When the brake pads on each wheel wear down during normal brake operation, the brake fluid level in the master cylinder drops slightly. If multiple top-ups are required to maintain the brake fluid level in the master cylinder, this is a sign of a leak in the brake system. The leak must be repaired immediately. Check all brake hoses and connections (for more information on this subject, see section 17).
23. If, when checking the brake fluid level in the master cylinder, you find that one or both circuits are empty or nearly empty, the brake system should be bled (see chapter 9).
[For details, visit the website: «ChevyMan.ru»]