
ChevyMan.ru
Mazda Mitsubishi Toyota Land Rover Honda Kia Nissan
English Русский
Български
Беларускі
Український
Српски
Hrvatski
Română
Polski
Slovenský
Magyar
|
Articles | Sitemap | Contacts |


Home   Aveo   Captiva   Cruze   Lacetti   Lanos   Niva   Tahoe   Others  
Cruze 1 (2008-2016)
  • Home
  • Cruze
  • J300 (2008-2016)
  • Power unit
  • Engine repair
  • Replacing the powertrain suspension mounts

Replacing the powertrain suspension mounts (Chevrolet Cruze J300)

            0

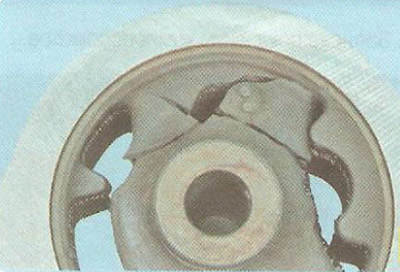
The power unit is mounted on four supports with rubber cushions: two supports on the right and left, and two supports in the front and rear.

The power unit is mounted on four supports with rubber cushions: two supports on the right and…


If the rubber mass cracks, peels off from the outer bushing, or if cracks appear in the brackets, replace the supports.

You will need: a 18 mm wrench (two), a jack or similar lifting mechanism.

1. Raise the front of the vehicle on stands or lift the vehicle on a lift.
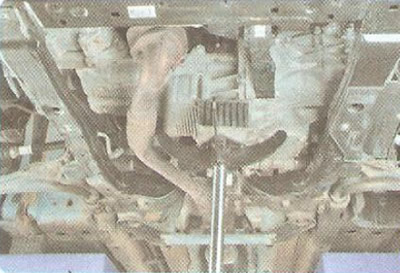
1. Raise the front of the vehicle on stands or lift the vehicle on a lift.


2. Place a jack or support under the engine or gearbox crankcase.
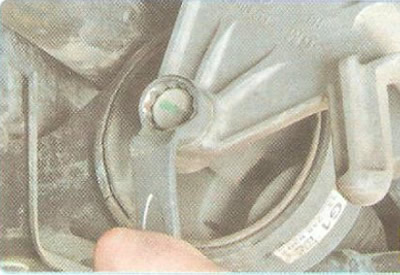
2. Place a jack or support under the engine or gearbox crankcase.


3. To replace the rear support cushion, loosen the bolt securing the powertrain suspension support cushion to the bracket.
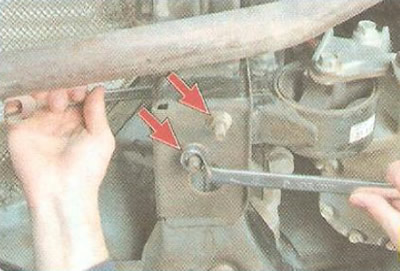


3. To replace the rear support cushion, loosen the bolt securing the powertrain suspension support…


4. Unscrew the two nuts securing the cushion to the front suspension subframe and remove the bolts upward.
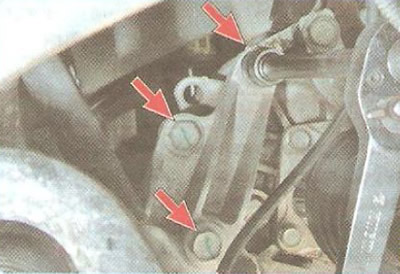
4. Unscrew the two nuts securing the cushion to the front suspension subframe and remove the bolts…


5. Remove the three bolts securing the bracket to the gearbox housing.
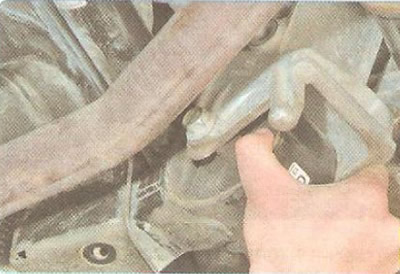
5. Remove the three bolts securing the bracket to the gearbox housing.


6. Remove the powertrain suspension support cushion together with the bracket, moving it forward and to the right in the direction of vehicle travel.
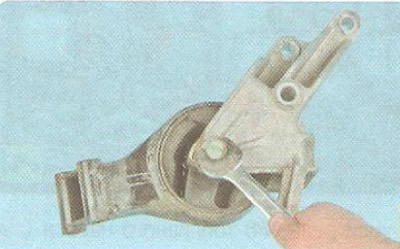


6. Remove the powertrain suspension support cushion together with the bracket, moving it forward…


7. Unscrew the bolt securing the support to the bracket...
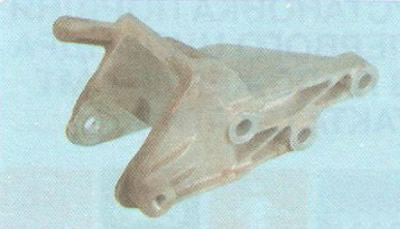
7. Unscrew the bolt securing the support to the bracket...


8. ...and remove the bracket.

9. Install the rear powertrain suspension support cushion in the reverse order of removal. Tighten the support mounting bolt to the bracket completely after removing the support from under the engine.
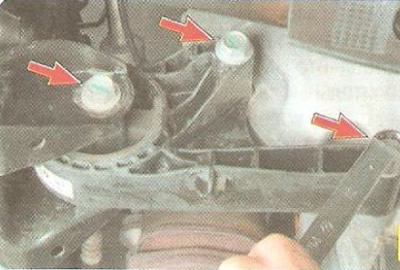
9. Install the rear powertrain suspension support cushion in the reverse order of removal. Tighten…


10. To replace the front support of the power unit suspension, unscrew the two bolts securing the support cushion of the power unit suspension to the gearbox housing and one bolt securing it to the subframe.
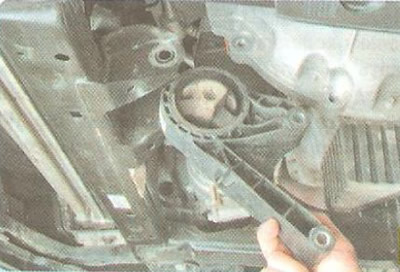


10. To replace the front support of the power unit suspension, unscrew the two bolts securing the…


11. Remove the support.

Note: The front support of the power unit is non-separable and is replaced as an assembly with the cushion.
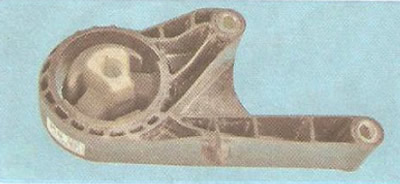

Note: The front support of the power unit is non-separable and is replaced as an assembly with the…


12. Install the front powertrain mount in the reverse order of removal.
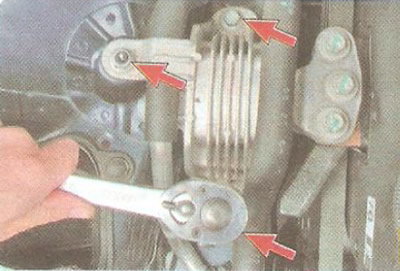
12. Install the front powertrain mount in the reverse order of removal.


13. To replace the right powertrain suspension support, unscrew the two bolts and unscrew one nut securing the support bracket to the wing.
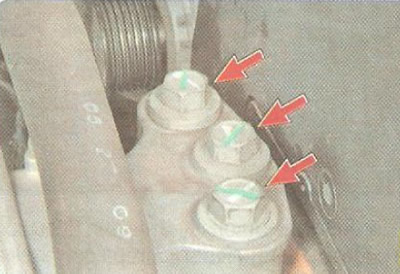


13. To replace the right powertrain suspension support, unscrew the two bolts and unscrew one nut…


14. Remove the three bolts securing the right support to the bracket on the engine...
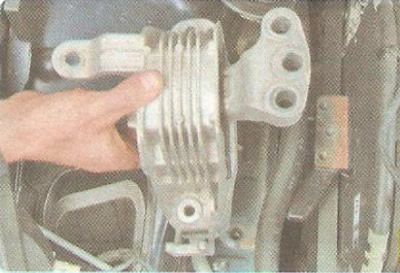
14. Remove the three bolts securing the right support to the bracket on the engine...


15. ...and remove the right engine mount bracket.

Note: The right support of the power unit is non-separable and is replaced as an assembly with the cushion.
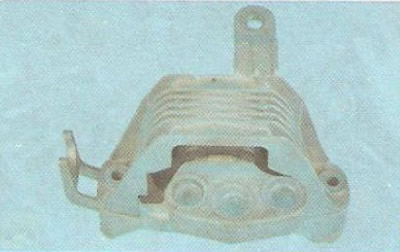

Note: The right support of the power unit is non-separable and is replaced as an assembly with the…


16. Install the right powertrain suspension support in the reverse order of removal.


17. To replace the left powertrain suspension mount cushion, remove the relay and fuse box located in the engine compartment (see "Removal and installation of mounting blocks").

18. Remove the battery (see "Removal and installation the battery").
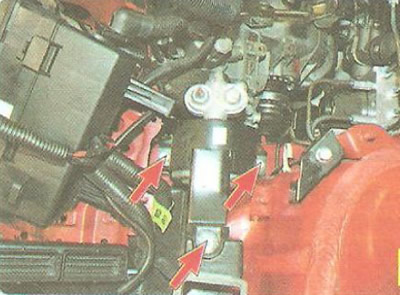
18. Remove the battery (see «Removal and installation the battery»).


19. Remove the bolts securing the left support cushion to the engine compartment mudguard...
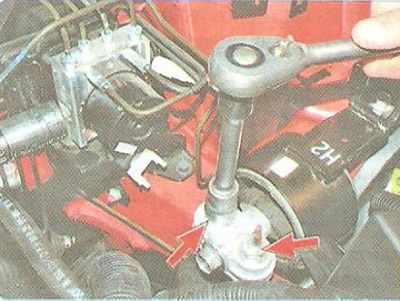
19. Remove the bolts securing the left support cushion to the engine compartment mudguard...


20. ...unscrew the bolt and unscrew the nut of the stud securing the left support cushion to the bracket on the gearbox...
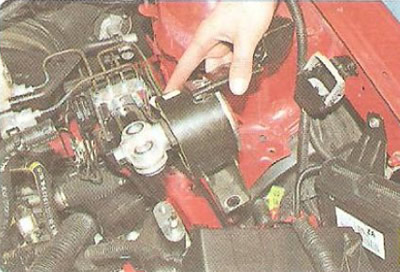
20. ...unscrew the bolt and unscrew the nut of the stud securing the left support cushion to the…


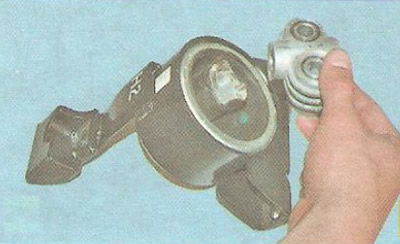
21. ...and then remove the left powertrain suspension mount cushion from the vehicle.
21. ...and then remove the left powertrain suspension mount cushion from the vehicle.


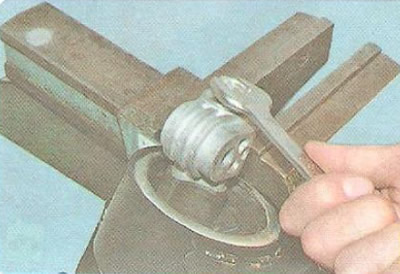
22. Clamp the left support cushion bracket in a vice, unscrew the bracket mounting bolt to the support...
22. Clamp the left support cushion bracket in a vice, unscrew the bracket mounting bolt to the…


23. ...and remove the bracket from the support.

24. Install the left engine mount cushion and all previously removed parts in the reverse order of removal.

The article was checked: Vladimir Romannikov
This article is available at russian, bulgarian, belarusian, ukrainian, serbian, croatian, romanian, polish, slovak, hungarian

Share information:

Previous articles
Cruze 1: Engine repair
Next articles

Removal and installation engine mudguards
Checking the compression in the cylinders
Removal and installation the decorative engine cover
Possible engine malfunctions, their causes and solutions
Design Features of F16D and F18D Engines
Cleaning the crankcase ventilation system
Setting the piston of the first cylinder to the TDC position of the compression stroke
Checking the accessory drive belt
Replacement of auxiliary drive belt
Checking timing belt


See similar articles on the topic of Chevrolet cars:
Replacing the left support of the powertrain suspension Chevrolet Aveo T300 (2012-2018)
Replacing windshield wiper blades Chevrolet Captiva 1 (2006-2018)
Replacing the powertrain mounts Chevrolet Lacetti 1 (2002-2009)
Replacing the exhaust system suspension cushions Chevrolet Lanos T150 (2002-2009)
Replacing fuses Chevrolet Niva 1 (2002-2016)
Transmission Mounts — Checking and Replacing Chevrolet Tahoe 1 (1992-2000)
Checking and replacing engine mounts Chevrolet Lumina 1 (1989-1994)
Link in different formats to this page


Visitor comments

No comments yet


How much will 13 + 30 =


Cruze 1 (2008-2016) 
  • General information
  • User manual
  • Troubleshooting
  • Maintenance
  • Power unit
  • Engine repair
  • Lubrication system
  • Cooling system
  • Exhaust system
  • Supply system
  • Control system
  • Transmission
  • Clutch
  • Car gearbox
  • Front wheel drives
  • Chassis
  • Front suspension
  • Rear suspension
  • Steering
  • Brake system
  • Body
  • Exterior (external elements)
  • Interior (internal elements)
  • Doors, covers and windows
  • Heating and air conditioning
  • Security systems
  • Electrical equipment
  • Equipment and devices
  • Power devices
  • Lighting and signaling
  • Electrical circuits


ChevyMan.ru © 2017-2026 · Mobile version · Feedback · Site search · Interesting to read · Sitemap: EN BG BY UA RS HR RO PL SK HU

Aveo 2003-2008 · Aveo 2006-2011 · Aveo 2012-2018 · Captiva 2006-2018 · Cruze 2008-2016 · Lacetti 2002-2009 · Lanos 2002-2009 · Niva 2002-2016 · Tahoe 1992-2000 · Tahoe 2000-2014 · Lumina 1 1989-1994 · Trailblazer 1 2001-2008 · Orlando 1 2010-2018 ·
🛡️ For your security and to improve our service, this site uses cookies. You can disable them in your browser.