
ChevyMan.ru
Mazda Mitsubishi Toyota Land Rover Honda Kia Nissan
English Русский
Български
Беларускі
Український
Српски
Hrvatski
Română
Polski
Slovenský
Magyar
|
Articles | Sitemap | Contacts |


Home   Aveo   Captiva   Cruze   Lacetti   Lanos   Niva   Tahoe   Others  
Cruze 1 (2008-2016)
  • Home
  • Cruze
  • J300 (2008-2016)
  • Body
  • Doors, covers and windows
  • Replacement of fixed body glazing

Replacement of fixed body glazing (Chevrolet Cruze J300)

            0

The windshield and rear window glass are glued into the body openings. They are replaced using the same techniques, so the work is shown using the windshield glass as an example.

You will need: a flat-blade screwdriver, an awl, a knife, and a glass gluing kit.
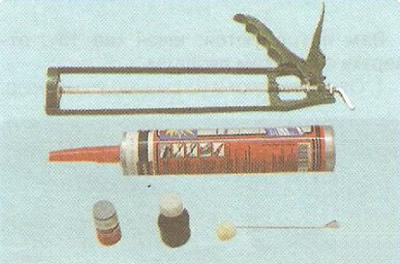
You will need: a flat-blade screwdriver, an awl, a knife, and a glass gluing kit.


This is what a glass gluing kit looks like. It consists of a tube of glue, a tube tip, an activator/cleaner, and a primer.

Note: There may be minor differences in the instructions for use of kits from different manufacturers. Therefore, when performing this operation, please refer to the instructions for the kit you purchased.

Note: There may be minor differences in the instructions for use of kits from different…


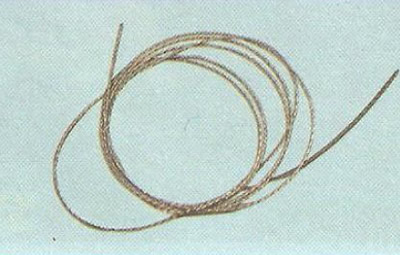
Helpful tip: It is convenient to use a steel wire to remove glued glass.


1. Remove the windshield wiper arms together with the blades (see "Replacing windshield wiper arms").


2. Open the hood and remove the air intake box grille (see "Removal and installation the air intake box grille"). Close the hood.

3. Open both front doors.

4. Remove the front pillar trims (see "Removal and installation of interior trim").

5. Remove the interior rearview mirror (see "Removal and installation the interior mirror").

6. Remove the windshield glass seal by sliding it off the glass and removing it from the window opening groove.
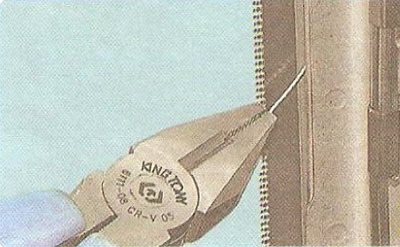

6. Remove the windshield glass seal by sliding it off the glass and removing it from the window…


7. Lightly pry the glass with a screwdriver and pierce the adhesive seam with a pointed tool (for example, with an awl) and pull the string through the hole.
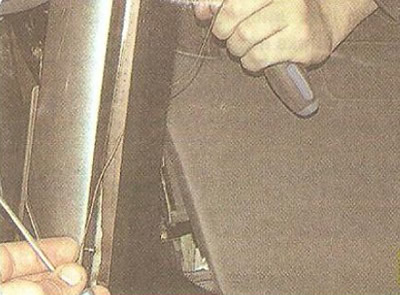
7. Lightly pry the glass with a screwdriver and pierce the adhesive seam with a pointed tool (for…


8. For ease of use, screwdrivers can be attached to the ends of the string to serve as handles.

9. Use a string to cut the glue seam along the entire perimeter of the glass (you may need an assistant to perform this operation).


10. Remove the glass from the car.

Warning: Use caution when handling glass. Damaged glass may break unexpectedly.
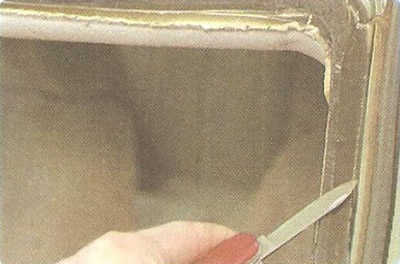

Warning: Use caution when handling glass. Damaged glass may break unexpectedly.


11. Cut off the old seam, leaving a thin layer of glue (1.0-2.0 mm).
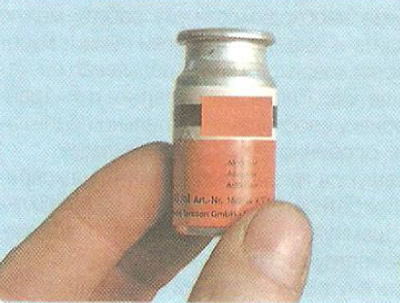
11. Cut off the old seam, leaving a thin layer of glue (1.0-2.0 mm).


12. Apply activator.
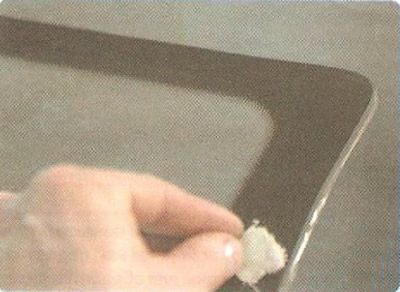
12. Apply activator.


13. ...on the edge of the glass and the window opening along the entire perimeter.
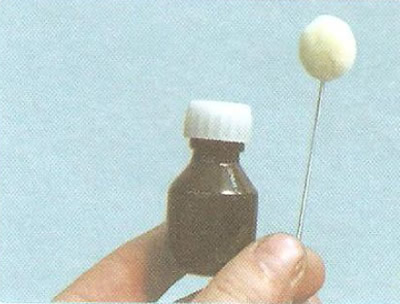
13. ...on the edge of the glass and the window opening along the entire perimeter.


14. Apply grease around the perimeters of the glass and window opening.


Warning: Do not apply primer over old adhesive residue.


15. Install rubber pads of the same thickness around the entire opening to prevent contact between the glass and body elements.

16. Within 30 minutes after applying the primer, apply the glue evenly to the window opening (layer thickness 0.5 cm) and around the perimeter of the glass.

17. Install the glass on the car,

18. Replace the glass seal.

1.9, Press and fix the glass in any available way (for example, with masking tape). The polymerization period of the glue is at least 2-3 hours. During this time, the car should not be exposed to any external influences. Even a sharp closing of the door can lead to an increase in air pressure in the cabin and, as a result, to the glass tearing off. It is advisable to start using the car no earlier than 24 hours after gluing the glass.

20. Install the front pillar trims.

21. Install the air intake box grille and interior rearview mirror.

22. Install the windshield wiper arms together with the blades.

23. Replace the rear glass in the same way.

For details, visit the website «ChevyMan.ru»

The article was checked: Vladimir Romannikov
This article is available at russian, bulgarian, belarusian, ukrainian, serbian, croatian, romanian, polish, slovak, hungarian

Share information:

Previous articles
Cruze 1: Doors, covers and windows
Next articles

Removal and installation the fuel tank filler pipe hatch cover
Removal and installation the trunk lid
Replacement of the lock, latch and trunk lid release button
Removal and installation the decorative trim on the trunk lid
Removal and installation the trunk lid trim


See similar articles on the topic of Chevrolet cars:
Features of the body design Chevrolet Aveo T300 (2012-2018)
Electronic throttle body Chevrolet Captiva 1 (2006-2018)
Car body structure Chevrolet Lacetti 1 (2002-2009)
Description of the body structure Chevrolet Lanos T150 (2002-2009)
Car body care Chevrolet Niva 1 (2002-2016)
Lubrication of chassis and body parts Chevrolet Tahoe 1 (1992-2000)
Chassis and body lubrication (every 30,000 miles or 24 months) Chevrolet Lumina 1 (1989-1994)
Link in different formats to this page


Visitor comments

No comments yet


How much will 44 + 25 =


Cruze 1 (2008-2016) 
  • General information
  • User manual
  • Troubleshooting
  • Maintenance
  • Power unit
  • Engine repair
  • Lubrication system
  • Cooling system
  • Exhaust system
  • Supply system
  • Control system
  • Transmission
  • Clutch
  • Car gearbox
  • Front wheel drives
  • Chassis
  • Front suspension
  • Rear suspension
  • Steering
  • Brake system
  • Body
  • Exterior (external elements)
  • Interior (internal elements)
  • Doors, covers and windows
  • Heating and air conditioning
  • Security systems
  • Electrical equipment
  • Equipment and devices
  • Power devices
  • Lighting and signaling
  • Electrical circuits


ChevyMan.ru © 2017-2026 · Mobile version · Feedback · Site search · Interesting to read · Sitemap: EN BG BY UA RS HR RO PL SK HU

Aveo 2003-2008 · Aveo 2006-2011 · Aveo 2012-2018 · Captiva 2006-2018 · Cruze 2008-2016 · Lacetti 2002-2009 · Lanos 2002-2009 · Niva 2002-2016 · Tahoe 1992-2000 · Tahoe 2000-2014 · Lumina 1 1989-1994 · Trailblazer 1 2001-2008 · Orlando 1 2010-2018 ·
🛡️ For your security and to improve our service, this site uses cookies. You can disable them in your browser.