


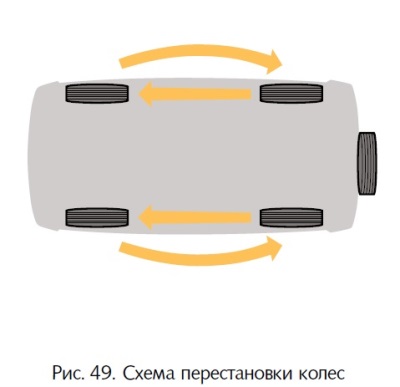
To replace wheels:
1. Apply the parking brake, engage first or reverse gear in the gearbox, and make sure that the transfer case control lever is not in neutral. If possible, take additional measures to prevent the car from rolling away by placing objects in front and behind the wheel furthest from the one being replaced that prevent it from rolling.
2. Take out the jack 5, Fig. 50, which is secured with an elastic strap in the trunk on the arch of the rear left wheel, the pump and the tool bag, located in the trunk on the arch of the rear right wheel. Remove the spare wheel 2. To remove the spare wheel, remove the decorative cap 1 and unscrew the three nuts with which the wheel is secured to a special bracket.
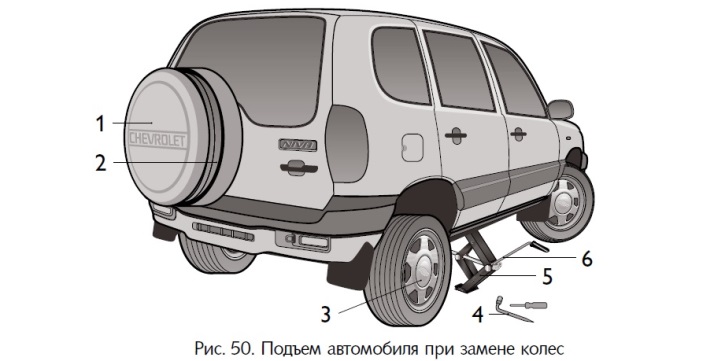
3. Remove the protective cover 3 from the wheel being replaced, if provided by the design of the aluminum alloy wheel, and loosen the five wheel mounting nuts by one turn using the combination wrench 4.
4. Install jack 5 closer to the wheel being replaced so that when lifting, its heel rests against the stamping of the special bracket on the bottom of the body. By turning the handle clockwise, fix the jack in a strictly vertical position so that the jack heel is located strictly under the installation point of the support on the body. If this is not ensured during lifting, repeat the jack installation procedure. Do not allow foreign objects, hands and other body parts to get into the gap between the support and the body; make sure that children do not do this.
5. Rotate the jack handle 6 clockwise until the wheel is raised a few centimeters above the ground, sufficient to install the spare wheel.
Warning. An incorrectly installed jack can cause damage to the vehicle or cause it to fall off the jack. Make sure that the heel of the jack rests precisely against the stamping of the special bracket on the bottom of the body. It is prohibited to stand under a vehicle raised by a jack.
6. Loosen the nuts and remove the wheel. Install the spare wheel and tighten the mounting nuts evenly.
7. Lower the vehicle by turning handle 6 counterclockwise.
8. Tighten the nuts, check and adjust the air pressure in the tire to the correct level.
9. Secure the replaced wheel to the tailgate bracket and replace the decorative cap 1.
10. Place the jack and tool in their proper place and secure them with elastic straps.