
Contents: Removal ↧ Installation ↧
Caution! The air conditioning system is under high pressure. Do not loosen any hoses or fittings or remove any parts until the system has been discharged by a workshop or service station. When disconnecting air conditioning hoses, wear eye protection.
Note: If the compressor is replaced, the filter (see section 14).
Removal
1. Have your air conditioning system discharged for you (see precautions above).
2. Disconnect the negative battery cable and on vehicles with a front fan, remove the auxiliary fan (see section 4).
3. Set the car to the parking brake and block the rear wheels. Raise the front of the vehicle and support it securely on jack stands.
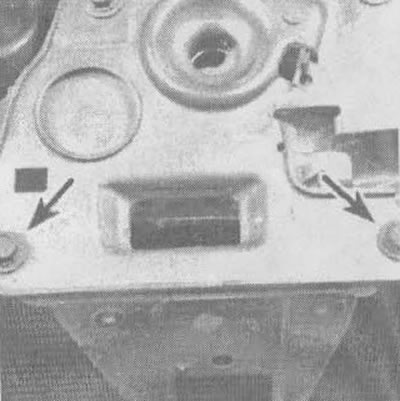
4. To remove the radiator, follow the steps shown in the series of photographs (see illustrations), not forgetting to read the accompanying inscriptions.
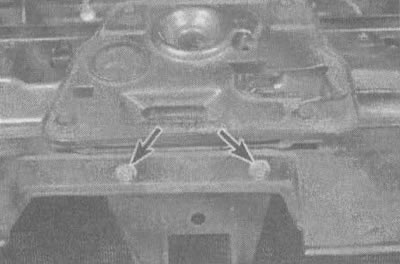
16.4a. Remove the upper diffuser shield (indicated by arrows), by unscrewing the bolts and pulling the shield out of its holders |
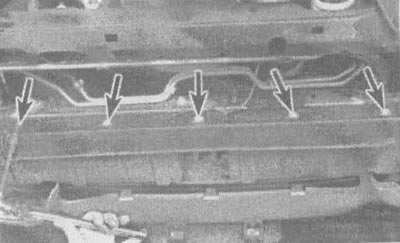
16.4b. Remove the lower deflector by unscrewing five bolts (indicated by arrows),... |
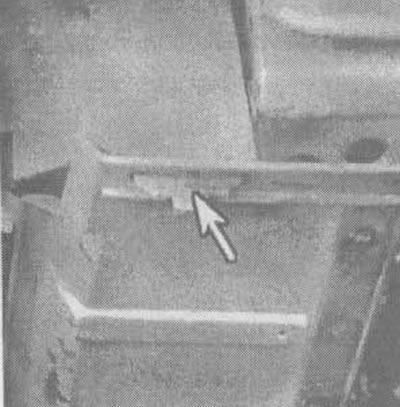
16.4v.... having released the side flaps (indicated by the arrow)... |
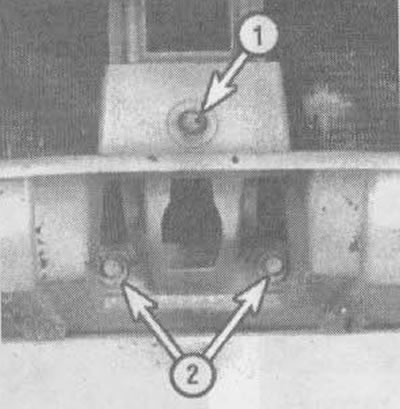
16.4g....and remove the central bolt (1). Remove the central grille by unscrewing the lower grille bolts (2)... |
16.4d....and the upper grille bolts (indicated by arrows) |

16.4e. Unscrew the upper and lower refrigerant lines (indicated by arrows), using a support wrench to avoid twisting the pipe; to prevent dirt from getting into the pipes, plug them |

16.4g. Remove the lower insulators (one of them is indicated by an arrow), located on the lower corners of the radiator, and remove the radiator by disconnecting the upper insulator and seal
Installation
5. If installing a new radiator, add one ounce of fresh oil to it before installation.
6. Install the parts in reverse order. Don't forget to replace the rubber gaskets under the radiator and new refrigerant line seals (see illustration 14.7).
7. Have the system pumped, recharged and leak tested by the same shop that discharged the system.