


However, if the temperature control knob is set to heating, warm air is supplied to the passenger compartment even when the air conditioner is on.
Note: When driving with the air conditioner on, you may see some drips under the engine compartment. This is normal because the vehicle's cooling system removes moist air from the interior.
Note: Since the air conditioning compressor is driven by the vehicle engine, slight changes in power and dynamics are possible when the compressor is on.
A/C button
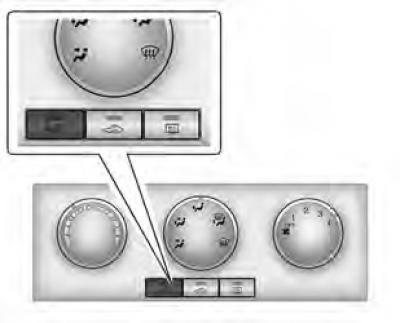
Caution: Using the air conditioner on steep hills or in heavy traffic may cause the engine to overheat. Check the temperature gauge.
If the temperature gauge indicates that the engine is overheating, turn off the air conditioner.
Otherwise, the engine may break down.
To turn on the air conditioner:
1. Start the engine.
2. Press the air conditioner (A/C) on/off button. (The indicator light in the button will light up, indicating that the air conditioner is working.)
3. Adjust the fan speed.
Note: When the air supply control knob is in the OFF position, air conditioning is not performed.
To turn off the air conditioner
Press the air conditioner (A/C) on/off button again. (The indicator light in the button will go out, indicating that the air conditioner is not working)
Cooling
Maximum cooling
Used for maximum cooling of the air in the cabin in hot weather or when the car is exposed to the sun for a long time.
1. Open the windows slightly to allow warm air to escape from the cabin.
2. Turn on the air conditioner. (The indicator light in the button will light up.)
3. Press the recirculation mode button. (The indicator light in the button will light up.)
4. Set the air distribution mode switch to the "Front Zone" position (
 ).
).
5. Move the temperature control knob to the blue zone.
6. Set the air supply control handle to maximum speed.
Normal cooling
1. Press the air conditioner (A/C) button. (The indicator light in the button will light up.)
2. Press the recirculation mode button. (The indicator light in the button will light up.)
3. Turn the air distribution control knob to the FRONT position ("Front zone") (
) or BI-LEVEL (Mixed mode) ( ).
).
4. Move the temperature control knob to the blue zone.
5. Set the air supply control handle to the required speed.
Heating
Maximum heating
The maximum heating mode allows you to quickly increase the air temperature in the cabin. It is not recommended to leave this mode on for a long time, since during this time the air inside the cabin may become stale and the windows may fog up.
To remove condensation from the windows, turn off the air recirculation mode, after which fresh air will begin to flow into the cabin.
To turn on the maximum heating mode:
1. Turn off the air conditioner. (The indicator will go out).
2. Press the recirculation mode button. (The indicator light in the button will light up.)
3. Turn the air distribution control knob to the "Mixed mode" position (
) or FLOOR (Foot area) ( ).
).
4. Move the temperature control knob to the end of the red zone.
5. Set the air supply control handle to maximum speed.
Normal heating mode
1. Turn off the air conditioner. (The indicator will go out.)
2. Turn off the recirculation mode. (The indicator will go out.)
3. Turn the air distribution control knob to the FLOOR position (
) or BI-LEVEL (Mixed mode) ().
4. Move the temperature control knob to the red zone.
Ventilation
Two-level blowing
This mode is recommended for use on cool but sunny days. Warmer air will flow to the footwell area, and cool air from the street will flow to the upper part of the cabin.
To enable this mode:
1. Turn off the recirculation mode. (The indicator will go out.)
2. Turn the air distribution control knob to the "Mixed mode" position (
).
3. Set the temperature control knob to the desired temperature.
4. Set the air supply control handle to the required speed.
5. Set the air supply control handle to the required speed.
Ventilation
To supply air through the central and side ventilation grilles:
1. Turn off the air conditioner. (The indicator will go out.)
2. Turn off the recirculation mode. (The indicator will go out.)
3. Turn the air distribution control knob to the FRONT position ("Front zone") (
) or BI-LEVEL (Mixed mode) ().
4. Move the temperature control knob to the blue zone.
5. Set the air supply control handle to the required speed.
Removal of frost and condensation
To remove frost from your windshield:
1. Turn the air distribution knob to the DEFROST position (Glass blowing) (
 ).
).
2. Move the temperature control knob to the red zone.
3. To quickly remove frost, set the air supply control handle to maximum speed.
Note: The air conditioning and fresh air intake modes are switched on automatically, increasing the efficiency of clearing the windshield from frost in the "Windshield Defrost" mode ().
To prevent the windshield from freezing and to direct warm air to the footwell, turn the mode selector knob to the Footwell/Window Defroster position (
).
Caution: The difference in temperature between the outside environment and the windshield may cause the glass to fog up, thus limiting visibility.
Do not use FLOOR/DEFROST mode (foot area/window defrost) (
) or DEFROST (glass blowing) () in very humid weather and the temperature control knob in the blue zone.
This could result in an accident with possible damage to the vehicle and injury to passengers.