
Recommendation. Keep the spare key and license plate in a safe place, but never in the vehicle itself.
The keys have a built-in electronic chip, from which the immobilizer sensor reads the code and removes the ban on starting the engine. The key is equipped with a remote control for the central lock. The remote control has two buttons that control the door locks. The mechanical key is also located on the remote control. To remove it, press the locking button.
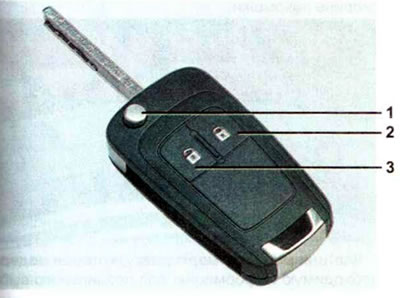
Remote control with folding key: 1 - button to lock the key in the folded position; 2 - door lock button; 3 - door lock unlock button
The door locks are locked and unlocked by briefly pressing the corresponding button on the remote control.
Note: If after disabling the door locks, no door is opened within 30 seconds without the ignition being on, the security alarm will be automatically activated.
If the clarity and range of the remote control decreases, the battery needs to be replaced.
Warning: The key housing contains electronic components, so do not allow water to come into contact with it. Do not leave the key in the sun for a long time.
Replacing the battery in the remote control
Note: The remote control uses a CR2032 battery.
1. Using a thin slotted screwdriver...
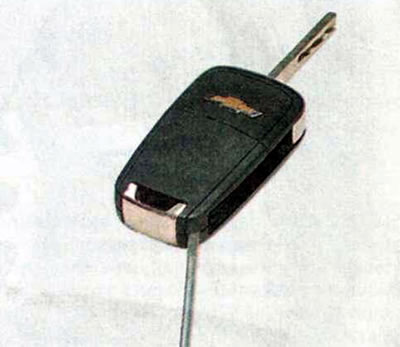
...we separate the cover from the remote control body.
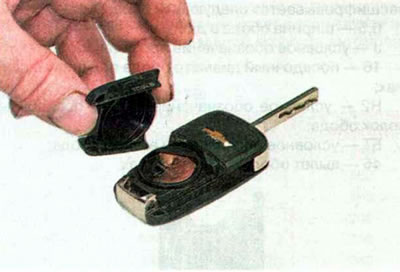
2. Using a thin slotted screwdriver, remove the power element.

3. Install the new battery, observing the polarity ("+" facing outward toward the cover).
4. Put the cover back in place and press it until the latch clicks into place.
[For details, visit the website ChevyMan]