
Contents: Removal ↧ Installation ↧
Removal
1. Loosen the front wheel nuts, apply the parking brake, jack up the front of the vehicle and install supports. Place chocks under the rear wheels to prevent the vehicle from rolling. Remove the wheel.
2. Measure the length of the exposed thread on the tie rod end and record the reading. Loosen the tie rod end lock nut (see illustration)
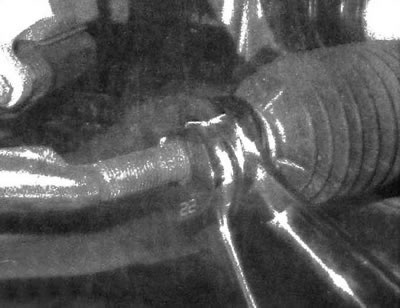
19.2 When loosening the lock nut, it is necessary to hold the hex section with an open-end wrench
Warning: Manufacturers recommend replacing the lock nut every time it is loosened.
3. Loosen up (but don't unscrew it completely) nut located on the tie rod end and ball stud, and loosen the tightening force of the tie rod end in the steering knuckle arm using a puller (see illustrations). After this, unscrew the nut and disconnect the tie rod end from the steering knuckle.
4. Unscrew the tip from the steering rod.
Installation
5. Thread the new locknut onto the new tie rod end so that the exposed thread length remains unchanged (see step 2).
6. Connect the tie rod end to the steering knuckle arm. Install the nut onto the ball stud and tighten it to the specified torque.
7. Tighten the lock nut securely and install the wheel. Lower the vehicle onto a supporting surface and tighten the wheel nuts to the torque value given in specifications of chapter 1.
8. Check and, if necessary, adjust the front wheel alignment angles.
For details, visit the website «CHEVYMAN»