
Contents: Removal ↧ Installation ↧
Warning: The vehicles described in this manual are equipped with a Supplemental Restraint System (SRS), also known as an air bag system. Before carrying out work in the area where the elements of this system are located, it is necessary to disconnect its power supply, since accidental deployment of the airbags can result in serious injury (see chapter 12).
Removal
1. Park the car with its wheels facing straight ahead. Disconnect the negative battery cable. Disable the SRS system (see chapter 12).
2. Remove the steering wheel (see subsection 17), then turn the ignition switch to the LOCK position to lock the steering column shaft.
Caution: Failure to comply with this requirement may result in damage to the spring mechanism.
3. Remove the knee level buffer and the reinforcing element located behind it (see chapter 11).
4. If your vehicle has a tilt steering column, pull the tilt lever out of the steering column.
5. Remove the steering column cover covers (see chapter 11).
6. Disconnect the steering column and body wiring harness plugs (see illustrations).
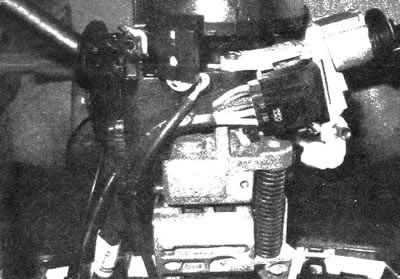
17.6a. Disconnect the steering wheel electrical connectors
17.6b. Disconnect the body wiring harness plug
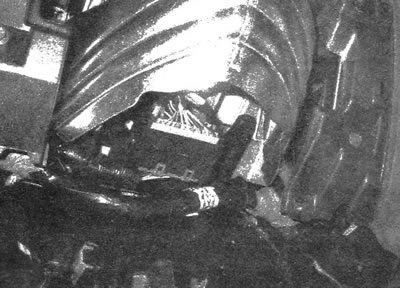
7. Remove the screw that secures the left heater duct (see illustration). Move the duct so that its temperature sensor can be disconnected, then disconnect the sensor and remove the duct.
17.7. Unscrew the fastening screw and remove the left heater air duct
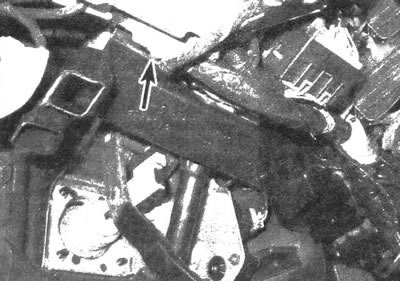
8. Loosen the nut of the shaft tightening screw and remove the bolt that secures the steering column shaft to the upper intermediate shaft (see illustration).
17.8. Bolt and nut for fastening the upper intermediate shaft to the steering column shaft; do not try to unscrew the bolt as it has a lock. Loosen the nut, then pull out the bolt
Note: Unscrew the nut without removing the bolt. Mark the original relative positions of the steering column shaft and intermediate shaft.
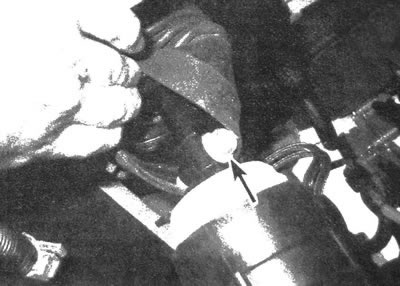
9. Unscrew the steering column mounting nuts (see illustration), lower the column and pull it back, making sure that nothing is connected to it. Separate the intermediate and steering shafts and remove the steering column.

17.9. Unscrew the steering column mounting nuts
Installation
Note: When installing a new steering column, check to see if it has a split pin.
Remove it if necessary.
10. Place the steering column in its original location, connect the intermediate shaft, then install the mounting nuts, but do not tighten them yet.
11. Install the tie rod bolt and nut, then tighten the nut to the specified torque.
12. Tighten the steering column mounting nuts to the required torque.
13. The rest of the assembly is carried out in the reverse order of removal.