


Contents: Main switch for lighting devices ↧ Instrument cluster backlight… ↧ Front fog lights (Additional… ↧ Reading lampshades ↧ Interior lighting lamps ↧ Battery discharge prevention system ↧
Main switch for lighting devices
1. The main outdoor lighting switch allows you to control the following lighting devices:
- a) Headlights
- b) Rear side lights
- c) Parking lights
- d) Registration plate light
- e) Side marker lights
- f) Control panel illumination lamps
2. To turn on your vehicle's headlights, turn the switch to position A (see illustration). At the same time, the side lights and other lighting devices will also turn on.
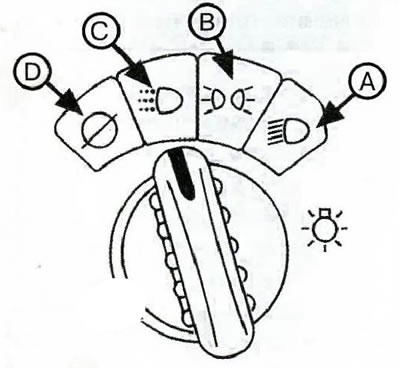
4.2 Main switch for external lighting
3. To switch the headlights from low beam to high beam, push the multifunction lever located on the steering column away from you. To switch the headlights from high beam to low beam again, pull the lever towards you. When the high beam headlights are turned on, the corresponding indicator lights up on the instrument panel.
4. To turn on the parking lights and other lighting devices of your car, turn the switch to position B. The headlights will not turn on. Turn the switch to position C to turn off the headlights and turn on the automatic headlight control system (additional equipment). When this position is selected, the indicator will light.
5. In vehicles that are not equipped with an automatic headlight control system, switch position C is deactivated. Turn the switch all the way to the left to position D to deactivate the automatic exterior lighting system (additional equipment) for the current ignition cycle. When this position is selected, the indicator will light.
6. In vehicles not equipped with an automatic headlight control system, switch position D is deactivated.
7. The headlight circuit is protected by fuses. If an overload occurs, the headlights may start to flicker. Contact a service station immediately to have the headlight electrical circuit checked.
Automatic headlight control system (if available)
8. To ensure that this function works properly, make sure that nothing is covering the light sensor located on the top of the control panel. The light switch must be in the automatic system operation position. Then, if it is dark outside, your car's headlights and parking lights will turn on automatically when you turn on the ignition and move the selector lever out of position P (Park).
Headlights and parking lights can also turn on automatically when you pass through a low-light area.
9. It may take about one minute for the headlights to turn off automatically after passing a low-light area. During this delay period, the instrument panel lighting may not be as bright as usual. Make sure that the instrument panel backlight brightness is adjusted correctly.
10. To leave the engine idling with the automatic headlight control system on, turn the switch counterclockwise until it stops. To reactivate the automatic lighting control system, turn the switch to the off position and release it.
11. If you want to use the normal headlight control system, you need to turn it on.
If the automatic control system turns on the headlights and you turn off the ignition, the headlights may remain on for a set delay period while you move away from the vehicle.
Reminder about outdoor lighting devices not being switched off
12. If you leave the lights on with the ignition key in the LOCK or ACC position (Additional electrical equipment), then when you open the driver's door you will hear a warning signal. To turn off the warning signal, turn off the exterior lights.
Instrument cluster backlight brightness control
13. This knob controls the intensity of the instrument panel lighting. Press the control knob lightly (see illustration), so that she would come out of the nest. To increase brightness, rotate the knob clockwise; to decrease brightness, rotate the knob counterclockwise. To turn on the interior lighting, turn the knob clockwise until it stops.
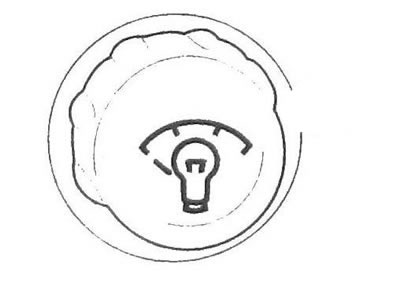
4.13 Instrument cluster backlight brightness control
After completing the adjustment, press the handle to press it into the panel.
The front fog lights turn off automatically when the high beam headlights are turned on. In some countries, the law requires that when fog lights are turned on, the regular headlights must also be turned on.
Front fog lights (Additional equipment)
14. Fog lights are used to improve visibility in fog or haze. The fog lights can only be switched on when the ignition is on. To turn the fog lights on or off, press the switch located next to the main exterior light switch (see illustration). When the fog lights are turned on, the corresponding indicator on the instrument panel also lights up.

4.14 Front fog light switch
Landing/disembarkation lighting system
15. When you press the button to turn off the ceiling lights, the light function for boarding/disembarking will be disabled until you use the remote control to unlock the vehicle's locks.
Landing Lighting System
16. Some interior lights will light up to provide illumination when entering the vehicle if one of the following actions occurs:
a) Some door will be opened.
b) The door locks are opened using the remote control (additional equipment).
Landing lighting system
17. Some interior lights will turn on to illuminate the vehicle when you exit the vehicle and remove the key from the ignition.
Reading lampshades
18. Your vehicle may be equipped with reading lights. To turn the lamps on or off, press their lens.
Interior lighting lamps
19. These lamps light up automatically when any door is opened. If you want the lights not to turn on when the doors are opened, press the automatic mode off button located under the main outdoor lighting switch (see illustration). To return to automatic operation, press this button again.
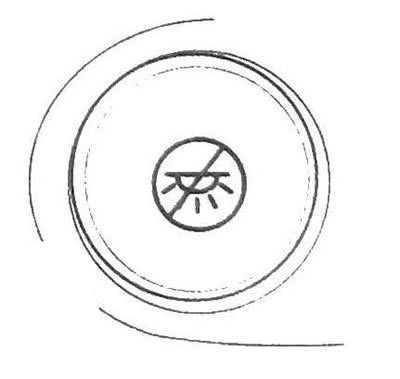
4.19 Automatic interior lighting deactivation button
20. To turn on the lights manually, regardless of whether the doors are open or not, turn the instrument panel lighting brightness control clockwise until it stops.
21. When you press the button to turn off the ceiling lights, the light function for boarding/disembarking will be disabled until you use the remote control to unlock the vehicle's locks.
Battery discharge prevention system
22. See "Protecting the Battery from Discharge" later in this section.