
ChevyMan.ru
Mazda Mitsubishi Toyota Land Rover Honda Kia Nissan
English Русский
Български
Беларускі
Український
Српски
Hrvatski
Română
Polski
Slovenský
Magyar
|
Articles | Sitemap | Contacts |


Home   Aveo   Captiva   Cruze   Lacetti   Lanos   Niva   Tahoe   Others  
Cruze 1 (2008-2016)
  • Home
  • Cruze
  • J300 (2008-2016)
  • Chassis
  • Rear suspension
  • Removal and installation the rear suspension beam

Removal and installation the rear suspension beam (Chevrolet Cruze J300)

            0

You will need: wrenches "15", "18", "21", a wrench for wheel nuts.

It is more convenient to remove the rear suspension beam on a lift. If it is not possible to install the car on a lift, lift the rear of the car by installing a jack under the beam. Then install supports under the jack mounting sockets on the car body.

Helpful Hint: When removing the rear suspension beam, you must have assistants who will hold and lower the rear suspension beam.


Warning: Loosen and tighten wheel nuts only with the vehicle on the ground.


1. Remove the rear wheels.

Note: The following describes the operations for removing parts from the right side of the suspension; parts from the left side of the suspension are removed in a similar manner.

Note: The following describes the operations for removing parts from the right side of the…


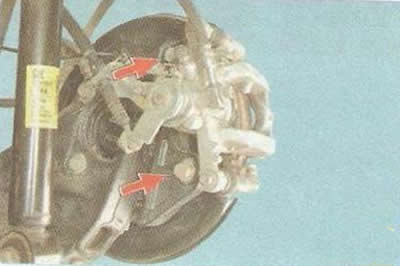
2. Remove the two bolts securing the brake shoe guide to the bracket.
2. Remove the two bolts securing the brake shoe guide to the bracket.


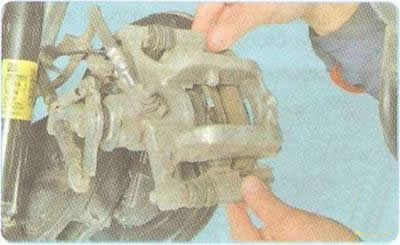
3. Remove the caliper assembly without disconnecting the brake hose.


3. Remove the caliper assembly without disconnecting the brake hose.


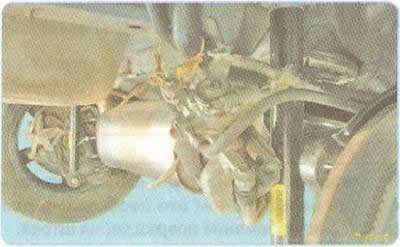
4. ...and secure it with wire, preventing the hose from twisting or being pulled.
4. ...and secure it with wire, preventing the hose from twisting or being pulled.


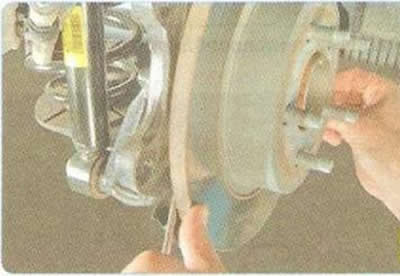
5. Remove the rear wheel brake disc (see "Replacing the brake disc of the rear wheel brake mechanism").
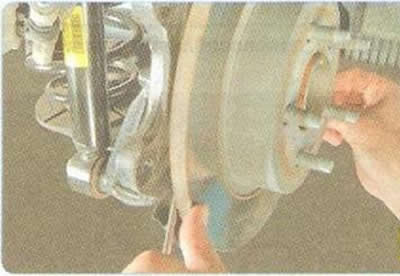
5. Remove the rear wheel brake disc (see «Replacing the brake disc of the rear wheel brake…


6. Remove the rear wheel hub (see "Replacing the rear wheel hub").
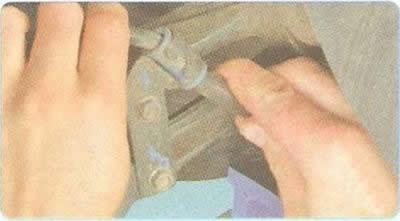
6. Remove the rear wheel hub (see «Replacing the rear wheel hub»).


7. Remove the parking brake cable from the bracket mount on the rear suspension beam.


8. Place supports under the arms and lower the vehicle, slightly loading the springs.
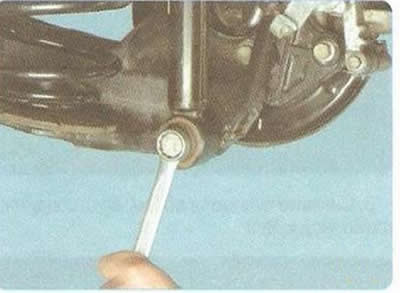
8. Place supports under the arms and lower the vehicle, slightly loading the springs.


9. Unscrew the lower shock absorber mounting bolt, remove the bolt and disconnect the shock absorber from the lever.

Warning: Do not move the shock absorber further than necessary to avoid damaging the piston rod.


10. Raise the vehicle, unload the springs and remove them.

Note: If you have a spring compressor...
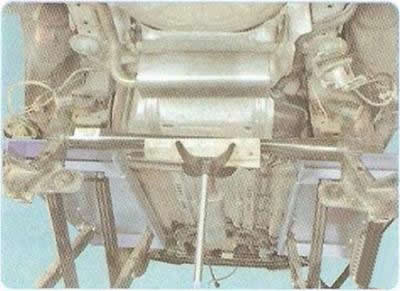

Note: If you have a spring compressor...


...install a support under the rear suspension beam...
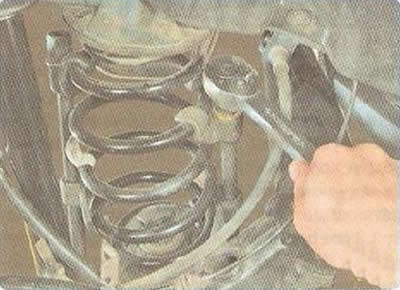

...install a support under the rear suspension beam...


...load the spring by installing a spring compressor and compressing it.


...load the spring by installing a spring compressor and compressing it.


11. Loosen the nut of the bolt securing the rear suspension beam to the body bracket, holding the bolt from turning.

12. Remove the bolts and remove the rear suspension beam (Fig. 7.6).

13. Install the rear suspension beam and all removed parts in the reverse order of removal. Finally tighten the beam mounting bolt nuts with the vehicle on the ground.

14. After installing the beam, bleed the brake system (see "Bleeding the brake system hydraulic line").
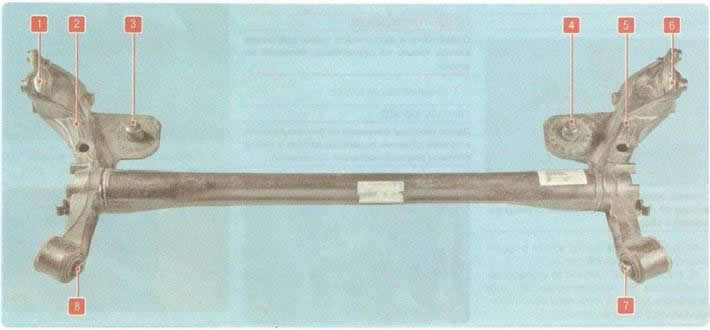
Fig. 7.6. Rear suspension beam: 1, 6 - hub mounting locations; 2, 5 - suspension arms; 3, 4 -…
Fig. 7.6. Rear suspension beam: 1, 6 - hub mounting locations; 2, 5 - suspension arms; 3, 4 - locations for installing lower spring gaskets; 7, 8 - silent blocks of the rear suspension beam

The article was checked: Vladimir Romannikov
This article is available at russian, bulgarian, belarusian, ukrainian, serbian, croatian, romanian, polish, slovak, hungarian

Share information:

Previous articles
Cruze 1: Rear suspension
Next articles

Replacing the rear wheel hub
Replacing the rear suspension spring
Replacing the rear shock absorber
Possible malfunctions of the rear suspension, their causes and methods of elimination
Features of the rear suspension design


See similar articles on the topic of Chevrolet cars:
Removal and installation the rear suspension beam Chevrolet Aveo T300 (2012-2018)
Rear suspension unit of the gearbox with the main gear assembly Chevrolet Captiva 1 (2006-2018)
Rear suspension device Chevrolet Lacetti 1 (2002-2009)
Removal the rear suspension beam Chevrolet Lanos T150 (2002-2009)
Checking the rear axle beam Chevrolet Niva 1 (2002-2016)
Front Suspension Springs (Rear Wheel Drive Models) — Removal and Installation Chevrolet Tahoe 1 (1992-2000)
Removal, checking and installation rear suspension springs Chevrolet Lumina 1 (1989-1994)
Link in different formats to this page


Visitor comments

No comments yet


How much will 17 + 26 =


Cruze 1 (2008-2016) 
  • General information
  • User manual
  • Troubleshooting
  • Maintenance
  • Power unit
  • Engine repair
  • Lubrication system
  • Cooling system
  • Exhaust system
  • Supply system
  • Control system
  • Transmission
  • Clutch
  • Car gearbox
  • Front wheel drives
  • Chassis
  • Front suspension
  • Rear suspension
  • Steering
  • Brake system
  • Body
  • Exterior (external elements)
  • Interior (internal elements)
  • Doors, covers and windows
  • Heating and air conditioning
  • Security systems
  • Electrical equipment
  • Equipment and devices
  • Power devices
  • Lighting and signaling
  • Electrical circuits


ChevyMan.ru © 2017-2026 · Mobile version · Feedback · Site search · Interesting to read · Sitemap: EN BG BY UA RS HR RO PL SK HU

Aveo 2003-2008 · Aveo 2006-2011 · Aveo 2012-2018 · Captiva 2006-2018 · Cruze 2008-2016 · Lacetti 2002-2009 · Lanos 2002-2009 · Niva 2002-2016 · Tahoe 1992-2000 · Tahoe 2000-2014 · Lumina 1 1989-1994 · Trailblazer 1 2001-2008 · Orlando 1 2010-2018 ·
🛡️ For your security and to improve our service, this site uses cookies. You can disable them in your browser.