
ChevyMan.ru
Mazda Mitsubishi Toyota Land Rover Honda Kia Nissan
English Русский
Български
Беларускі
Український
Српски
Hrvatski
Română
Polski
Slovenský
Magyar
|
Articles | Sitemap | Contacts |


Home   Aveo   Captiva   Cruze   Lacetti   Lanos   Niva   Tahoe   Others  
Cruze 1 (2008-2016)
  • Home
  • Cruze
  • J300 (2008-2016)
  • Chassis
  • Rear suspension
  • Replacing the rear wheel hub

Replacing the rear wheel hub (Chevrolet Cruze J300)

            0

The hub is equipped with a long-life double-row radial thrust ball bearing, which does not require adjustment or lubrication during operation. However, vehicle overloads, prolonged high-speed driving, driving on poorly paved roads, flooding of the vehicle, and a number of other factors dramatically reduce the service life of the bearing. To replace the bearing, special pullers or a press with mandrels are required. Hammering the bearing into the hub usually results in damage to the races. Even if there is no visible damage to the bearing after installing it with a hammer, the inevitable distortions during hammering lead to a sharp decrease in service life and noise during operation. Therefore, in garage conditions, if it is necessary to replace the bearing, it is recommended to replace the hub assembly.

You will need: 15 mm wrenches, TORX TZO, wheel nut wrench.

Note: This subsection describes the replacement of the right rear wheel hub; the left rear wheel hub is replaced in a similar manner.


1. Before raising the rear of the vehicle, engage 1st gear (move the automatic transmission selector to position "P").

2. Place wheel chocks ("shoes") under the wheels.

3. Raise and securely support the rear of the vehicle. Remove the wheel from the side of the hub being replaced.
3. Raise and securely support the rear of the vehicle. Remove the wheel from the side of the hub…


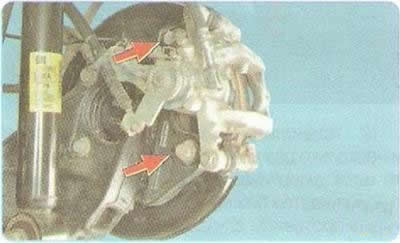
4. Remove the two bolts securing the brake shoe guide to the bracket.


4. Remove the two bolts securing the brake shoe guide to the bracket.


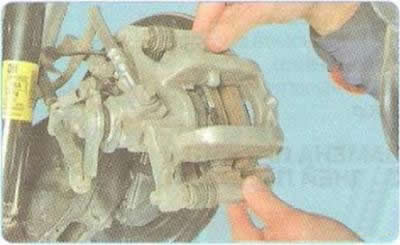
5. Remove the caliper assembly without disconnecting the brake hose:..

5. Remove the caliper assembly without disconnecting the brake hose:..


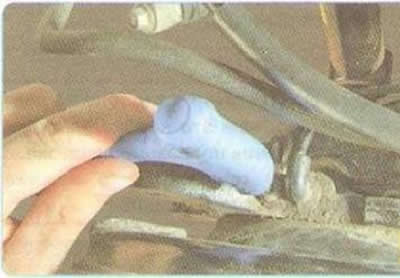
6. ...and secure it with wire, preventing the hose from twisting or being pulled.
6. ...and secure it with wire, preventing the hose from twisting or being pulled.


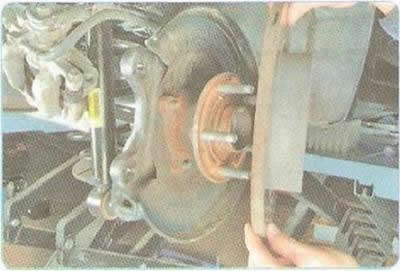
7. Remove the rear wheel brake disc (see "Replacing the brake disc of the rear wheel brake mechanism").
7. Remove the rear wheel brake disc (see «Replacing the brake disc of the rear wheel brake…


8. Remove the rear wheel speed sensor mounting screw...
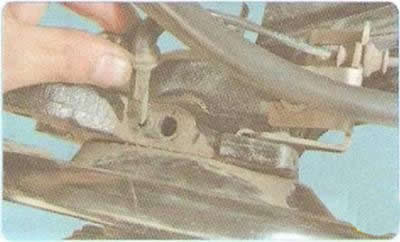


8. Remove the rear wheel speed sensor mounting screw...


9. ...remove the sensor.
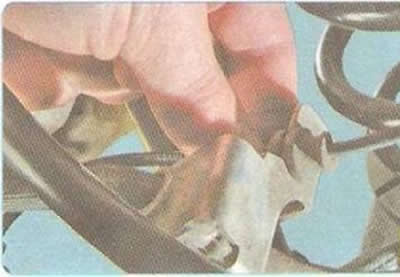
9. ...remove the sensor.


10. Remove the wheel speed sensor wiring harness holder from the bracket.
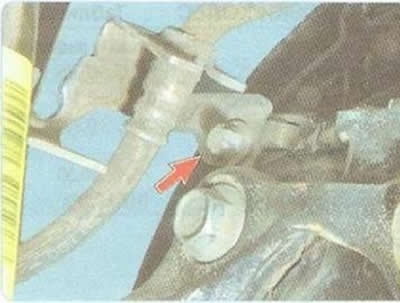
10. Remove the wheel speed sensor wiring harness holder from the bracket.


11. Remove the bolt securing the brake hose bracket and wheel speed sensor wiring harness.
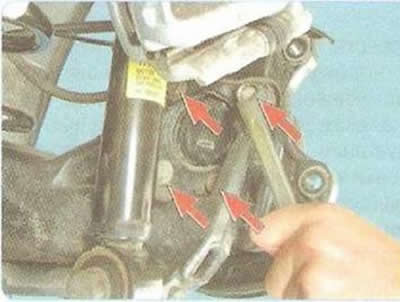
11. Remove the bolt securing the brake hose bracket and wheel speed sensor wiring harness.


12. Remove the four bolts securing the hub to the lever...
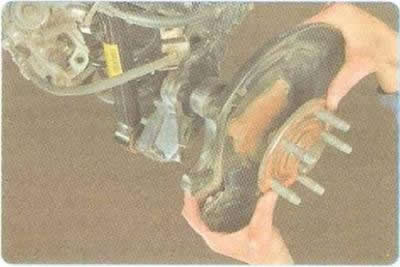


12. Remove the four bolts securing the hub to the lever...


13. ...and remove the hub together with the brake shield.

The rear wheel hub is non-separable. If its bearing fails, the hub is replaced as an assembly.


14. Install all removed parts in the reverse order of removal.

15. Press the brake pedal all the way down several times. This is necessary to eliminate the gaps in the brake mechanisms that appeared after their removal.

16. Install the wheel speed sensor in the reverse order of removal. If the anti-lock brake system malfunction indicator lamp does not go out after installing the wheel speed sensor, contact a service station for ABS diagnostics.

Warning: When installing the sensor, precisely align the hole in its housing with the threaded hole in the caliper mounting bracket. Do not rotate the sensor around its longitudinal axis during installation.


The increase in resistance to the sensor movement should be felt only in the last 2 mm before it is fully seated in the bracket. If the sensor enters the bracket hole with great resistance from the very beginning of installation, remove the sensor and eliminate the cause of jamming (dirt, burrs on the body, etc.).


It is strictly forbidden to press in the wheel speed sensor with a hammer.


17. If necessary, replace the second hub in the same manner.

The article was checked: Vladimir Romannikov
This article is available at russian, bulgarian, belarusian, ukrainian, serbian, croatian, romanian, polish, slovak, hungarian

Share information:

Previous articles
Cruze 1: Rear suspension
Next articles

Replacing the rear suspension spring
Replacing the rear shock absorber
Possible malfunctions of the rear suspension, their causes and methods of elimination
Features of the rear suspension design
Removal and installation the rear suspension beam


See similar articles on the topic of Chevrolet cars:
Replacing the rear wheel hub Chevrolet Aveo T300 (2012-2018)
Rear wheel opening molding Chevrolet Captiva 1 (2006-2018)
Replacing the rear wheel brake hose Chevrolet Lacetti 1 (2002-2009)
Replacing rear wheel bearings Chevrolet Lanos T150 (2002-2009)
Replacing grease in front wheel hub bearings Chevrolet Niva 1 (2002-2016)
Rear Brake Wheel Cylinder — Removal, Disassembly and Installation Chevrolet Tahoe 1 (1992-2000)
Checking and replacing rear brake pads Chevrolet Lumina 1 (1989-1994)
Link in different formats to this page


Visitor comments

No comments yet


How much will 25 + 26 =


Cruze 1 (2008-2016) 
  • General information
  • User manual
  • Troubleshooting
  • Maintenance
  • Power unit
  • Engine repair
  • Lubrication system
  • Cooling system
  • Exhaust system
  • Supply system
  • Control system
  • Transmission
  • Clutch
  • Car gearbox
  • Front wheel drives
  • Chassis
  • Front suspension
  • Rear suspension
  • Steering
  • Brake system
  • Body
  • Exterior (external elements)
  • Interior (internal elements)
  • Doors, covers and windows
  • Heating and air conditioning
  • Security systems
  • Electrical equipment
  • Equipment and devices
  • Power devices
  • Lighting and signaling
  • Electrical circuits


ChevyMan.ru © 2017-2026 · Mobile version · Feedback · Site search · Interesting to read · Sitemap: EN BG BY UA RS HR RO PL SK HU

Aveo 2003-2008 · Aveo 2006-2011 · Aveo 2012-2018 · Captiva 2006-2018 · Cruze 2008-2016 · Lacetti 2002-2009 · Lanos 2002-2009 · Niva 2002-2016 · Tahoe 1992-2000 · Tahoe 2000-2014 · Lumina 1 1989-1994 · Trailblazer 1 2001-2008 · Orlando 1 2010-2018 ·
🛡️ For your security and to improve our service, this site uses cookies. You can disable them in your browser.