


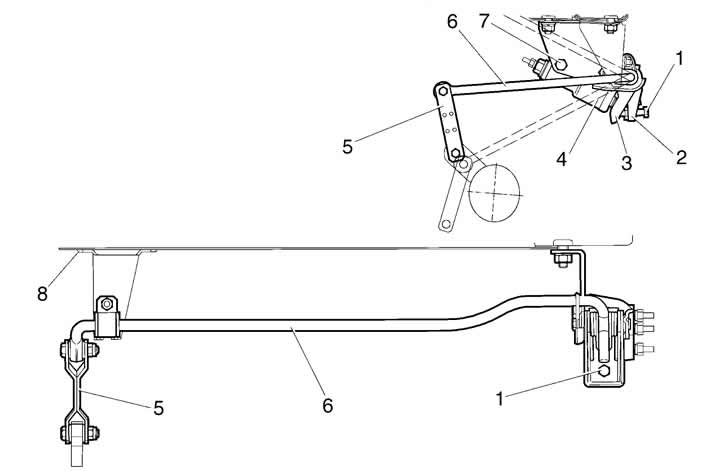
Figure 6-5. Rear brake pressure regulator installation diagram and adjustment:
1- adjusting bolt;
2 - pressure regulator drive lever;
3 - pressure regulator drive piston lever;
4 - pressure regulator;
5 - traction;
6 - pressure regulator lever;
7 - regulator mounting bolt;
8 - support sleeve bracket.
Fix lever 2 in the specified position, tighten adjusting bolt 6 until it touches lever 3 in such a way as to ensure contact between lever A, lever 4 and spring 5. Holding adjusting bolt 6 in this position, tighten the nut with a torque of (6.7+0.4) Nm. Check the size. If the size is outside the tolerance, repeat the adjustment.
Remove the pressure regulator drive adjustment tool and connect the end of the lever to rod 5 (figure 6-5).
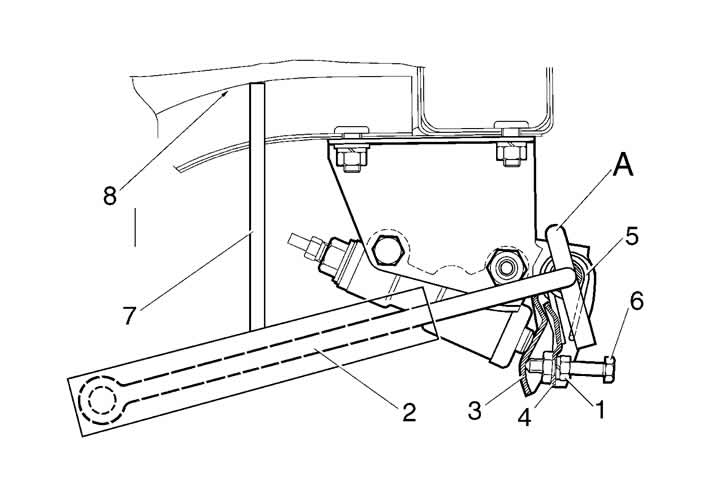
Figure 6-6. Installing the rear brake pressure regulator drive adjustment tool:
1 - lock nut;
2 - pressure regulator drive lever;
3 - pressure regulator drive piston lever;
4 - pressure regulator drive lever;
5 - spring;
6 - adjusting bolt;
7 - fixture rod;
8 - body bottom;
h = 200+5 mm - distance between the bottom and the lever.