2. With the engine not running, check by touch (or visually, by shining a flashlight) belt condition (see photo), the presence of cracks, delamination, burning or hardening on it.
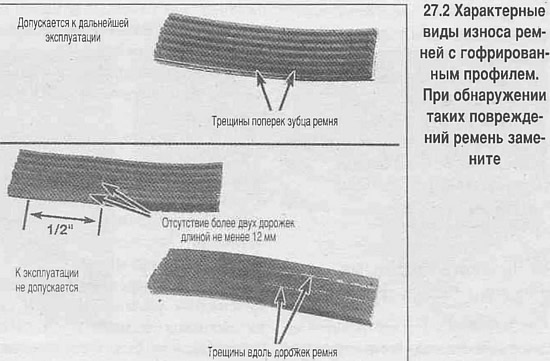
3. Check the condition of the ribs on the inside of the belt. All ribs should be of equal depth, with none of the ribs having an uneven surface.
4. The belt tension is automatic, set by the tensioning mechanism, so tension adjustment is not required.
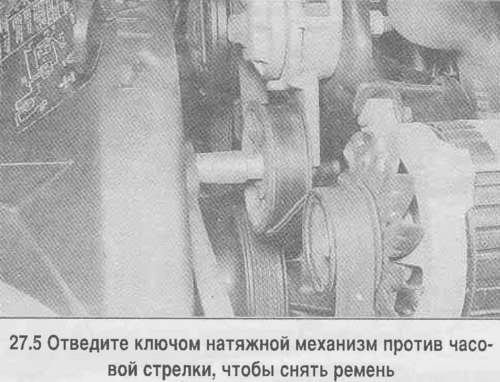
5. To replace the belt, use the key to turn the tensioner counterclockwise (see photo) and remove the belt. Then slowly release the tensioner.
6. When purchasing a new belt, compare it with the removed belt. The new belt must completely match the removed one in width and length.
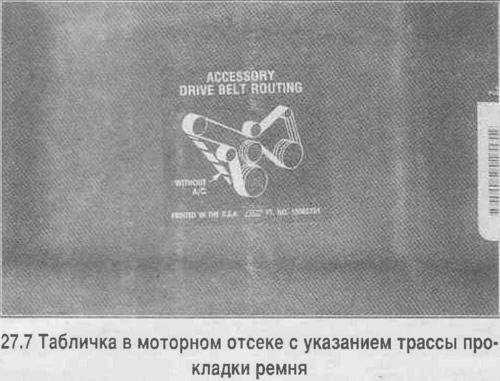
7. When installing a new belt, make sure that it is routed correctly along the entire route. The belt ribs should fit into the grooves on the pulleys. The belt route is indicated on the plate in the engine compartment (see photo).