
ChevyMan.ru
Mazda Mitsubishi Toyota Land Rover Honda Kia Nissan
English Русский
Български
Беларускі
Український
Српски
Hrvatski
Română
Polski
Slovenský
Magyar
|
Articles | Sitemap | Contacts |


Home   Aveo   Captiva   Cruze   Lacetti   Lanos   Niva   Tahoe   Others  
Aveo T300 (2012-2018) Aveo T250 (2006-2011) Aveo T200 (2003-2008)
  • Home
  • Aveo
  • T300 (2012-2018)
  • Power unit
  • Engine
  • Replacement of auxiliary drive belts

Replacement of auxiliary drive belts (Chevrolet Aveo T300)

            0

You will need: keys "13", "18", "19", TORX T20, a screwdriver with a flat blade.

To drive the auxiliary units, two belts are installed on the engine. The front belt drives the power steering pump. The rear belt rotates the pulleys of the air conditioning compressor, generator and water pump.

According to the manufacturer's recommendations, the power steering pump drive belt should be cut with a knife to remove it, after which it becomes unusable. This is explained by the fact that the belt, even after removal without damage, cannot be reused, since it is designed only for one-time stretching when put on the pulleys (belt tension adjustment is not provided). In addition, belt replacement is regulated after a certain mileage or service life, so when replacing the rear drive belt (air conditioning compressor, generator and water pump) the front drive belt should also be replaced at the same time (power steering pump).

However, the power steering pump drive belt can be removed without cutting it. The sequence of actions for this is described below.

To remove the front belt without cutting it, perform the following steps.

1. Place the vehicle on a lift or inspection pit.

2. Remove the right front wheel.
2. Remove the right front wheel.


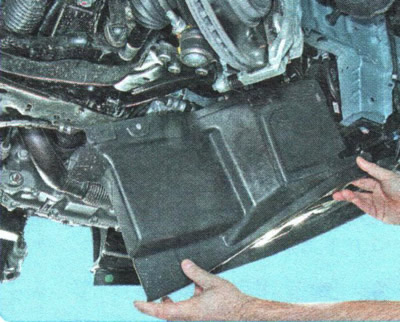
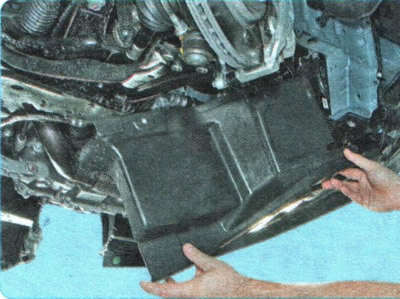
3. Remove the mudguard liner and the right engine splash guard (see "Removal and installation mudguards and engine crankcase protection").


3. Remove the mudguard liner and the right engine splash guard (see «Removal and installation…


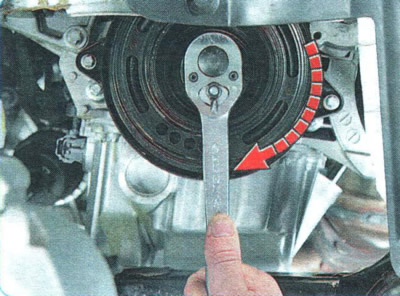
4. Turn the crankshaft by the crankshaft pulley mounting bolt so that any of the holes in the power steering pump pulley is opposite the head of the lower pump mounting bolt.

5. Loosen the lower pump mounting bolt by one or two turns through the hole in the pump pulley.
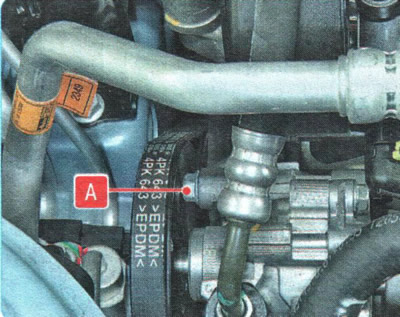
5. Loosen the lower pump mounting bolt by one or two turns through the hole in the pump pulley.


6. Turn the crankshaft pulley again so that any of the holes in the power steering pump pulley are opposite the head A of the upper pump mounting bolt.
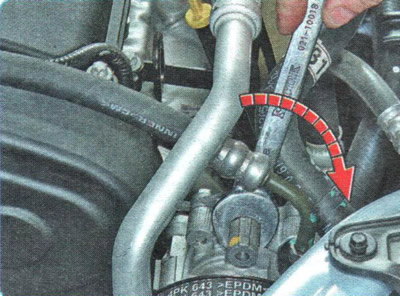
6. Turn the crankshaft pulley again so that any of the holes in the power steering pump pulley are…


7. Place an 18 mm open-end wrench on the edge of the pump body.
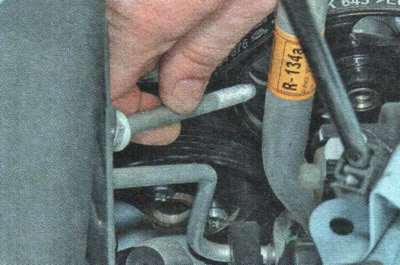


7. Place an 18 mm open-end wrench on the edge of the pump body.


8. Using an open-end wrench to hold the pump body from moving towards the block, unscrew the upper pump mounting bolt and remove it from the holes.

9. Release the holding key and the pump will move towards the engine block, releasing the belt tension.
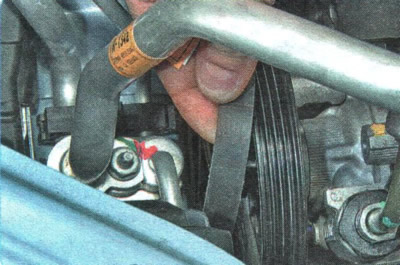
9. Release the holding key and the pump will move towards the engine block, releasing the belt…


10. First remove the belt from the power steering pump pulley...
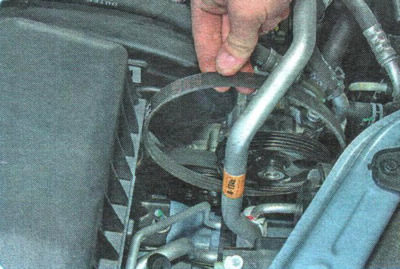
10. First remove the belt from the power steering pump pulley...


11. ...and then from the water pump pulley. Remove the belt.


NOTE: The power steering pump is driven by belt 4PK 643.


12. Install the power steering pump drive belt in the reverse order of removal.

13. Rotate the crankshaft three full revolutions to ensure that the belt is correctly positioned on the pulleys.

For removal rear belt perform the following tasks.

1. Place the vehicle on a lift or inspection pit.

2. Remove the right front wheel.
2. Remove the right front wheel.


3. Remove the mudguard liner and the right engine splash guard (see "Removal and installation mudguards and engine crankcase protection").

4. Remove the power steering pump drive belt (see above in this subsection).
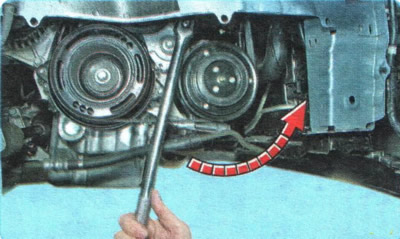
4. Remove the power steering pump drive belt (see above in this subsection).


5. Turn the tensioner lever counterclockwise with the key until the belt tension is released.
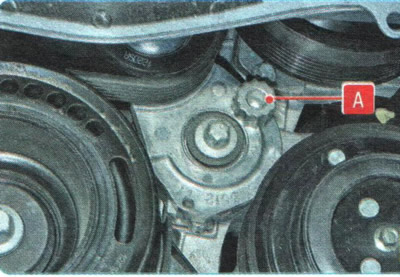
5. Turn the tensioner lever counterclockwise with the key until the belt tension is released.


NOTE: Rotate the tensioner lever by placing a 12-point socket wrench on the special protrusion on the bottom of the lever.
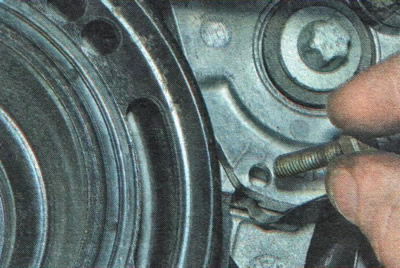


NOTE: Rotate the tensioner lever by placing a 12-point socket wrench on the special protrusion on…


6. Fix the tensioner in the pressed position by inserting a pin of the appropriate diameter into the aligned holes of the roller lever and the tensioner housing.
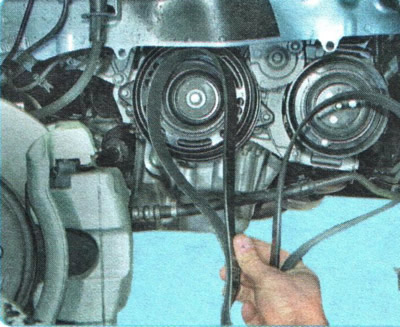
6. Fix the tensioner in the pressed position by inserting a pin of the appropriate diameter into…


7. Remove the belt.

NOTE: The 6PK 1557 belt is used to drive the air conditioning compressor, alternator and water pump.
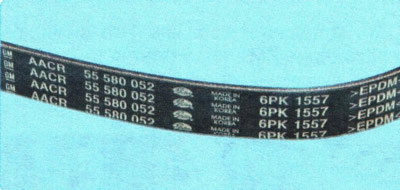

NOTE: The 6PK 1557 belt is used to drive the air conditioning compressor, alternator and water pump.


8. Install the air conditioning, alternator and water pump drive belt in the reverse order of removal, as shown in the figure.
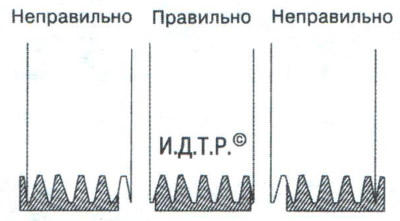


8. Install the air conditioning, alternator and water pump drive belt in the reverse order of…


9. Rotate the crankshaft three full revolutions to ensure that the belt is correctly positioned on the pulleys.

The article was checked: Vladimir Romannikov
This article is available at russian, bulgarian, belarusian, ukrainian, serbian, croatian, romanian, polish, slovak, hungarian

Share information:

Previous articles
Aveo T300: Engine
Next articles

Setting the piston of the first cylinder to the TDC position
Replacing the rear support of the powertrain suspension
Replacing the right powertrain suspension support
Replacing the left support of the powertrain suspension
Removal and installation mudguards and engine crankcase protection
Replacing the timing belt
Removal and installation the flywheel or torque converter drive disk
Replacing the cylinder head cover gasket
Replacing the cylinder head gasket
Replacing valve stem seals


See similar articles on the topic of Chevrolet cars:
Auxiliary drive belt Chevrolet Captiva 1 (2006-2018)
Replacement of auxiliary drive belt Chevrolet Cruze 1 (2008-2016)
Replacement of auxiliary drive belt Chevrolet Lacetti 1 (2002-2009)
Replacing the alternator drive belt Chevrolet Lanos T150 (2002-2009)
Adjusting the tension of the auxiliary drive belt Chevrolet Niva 1 (2002-2016)
Checking, adjusting and replacing drive belts of attachments Chevrolet Tahoe 1 (1992-2000)
Auxiliary drive belt Chevrolet Orlando 1 (2010-2018)
Link in different formats to this page


Visitor comments

No comments yet


How much will 44 + 47 =


Aveo T300 (2012-2018) 
  • General information
  • Vehicle device
  • User manual
  • Main malfunctions
  • Maintenance
  • Power unit
  • Engine
  • Lubrication system
  • Cooling system
  • Supply system
  • Exhaust system
  • Transmission
  • Clutch
  • Manual gearbox
  • Automatic gearbox
  • Front wheel drives
  • Chassis
  • Front suspension
  • Rear suspension
  • Steering
  • Brake system
  • Body
  • Exterior
  • Interior
  • Doors and trunk
  • Security systems
  • Electrical equipment
  • Engine electrics
  • Equipment and devices
  • Heating and air conditioning
  • Electrical circuits


Aveo T250 (2006-2011) 
  • Manual
  • Driver's workplace
  • Salon equipment
  • Vehicle characteristics
  • Maintenance
  • Engine 1.5 SOHC
  • Engine repair
  • Fuel supply system
  • Control system
  • Cooling system
  • Engine 1.6 DOHC
  • Engine repair
  • Control system
  • Transmission
  • Clutch
  • Manual gearbox
  • Automatic gearbox
  • Wheel drive
  • Chassis
  • Wheel suspension
  • Steering
  • Brake system
  • Body
  • Exterior
  • Interior


Aveo T200 (2003-2008) 
  • General information
  • User manual
  • Power unit
  • Engine repair 1.5L SOHC
  • Fuel system
  • Control system
  • Cooling system
  • Transmission
  • Clutch
  • Manual gearbox
  • Automatic gearbox
  • Drive shafts
  • Chassis
  • Front suspension
  • Rear suspension
  • Steering
  • Brake system
  • Body
  • Exterior (external elements)
  • Interior (internal elements)
  • Electrical equipment
  • Equipment and devices
  • Electrical circuits


ChevyMan.ru © 2017-2026 · Mobile version · Feedback · Site search · Interesting to read · Sitemap: EN BG BY UA RS HR RO PL SK HU

Aveo 2003-2008 · Aveo 2006-2011 · Aveo 2012-2018 · Captiva 2006-2018 · Cruze 2008-2016 · Lacetti 2002-2009 · Lanos 2002-2009 · Niva 2002-2016 · Tahoe 1992-2000 · Tahoe 2000-2014 · Lumina 1 1989-1994 · Trailblazer 1 2001-2008 · Orlando 1 2010-2018 ·
🛡️ For your security and to improve our service, this site uses cookies. You can disable them in your browser.