
Note: Air conditioning may not be installed on vehicles in the basic configuration.
During vehicle operation, there is no need to adjust the belt tension, since it is maintained at an optimal level using a tensioner - an automatic tensioning device with a roller.
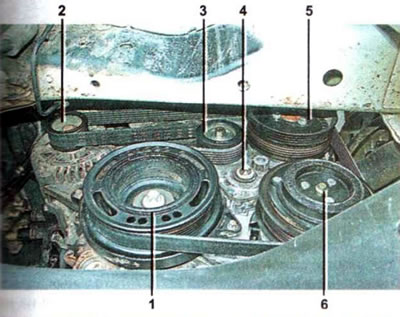
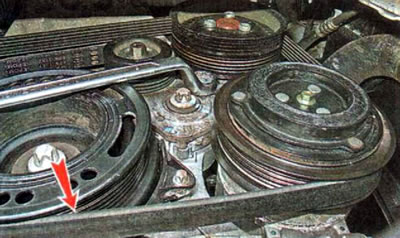
Engine auxiliary drive diagram (car with air conditioning): 1 - crankshaft pulley; 2 - generator pulley; 3 - tension roller; 4 — belt tensioner; 5 — pulley of the cooling system pump; 6 — air conditioning compressor pulley
All work related to checking and servicing the accessory drive belt must be carried out in accordance with the maintenance plan. In addition, the belt should be checked if signs of insufficient tension appear: a loud squeal when pressing the gas pedal sharply or when turning on powerful energy consumers and the air conditioner. To restore the normal functionality of a belt that has been contaminated with oil, you can try treating it with a special cleaner for drive belts. A heavily oiled belt should be replaced. A faulty tensioner also needs to be replaced.
The condition of the tension roller bearing can be assessed by the noise on the running engine using a technical stethoscope. This operation is indicated when checking the technical condition of the engine. A worn bearing will produce increased noise. After removing the accessory drive belt, you can check the condition of the roller by rotating it by hand. If the roller has play, makes a lot of noise or sticks when rotating, it must be replaced (gM part number 55 563 512).
Checking the condition of the auxiliary drive belt
We carry out the work in the following order.
1. We prepare the car for maintenance and repair.
2. On a car with an automatic transmission, switch the automatic transmission mode selector to position N, and on a car with a manual transmission, move the gear shift lever to neutral.
3. Using a jack, lift the right side of the car and remove the right front wheel. Remove the front part of the right front fender liner (the operation is shown when removing the front bumper cover).
4. Visually check the condition of the auxiliary drive belt from the inside on the section of the belt that is accessible for inspection.
5. To inspect the belt along its entire length, use a TORX E18 socket wrench to turn the engine crankshaft by the bolt securing its pulley.
Comment.
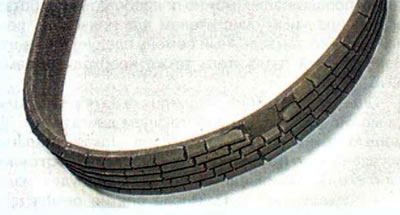
- The belt must not have any cracks, cuts, delamination or protruding cords.
- Also, it is not allowed to oil the belt, as this will reduce its service life. A faulty belt must be replaced (see below). The cause of oil getting on the belt must also be eliminated.
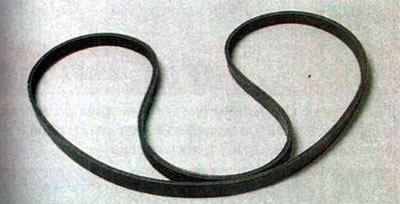
Replacement of auxiliary drive belt
The need to perform the work can be determined during the inspection of the technical condition of the auxiliary drive belt (see above). According to the maintenance plan, the belt must be replaced every 90,000 km or every 10 years, whichever comes first.
Recommendation. If the belt is in good condition and its removal is not related to replacement, then you should first put a mark indicating the direction of rotation of the belt so that when reassembling it, you can install it in the same position.
To complete the work you will need a metal rod with a diameter of about 5 mm.
We carry out the work in the following order.
1. We prepare the car for maintenance and repair.
2. Remove the front part of the right front fender liner (operation show when removing the front bumper cover).
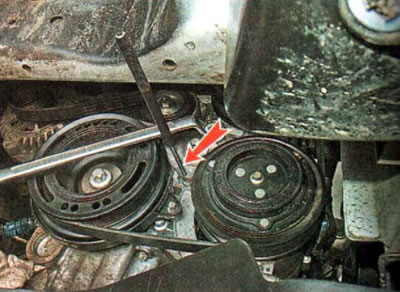
3. Using a 19 mm open-end 12-sided wrench, turn the tensioner lever to loosen the belt tension.
4. Holding the tensioner, we fix it in position by inserting the end of the steel rod into a special hole.
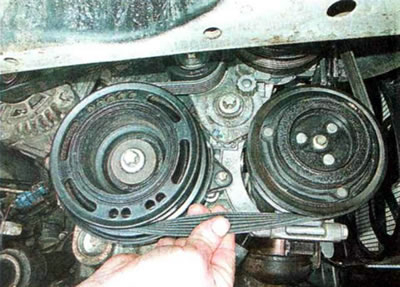
5. After removing the key, remove the accessory drive belt from the crankshaft pulley and take the belt out of the engine compartment.

Recommendation.
- Rotate the tension roller to check its condition and if the roller has play, makes a lot of noise or sticks when rotating, replace the accessory drive belt tensioner.
- Tensioner mounting bolt head for TORX E14 key.
- Bolt tightening torque 50 Nm.
6. Install the belt in the reverse order, using the previously applied mark as a guide and observing the auxiliary drive diagram. Before removing the locking rod from the tensioner, check the correct fit of the belt on the pulleys and adjust if necessary.
7. Install other parts in reverse order.
[The article was reprinted from the website ChevyMan]