
ChevyMan.ru
Mazda Mitsubishi Toyota Land Rover Honda Kia Nissan
English Русский
Български
Беларускі
Український
Српски
Hrvatski
Română
Polski
Slovenský
Magyar
|
Articles | Sitemap | Contacts |


Home   Aveo   Captiva   Cruze   Lacetti   Lanos   Niva   Tahoe   Others  
Aveo T300 (2012-2018) Aveo T250 (2006-2011) Aveo T200 (2003-2008)
  • Home
  • Aveo
  • T300 (2012-2018)
  • Power unit
  • Engine
  • Removal and installation mudguards and engine crankcase protection

Removal and installation mudguards and engine crankcase protection (Chevrolet Aveo T300)

            0

You will need: 13 mm keys, TORX T20, flat-blade screwdriver.

The engine mudguards, located in the engine compartment at the bottom, protect the underhood space from contamination and are not a power protection for the engine crankcase. To protect the engine crankcase, as well as all units and assemblies located in the engine compartment, from damage by stones flying out from under the wheels, a stamped steel shield is installed on the car. However, it should be taken into account that this shield is not able to protect the engine crankcase from strong impacts on large road obstacles (large stones, stumps, curbs, etc.), because it can bend down to the crankcase and the crankcase will be damaged.

Remove mudguards and engine crankcase protection if they are damaged or to provide access to components and assemblies from underneath the vehicle during repairs and maintenance.

1. Place the vehicle on a lift or inspection pit.
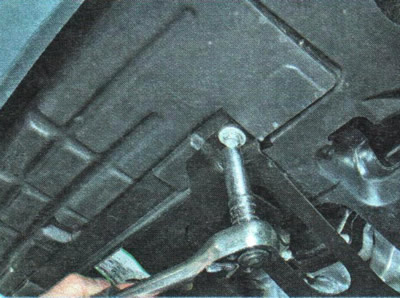
1. Place the vehicle on a lift or inspection pit.


2. To remove the engine crankcase protection, unscrew the two front...
2. To remove the engine crankcase protection, unscrew the two front...


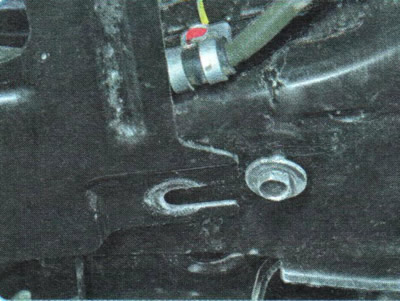
3. ...and loosen the two rear bolts securing the guard to the front suspension subframe.


3. ...and loosen the two rear bolts securing the guard to the front suspension subframe.


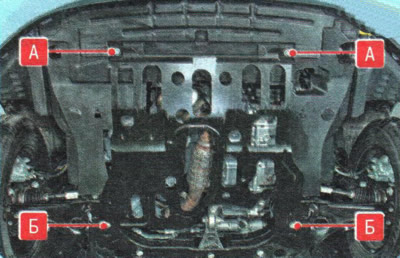
NOTE: This is how the front A and rear B engine guard mounting bolts are located.

NOTE: This is how the front A and rear B engine guard mounting bolts are located.


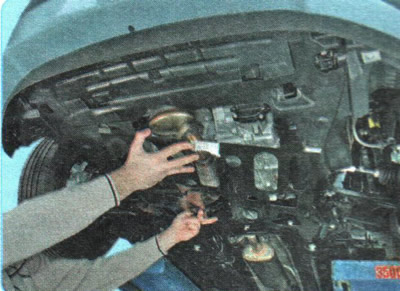
4. Slide off the rear bolts and remove the guard.
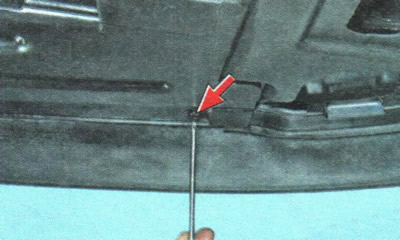
4. Slide off the rear bolts and remove the guard.


5. To remove the front mudguard, unscrew the two side screws 2 and 4 (figure 5.2) screws...
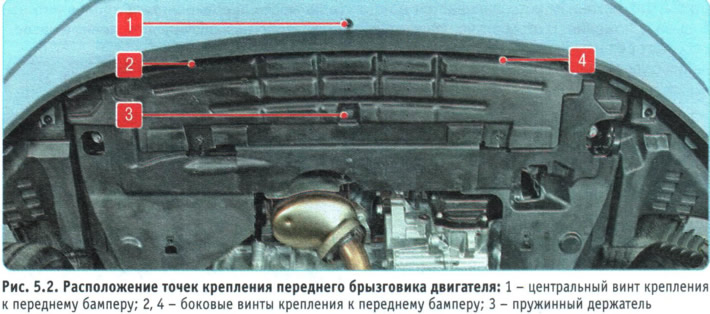
5. To remove the front mudguard, unscrew the two side screws 2 and 4 (figure 5.2) screws...
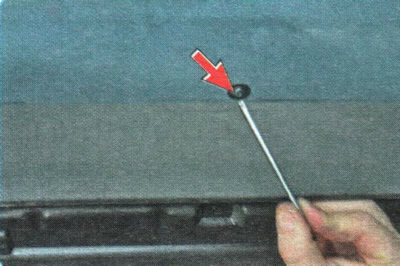

5. To remove the front mudguard, unscrew the two side screws 2 and 4 (figure 5.2) screws...


6. ...and the central 1 screw securing the front mudguard to the bumper.
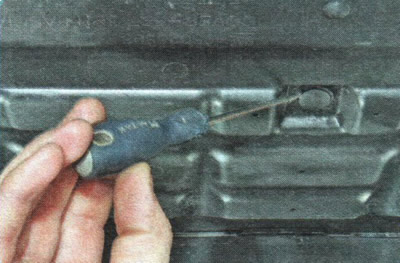


6. ...and the central 1 screw securing the front mudguard to the bumper.


7. Use a screwdriver to pry...
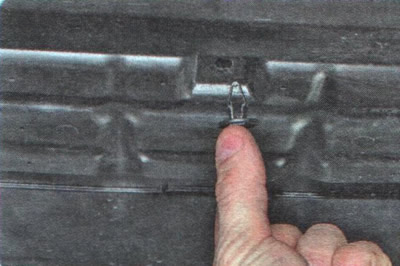
7. Use a screwdriver to pry...


8. ...and remove the spring holder 3 from the hole.
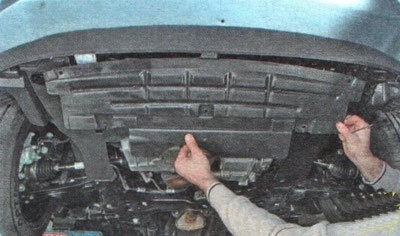
8. ...and remove the spring holder 3 from the hole.


9. Remove the front engine splash shield.
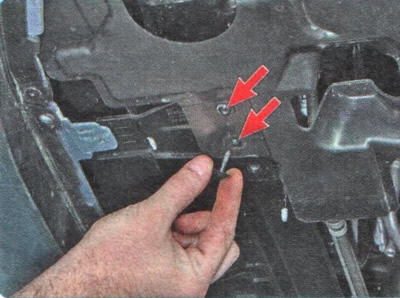
9. Remove the front engine splash shield.


10. To remove the left engine mudguard, unscrew the two lower mounting screws.
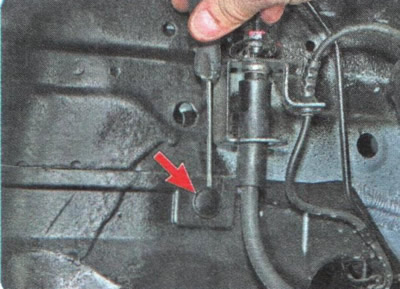


10. To remove the left engine mudguard, unscrew the two lower mounting screws.


11. In the wheel arch, use a screwdriver to pry up and pull out the rear upper bracket expansion pin.
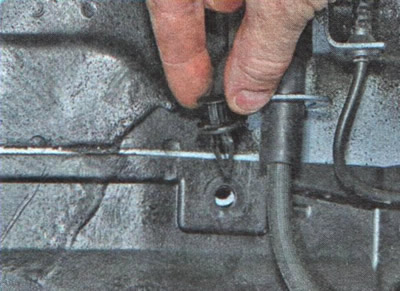
11. In the wheel arch, use a screwdriver to pry up and pull out the rear upper bracket expansion…


12. Remove the holder from the hole.

12. Remove the holder from the hole.
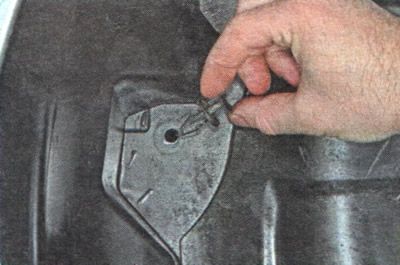

13. Remove the front upper holder in the same way.
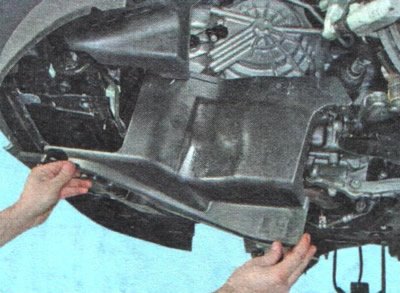
13. Remove the front upper holder in the same way.


14. Remove the left engine splash guard.
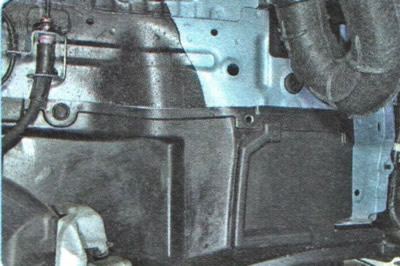


14. Remove the left engine splash guard.


15. To remove the right engine mudguard, remove the right front wheel mudguard liner (see "Removing and installing wheel mudguards and mudguards", p. 261.
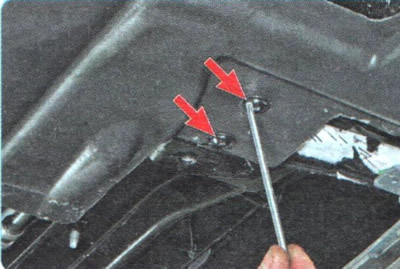
15. To remove the right engine mudguard, remove the right front wheel mudguard liner (see «Removing…


16. Remove the two lower mounting screws.
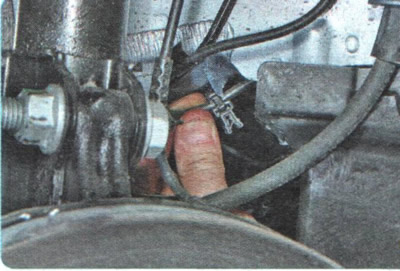
16. Remove the two lower mounting screws.


17. Remove the wheel speed sensor wiring harness holder from the mudguard edge.
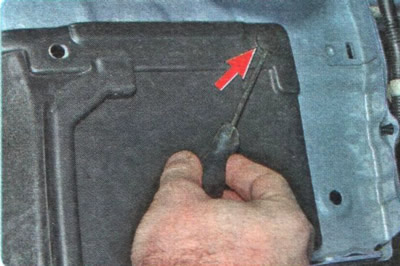
17. Remove the wheel speed sensor wiring harness holder from the mudguard edge.


18. In the wheel arch, use a screwdriver to pry up and pull out the expansion pin of the front upper bracket.
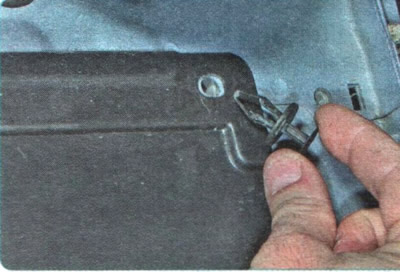


18. In the wheel arch, use a screwdriver to pry up and pull out the expansion pin of the front…


19. Remove the holder from the hole.

19. Remove the holder from the hole.
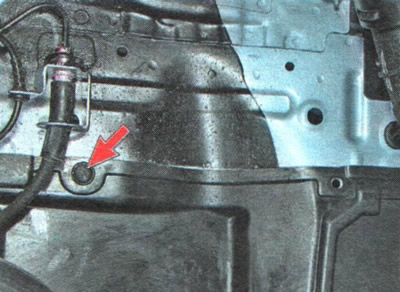

20. Remove the rear upper holder in the same way.
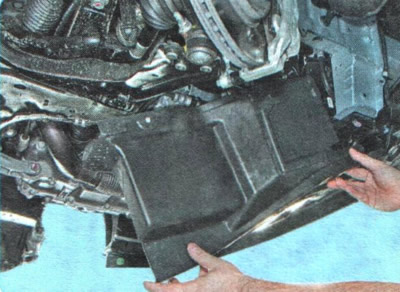
20. Remove the rear upper holder in the same way.


21. Remove the right engine splash guard.

22. Install the mudguards and engine crankcase protection in the reverse order of removal.

For details, visit the website: «ChevyMan.ru»

The article was checked: Vladimir Romannikov
This article is available at russian, bulgarian, belarusian, ukrainian, serbian, croatian, romanian, polish, slovak, hungarian

Share information:

Previous articles
Aveo T300: Engine
Next articles

Possible engine malfunctions, their causes and solutions
Checking the compression in the cylinders
Engine design features
Replacing the left support of the powertrain suspension
Replacing the right powertrain suspension support
Replacing the rear support of the powertrain suspension
Setting the piston of the first cylinder to the TDC position
Replacement of auxiliary drive belts


See similar articles on the topic of Chevrolet cars:
Engine mudguards Chevrolet Captiva 1 (2006-2018)
Removal and installation engine mudguards Chevrolet Cruze 1 (2008-2016)
Removal the engine compartment mudguards Chevrolet Lacetti 1 (2002-2009)
Starting the engine from another car's battery (jump-starting) Chevrolet Lanos T150 (2002-2009)
Engine crankcase ventilation system Chevrolet Niva 1 (2002-2016)
Starting a gasoline engine Chevrolet Tahoe 1 (1992-2000)
Protection of engine crankcase and pipelines with steel sheets Chevrolet Orlando 1 (2010-2018)
Link in different formats to this page


Visitor comments

No comments yet


How much will 26 + 37 =


Aveo T300 (2012-2018) 
  • General information
  • Vehicle device
  • User manual
  • Main malfunctions
  • Maintenance
  • Power unit
  • Engine
  • Lubrication system
  • Cooling system
  • Supply system
  • Exhaust system
  • Transmission
  • Clutch
  • Manual gearbox
  • Automatic gearbox
  • Front wheel drives
  • Chassis
  • Front suspension
  • Rear suspension
  • Steering
  • Brake system
  • Body
  • Exterior
  • Interior
  • Doors and trunk
  • Security systems
  • Electrical equipment
  • Engine electrics
  • Equipment and devices
  • Heating and air conditioning
  • Electrical circuits


Aveo T250 (2006-2011) 
  • Manual
  • Driver's workplace
  • Salon equipment
  • Vehicle characteristics
  • Maintenance
  • Engine 1.5 SOHC
  • Engine repair
  • Fuel supply system
  • Control system
  • Cooling system
  • Engine 1.6 DOHC
  • Engine repair
  • Control system
  • Transmission
  • Clutch
  • Manual gearbox
  • Automatic gearbox
  • Wheel drive
  • Chassis
  • Wheel suspension
  • Steering
  • Brake system
  • Body
  • Exterior
  • Interior


Aveo T200 (2003-2008) 
  • General information
  • User manual
  • Power unit
  • Engine repair 1.5L SOHC
  • Fuel system
  • Control system
  • Cooling system
  • Transmission
  • Clutch
  • Manual gearbox
  • Automatic gearbox
  • Drive shafts
  • Chassis
  • Front suspension
  • Rear suspension
  • Steering
  • Brake system
  • Body
  • Exterior (external elements)
  • Interior (internal elements)
  • Electrical equipment
  • Equipment and devices
  • Electrical circuits


ChevyMan.ru © 2017-2026 · Mobile version · Feedback · Site search · Interesting to read · Sitemap: EN BG BY UA RS HR RO PL SK HU

Aveo 2003-2008 · Aveo 2006-2011 · Aveo 2012-2018 · Captiva 2006-2018 · Cruze 2008-2016 · Lacetti 2002-2009 · Lanos 2002-2009 · Niva 2002-2016 · Tahoe 1992-2000 · Tahoe 2000-2014 · Lumina 1 1989-1994 · Trailblazer 1 2001-2008 · Orlando 1 2010-2018 ·
🛡️ For your security and to improve our service, this site uses cookies. You can disable them in your browser.