
ChevyMan.ru
Mazda Mitsubishi Toyota Land Rover Honda Kia Nissan
English Русский
Български
Беларускі
Український
Српски
Hrvatski
Română
Polski
Slovenský
Magyar
|
Articles | Sitemap | Contacts |


Home   Aveo   Captiva   Cruze   Lacetti   Lanos   Niva   Tahoe   Others  
Aveo T300 (2012-2018) Aveo T250 (2006-2011) Aveo T200 (2003-2008)
  • Home
  • Aveo
  • T300 (2012-2018)
  • Power unit
  • Engine
  • Replacing the cylinder head gasket

Replacing the cylinder head gasket (Chevrolet Aveo T300)

            0

You will need: TORX keys E11, E14, E18, T50, T55, Allen key "6", socket heads "11", "24", extension, ratchet, flat-blade screwdriver.

If engine oil or coolant leaks are detected at the joints between the cylinder head and the cylinder block, remove the head and replace its gasket.

A leak may also occur as a result of warping of the cylinder head due to overheating.

1. Reduce the pressure in the fuel system (see "Reducing pressure in the fuel system").

2. Disconnect the wire from the negative terminal of the battery.

3. Drain the cooling system (see "Replacing the coolant").
3. Drain the cooling system (see «Replacing the coolant»).


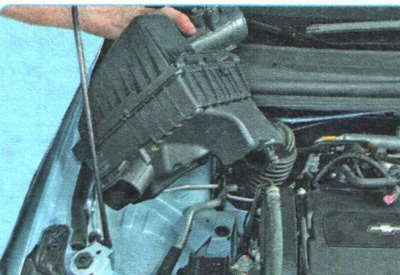
4. Remove the air filter (see "Removal and installation the air filter and air duct").
4. Remove the air filter (see «Removal and installation the air filter and air duct»).


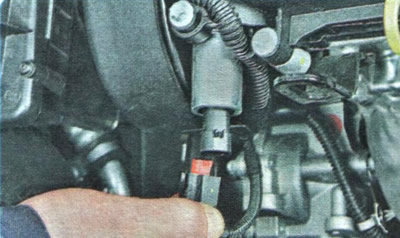
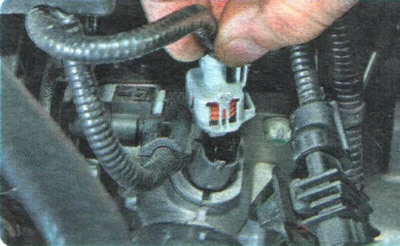
5. Press the lock and disconnect the wiring harness connector from the exhaust camshaft variable valve timing system valve.


5. Press the lock and disconnect the wiring harness connector from the exhaust camshaft variable…


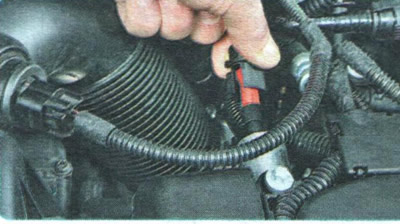
6. Similarly, disconnect the wiring harness connector from the intake camshaft valve.
6. Similarly, disconnect the wiring harness connector from the intake camshaft valve.


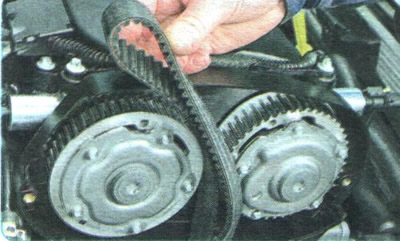
7. Remove the timing belt from the camshaft pulleys (see "Replacing the timing belt").
7. Remove the timing belt from the camshaft pulleys (see «Replacing the timing belt»).


8. Press the release button and disconnect the wiring harness connector from the thermostat heating element.
8. Press the release button and disconnect the wiring harness connector from the thermostat heating…


9. Loosen the engine wiring harness bracket mounting nut, remove the bracket from the stud and move the wiring harness to the side.


9. Loosen the engine wiring harness bracket mounting nut, remove the bracket from the stud and move…


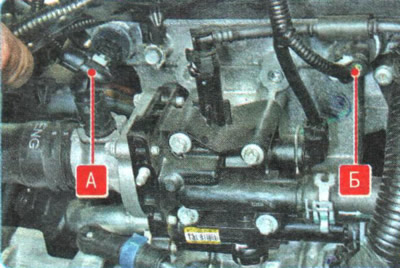
10. Disconnect the wiring harness connectors from the exhaust camshaft position sensor A and the intake camshaft position sensor B.
10. Disconnect the wiring harness connectors from the exhaust camshaft position sensor A and the…


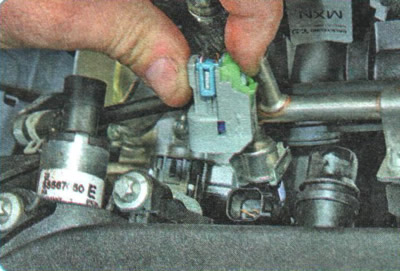
11. Disconnect the wiring harness connectors from the fuel injectors.
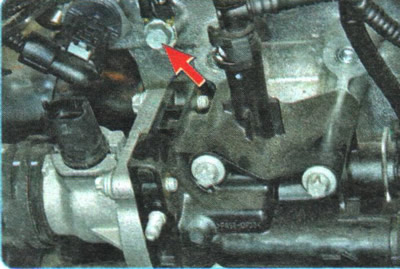
11. Disconnect the wiring harness connectors from the fuel injectors.


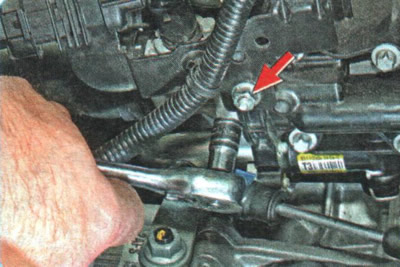
12. Unscrew the bolt securing the negative wire tip to the cylinder head and move the tip to the side.
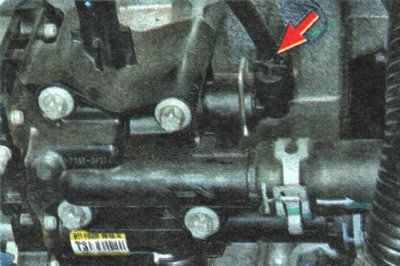


12. Unscrew the bolt securing the negative wire tip to the cylinder head and move the tip to the…


13. Press the lock and disconnect the wiring harness connector from the coolant temperature sensor.
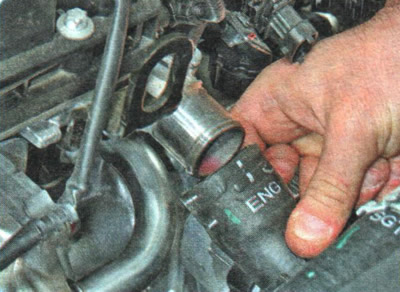
13. Press the lock and disconnect the wiring harness connector from the coolant temperature sensor.


14. Loosen the clamp securing the hose to the thermostat pipe and disconnect the hose from the pipe.
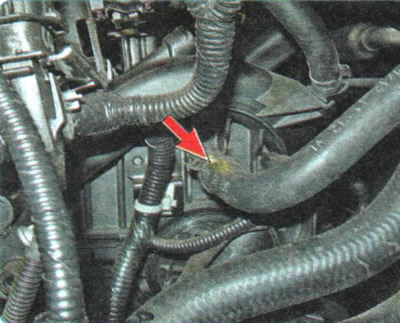
14. Loosen the clamp securing the hose to the thermostat pipe and disconnect the hose from the pipe.


15. Loosen the brake booster vacuum hose clamp by squeezing its bent tabs with pliers. Slide the clamp along the hose and disconnect the hose from the inlet pipe fitting.
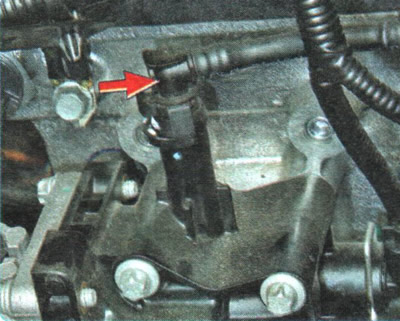


15. Loosen the brake booster vacuum hose clamp by squeezing its bent tabs with pliers. Slide the…


16. Squeeze the retainer and disconnect the throttle assembly heating hose tip from the water distributor fitting.
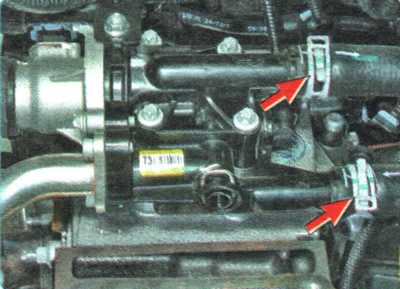
16. Squeeze the retainer and disconnect the throttle assembly heating hose tip from the water…


17. Loosen the heater hose clamps by squeezing their bent tabs with pliers. Slide the clamps along the hoses and disconnect the hoses.
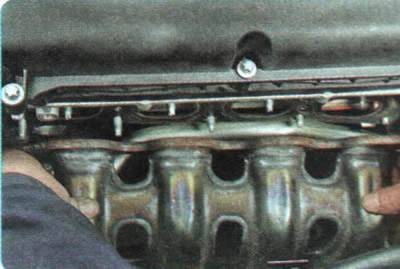
17. Loosen the heater hose clamps by squeezing their bent tabs with pliers. Slide the clamps along…


18. Remove the catalytic converter (see "Removal and installation the catalytic converter, replacing its gasket").
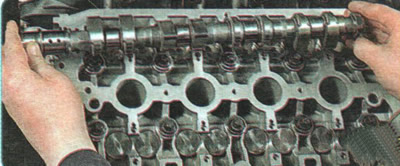


18. Remove the catalytic converter (see «Removal and installation the catalytic converter,…


19. Remove the camshafts (see "Removal, inspection and installation of camshafts").
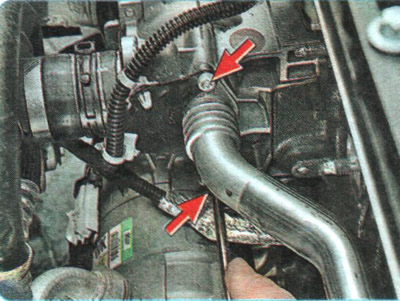
19. Remove the camshafts (see «Removal, inspection and installation of camshafts»).


20. Remove the two bolts securing the water distribution pipe to the water pump...
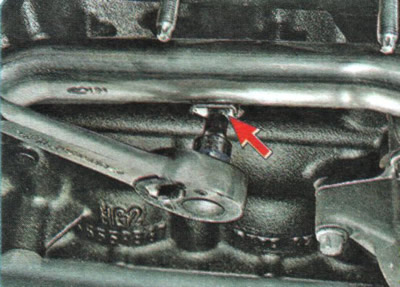
20. Remove the two bolts securing the water distribution pipe to the water pump...


21. ...bolt for fastening the water distribution pipe to the cylinder block...
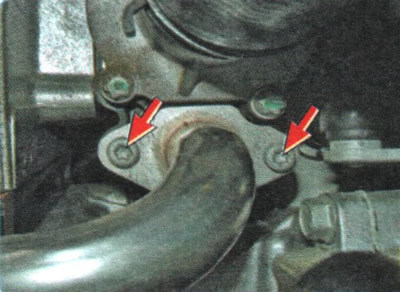
21. ...bolt for fastening the water distribution pipe to the cylinder block...


22. ...two bolts securing the pipe to the thermostat module...
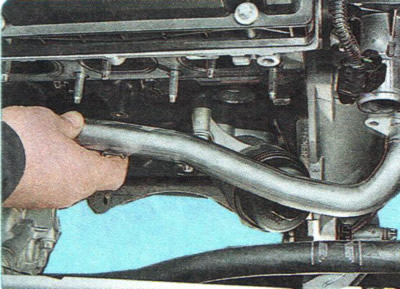
22. ...two bolts securing the pipe to the thermostat module...


23. ...and remove the water distribution pipe.
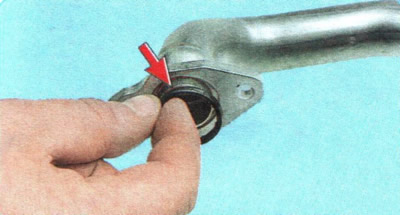
23. ...and remove the water distribution pipe.


WARNING: The water distribution pipe flanges are sealed with rubber rings. Replace the rings whenever the connections are disassembled.

WARNING: The water distribution pipe flanges are sealed with rubber rings. Replace the rings…


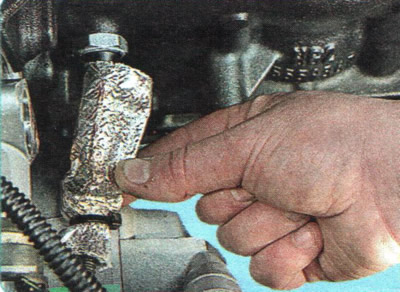
24. Slide the heat shield along the wire harness, press the wire harness connector lock...
24. Slide the heat shield along the wire harness, press the wire harness connector lock...


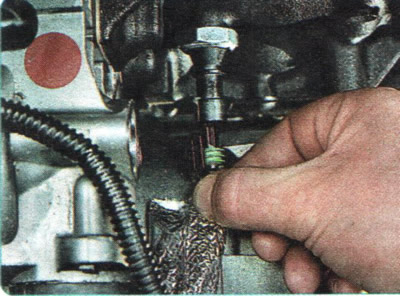
25. ...and disconnect the connector from the oil pressure sensor.
25. ...and disconnect the connector from the oil pressure sensor.


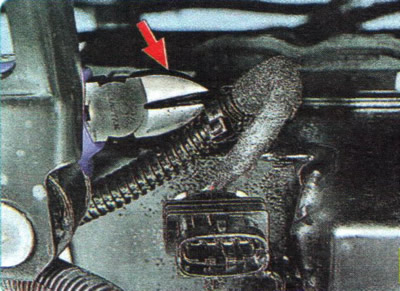
26. Disconnect the plastic holders of the engine wiring harness from the engine brackets by cutting them with pliers, and remove the wiring harness from the engine compartment.

27. Loosen the ten bolts securing the head to the cylinder block in the sequence shown in Figure 5.3 and remove them.
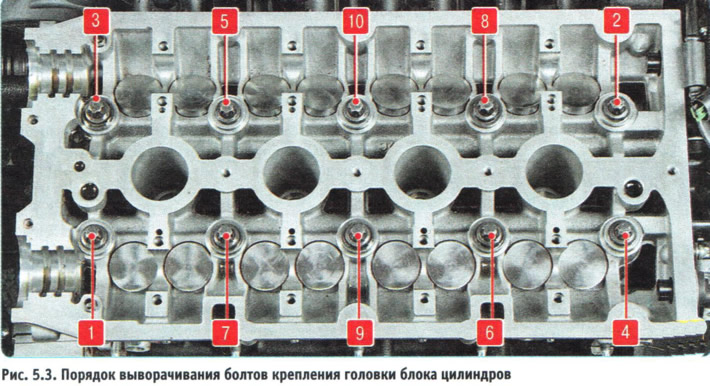
27. Loosen the ten bolts securing the head to the cylinder block in the sequence shown in Figure…


WARNING: The cylinder head bolts may only be removed when the engine is cold.
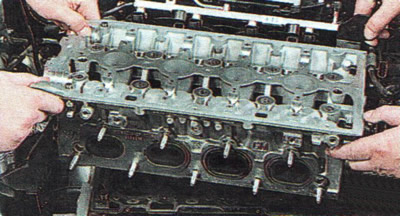

WARNING: The cylinder head bolts may only be removed when the engine is cold.


28. Remove the cylinder head assembly with the intake pipe.

HELPFUL TIP: Remove the cylinder head with an assistant, as it is quite heavy.

HELPFUL TIP: Remove the cylinder head with an assistant, as it is quite heavy.


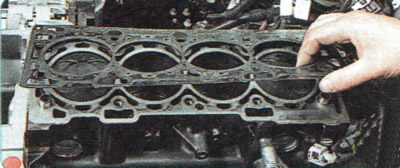
29. Remove the cylinder head gasket.

30. Clean the mating surfaces of the cylinder head and block from oxides and remnants of the old gasket.
30. Clean the mating surfaces of the cylinder head and block from oxides and remnants of the old…


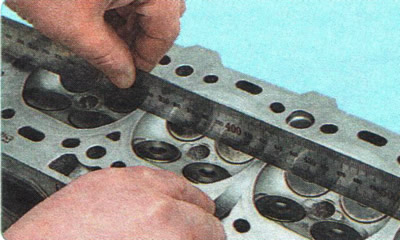
31. Check the cylinder head for warpage. To do this, place a ruler on the surface of the head, first in the middle along, then across and diagonally, and measure the gap between the surface of the head and the ruler with a feeler gauge. Grind the cylinder head if the gap exceeds 0.1 mm.

32. Install the cylinder head in the reverse order of removal, taking into account the following:
  • remove any oil and coolant from the threaded holes of the cylinder head mounting bolts that got there when the head was removed;
remove any oil and coolant from the threaded holes of the cylinder head mounting bolts that got…

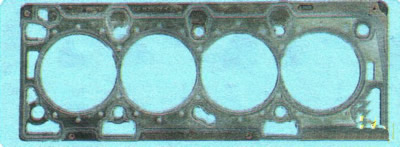
  • be sure to install a new cylinder head gasket, it cannot be reused;
  • lubricate the bolts with engine oil;
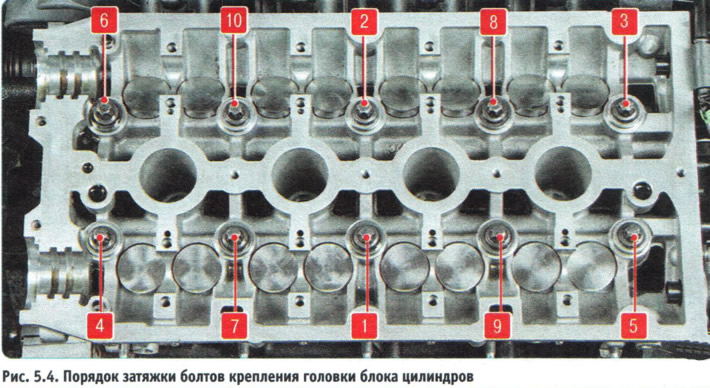
  • tighten the bolts on a cold engine in the order shown in Figure 5.4, to the torque specified in Appendix 1.
tighten the bolts on a cold engine in the order shown in Figure 5.4, to the torque specified in…


33. Install the camshafts in the sequence specified in subsection "Removal, inspection and installation of camshafts".

34. Install all previously removed parts in the reverse order of removal.

The original article is on the website ChevyMan.ru

The article was checked: Vladimir Romannikov
This article is available at russian, bulgarian, belarusian, ukrainian, serbian, croatian, romanian, polish, slovak, hungarian

Share information:

Previous articles
Aveo T300: Engine
Next articles

Replacing the cylinder head cover gasket
Removal and installation the flywheel or torque converter drive disk
Replacing the timing belt
Replacement of auxiliary drive belts
Setting the piston of the first cylinder to the TDC position
Replacing valve stem seals
Replacing the intake manifold gasket
Replacing crankshaft seals
Replacing the oil pan seal
Replacing camshaft seals


See similar articles on the topic of Chevrolet cars:
Cylinder head and gasket Chevrolet Captiva 1 (2006-2018)
Replacing the cylinder head gasket Chevrolet Cruze 1 (2008-2016)
Replacing the cylinder head cover gasket Chevrolet Lacetti 1 (2002-2009)
Replacing the cylinder head cover gasket Chevrolet Lanos T150 (2002-2009)
Cylinder head and valve mechanism Chevrolet Niva 1 (2002-2016)
Cylinder Head Cover — Removal and Installation Chevrolet Tahoe 1 (1992-2000)
Removal and installation the cylinder head Chevrolet Lumina 1 (1989-1994)
Link in different formats to this page


Visitor comments

No comments yet


How much will 43 + 37 =


Aveo T300 (2012-2018) 
  • General information
  • Vehicle device
  • User manual
  • Main malfunctions
  • Maintenance
  • Power unit
  • Engine
  • Lubrication system
  • Cooling system
  • Supply system
  • Exhaust system
  • Transmission
  • Clutch
  • Manual gearbox
  • Automatic gearbox
  • Front wheel drives
  • Chassis
  • Front suspension
  • Rear suspension
  • Steering
  • Brake system
  • Body
  • Exterior
  • Interior
  • Doors and trunk
  • Security systems
  • Electrical equipment
  • Engine electrics
  • Equipment and devices
  • Heating and air conditioning
  • Electrical circuits


Aveo T250 (2006-2011) 
  • Manual
  • Driver's workplace
  • Salon equipment
  • Vehicle characteristics
  • Maintenance
  • Engine 1.5 SOHC
  • Engine repair
  • Fuel supply system
  • Control system
  • Cooling system
  • Engine 1.6 DOHC
  • Engine repair
  • Control system
  • Transmission
  • Clutch
  • Manual gearbox
  • Automatic gearbox
  • Wheel drive
  • Chassis
  • Wheel suspension
  • Steering
  • Brake system
  • Body
  • Exterior
  • Interior


Aveo T200 (2003-2008) 
  • General information
  • User manual
  • Power unit
  • Engine repair 1.5L SOHC
  • Fuel system
  • Control system
  • Cooling system
  • Transmission
  • Clutch
  • Manual gearbox
  • Automatic gearbox
  • Drive shafts
  • Chassis
  • Front suspension
  • Rear suspension
  • Steering
  • Brake system
  • Body
  • Exterior (external elements)
  • Interior (internal elements)
  • Electrical equipment
  • Equipment and devices
  • Electrical circuits


ChevyMan.ru © 2017-2026 · Mobile version · Feedback · Site search · Interesting to read · Sitemap: EN BG BY UA RS HR RO PL SK HU

Aveo 2003-2008 · Aveo 2006-2011 · Aveo 2012-2018 · Captiva 2006-2018 · Cruze 2008-2016 · Lacetti 2002-2009 · Lanos 2002-2009 · Niva 2002-2016 · Tahoe 1992-2000 · Tahoe 2000-2014 · Lumina 1 1989-1994 · Trailblazer 1 2001-2008 · Orlando 1 2010-2018 ·
🛡️ For your security and to improve our service, this site uses cookies. You can disable them in your browser.