ChevyMan.ru
Mazda Mitsubishi Toyota Land Rover Honda Kia Nissan
English Русский
Български
Беларускі
Український
Српски
Hrvatski
Română
Polski
Slovenský
Magyar
|
Articles | Sitemap | Contacts |


Home   Aveo   Captiva   Cruze   Lacetti   Lanos   Niva   Tahoe   Others  
Aveo T300 (2012-2018) Aveo T250 (2006-2011) Aveo T200 (2003-2008)
  • Home
  • Aveo
  • T300 (2012-2018)
  • Power unit
  • Cooling system
  • Replacing the coolant

Replacing the coolant (Chevrolet Aveo T300)

            0

You will need: a flat-blade screwdriver, coolant, a clean wiping cloth, a container of at least 10 liters for draining the coolant, and pliers.

According to the manufacturer's recommendation, the coolant should be replaced after 45 thousand km of mileage or 2 years of operation (whichever comes first).

WARNINGS: Use ethylene glycol based coolants (antifreeze).


Replace coolant only when the engine is cold.


When starting the engine, the expansion tank cap must be closed. Screw the tank cap tightly. The cooling system is under pressure when the engine is running, so coolant may leak from under a poorly screwed cap.


Coolant is toxic, so be careful when handling it.


1. Place the vehicle on a lift or inspection pit.
1. Place the vehicle on a lift or inspection pit.


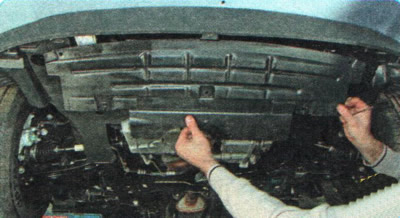
2. Remove the front engine splash guard (see "Removal and installation mudguards and engine crankcase protection").
2. Remove the front engine splash guard (see «Removal and installation mudguards and engine…


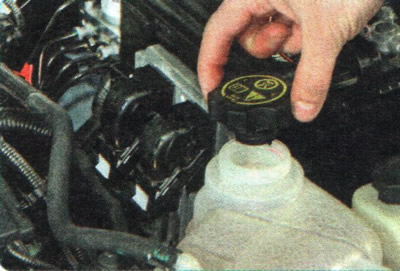
3. Unscrew the expansion tank cap.


3. Unscrew the expansion tank cap.


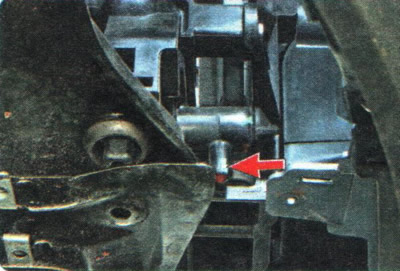
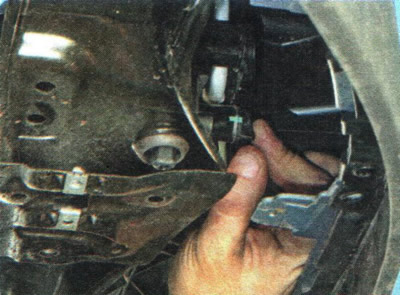
4. Place a container under the drain cock on the radiator of the cooling system, located at the bottom of the tank on the right side of the radiator.
4. Place a container under the drain cock on the radiator of the cooling system, located at the…


5. Turn off the tap...

5. Turn off the tap...


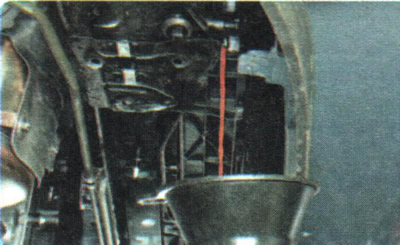
6. ...and drain the liquid.

WARNING: Antifreeze is deadly poisonous to all living things. In order not to pollute the environment, drain it from the radiator through a funnel (for example, made from a plastic bottle). If you don't have a hose of the appropriate diameter, you can use, for example, a cut-off canister.


WARNING: Antifreeze is deadly poisonous to all living things. In order not to pollute the…


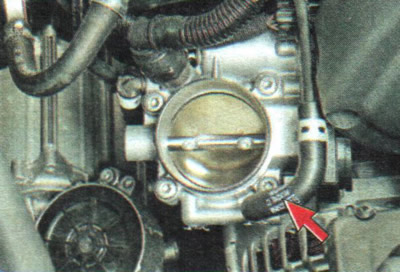
7. To ensure complete drainage of the fluid from the system and guaranteed removal of air from it when filling, squeeze the tabs of the clamp securing the throttle heating hose, slide the clamp along the hose and remove the hose from the throttle assembly fitting.

8. Close the drain valve.

NOTE: If the expansion tank is heavily contaminated, remove (see "Removal and installation the expansion tank") and rinse it.


9. Flush the cooling system by reinstalling the coolant supply hose to the throttle assembly and slowly filling the system with water through the expansion tank to the level of the steam outlet tube.

10. Start the engine and let it run until the electric fan turns on.

11. Turn off the engine and drain the water.

12. Flush the cooling system until clean water starts to drain.

13. Disconnect the hose again from the fitting of the intermediate coolant supply pipe to the throttle assembly.
13. Disconnect the hose again from the fitting of the intermediate coolant supply pipe to the…


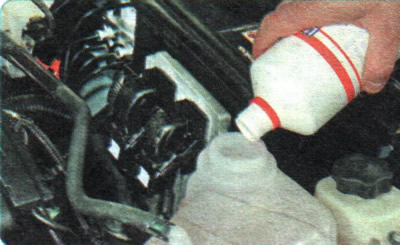
14. Fill the engine cooling system by pouring coolant into the expansion tank until it starts to flow out of the throttle body fitting and the removed hose. When the liquid starts to flow out, put the hose back in place and secure it with a clamp.


15. Start the engine and warm it up to operating temperature (before turning on the fan). After this, stop the engine, check the coolant level and, if necessary, add it to the expansion tank slightly above the welded seam of the tank halves (it is indicated by two arrows applied to the wall of the expansion tank).

NOTE: While the engine is running, watch the coolant overheating warning light in the instrument cluster. If the light comes on and the radiator fan does not turn on, turn on the heater and check what kind of air is passing through it. If the heater is delivering warm air, the fan is most likely faulty, and if it is delivering cold air, an air lock has formed in the engine cooling system. To remove it, turn off the engine, let it cool down and unscrew the expansion tank cap. Start the engine, let it run for 3-5 minutes and tighten the tank cap.


USEFUL TIPS: To better fill the system without air locks, periodically squeeze the radiator hoses with your hand.


After several days of vehicle operation after replacing the coolant, check its level. Replenish the level if necessary.


If after a very short time the color of the fresh liquid turns brown, then you have poured in a fake, to which the manufacturer "forgot" to add corrosion inhibitors. In addition, one of the signs of a fake is a sudden complete discoloration of the liquid. The dye of high-quality cooling liquid is very stable and only darkens over time.

The article was checked: Vladimir Romannikov
This article is available at russian, bulgarian, belarusian, ukrainian, serbian, croatian, romanian, polish, slovak, hungarian

Share information:

Previous articles
Aveo T300: Cooling system
Next articles

Checking the cooling system hoses and connections
Possible malfunctions of the cooling system, their causes and methods of elimination
Design features of the cooling system
Removal and installation of the electric fan of the radiator of the engine cooling system in assembly with the casing
Replacing the cooling system radiator
Removal and installation the expansion tank
Replacing the water pump
Removal and installation the thermostat


See similar articles on the topic of Chevrolet cars:
Engine coolant temperature gauge Chevrolet Captiva 1 (2006-2018)
Replacing the coolant Chevrolet Cruze 1 (2008-2016)
Replacing the coolant Chevrolet Lacetti 1 (2002-2009)
Replacing the coolant Chevrolet Lanos T150 (2002-2009)
Replacing fuses Chevrolet Niva 1 (2002-2016)
Replacing the coolant Chevrolet Tahoe 2 and 3 (2000-2014)
Checking and replacing the coolant temperature sensor Chevrolet Lumina 1 (1989-1994)
Link in different formats to this page


Visitor comments

No comments yet


How much will 47 + 18 =


Aveo T300 (2012-2018) 
  • General information
  • Vehicle device
  • User manual
  • Main malfunctions
  • Maintenance
  • Power unit
  • Engine
  • Lubrication system
  • Cooling system
  • Supply system
  • Exhaust system
  • Transmission
  • Clutch
  • Manual gearbox
  • Automatic gearbox
  • Front wheel drives
  • Chassis
  • Front suspension
  • Rear suspension
  • Steering
  • Brake system
  • Body
  • Exterior
  • Interior
  • Doors and trunk
  • Security systems
  • Electrical equipment
  • Engine electrics
  • Equipment and devices
  • Heating and air conditioning
  • Electrical circuits


Aveo T250 (2006-2011) 
  • Manual
  • Driver's workplace
  • Salon equipment
  • Vehicle characteristics
  • Maintenance
  • Engine 1.5 SOHC
  • Engine repair
  • Fuel supply system
  • Control system
  • Cooling system
  • Engine 1.6 DOHC
  • Engine repair
  • Control system
  • Transmission
  • Clutch
  • Manual gearbox
  • Automatic gearbox
  • Wheel drive
  • Chassis
  • Wheel suspension
  • Steering
  • Brake system
  • Body
  • Exterior
  • Interior


Aveo T200 (2003-2008) 
  • General information
  • User manual
  • Power unit
  • Engine repair 1.5L SOHC
  • Fuel system
  • Control system
  • Cooling system
  • Transmission
  • Clutch
  • Manual gearbox
  • Automatic gearbox
  • Drive shafts
  • Chassis
  • Front suspension
  • Rear suspension
  • Steering
  • Brake system
  • Body
  • Exterior (external elements)
  • Interior (internal elements)
  • Electrical equipment
  • Equipment and devices
  • Electrical circuits


ChevyMan.ru © 2017-2026 · Mobile version · Feedback · Site search · Interesting to read · Sitemap: EN BG BY UA RS HR RO PL SK HU

Aveo 2003-2008 · Aveo 2006-2011 · Aveo 2012-2018 · Captiva 2006-2018 · Cruze 2008-2016 · Lacetti 2002-2009 · Lanos 2002-2009 · Niva 2002-2016 · Tahoe 1992-2000 · Tahoe 2000-2014 · Lumina 1 1989-1994 · Trailblazer 1 2001-2008 · Orlando 1 2010-2018 ·
🛡️ For your security and to improve our service, this site uses cookies. You can disable them in your browser.