
Contents: Turn signal relay ↧ Alarm relay ↧
Turn signal relay
1. The turn signal relay, located under the instrument panel in the clip to the left of the steering column, ensures the turn signal light flashes.
2. When the relay is operating normally, distinct clicks can be heard. If the turn signals do not work on any side of the vehicle and the characteristic clicking sound is not heard, the turn signal warning light on the instrument panel will come on.
3. If the turn signals do not flash on both sides of the vehicle, this may be due to a blown fuse, a faulty breaker circuit, a faulty switch, or open or loose connections in the wiring. If inspection of the fuse box reveals that the turn signal circuit fuse is blown, check the wiring for a short circuit before installing a new fuse.
4. To replace the relay, simply disconnect it from the panel and release it from the clamp.
5. Make sure that the new relay is identical to the faulty one. Before installing a new relay, compare it with the burnt out one - they should be the same.
6. Installation of the relay is performed in reverse order.
Alarm relay
7. This relay is located in the center of the panel; when it is working, all four turn signals start flashing simultaneously.
8. Checking the relay is similar to checking the turn signal relay (see points 2 and 3).
9. To replace the relay, remove it from the board (see illustration).
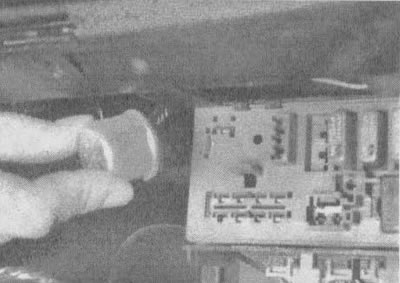
7.9. Grasp the turn signal relay with your hand and remove it from the board
10. Make sure that the new relay has identical characteristics to the failed one. Before installing a new relay, compare it with the burnt out one.
(The original article is on the website «CHEVYMAN.RU»)