


Contents: Front door ↧ Back door ↧
Caution: Do not remove the motor from the window regulator mechanism. A replacement electric motor can only be purchased as a built-in component of a new window lifter.
Front door
1. Remove the trim panel, moisture insulation shield and speaker of the acoustic system located in the door (see subsection 15 and chapter 12).
2. Remove the glass (see subsection 18).
3. Disconnect the window lift motor connector.
4. Loosen the two upper window mechanism bolts, but do not remove them (see illustration). Remove the three bottom bolts and pull the mechanism off the two top bolts. Tilt the window regulator forward, lift it up and remove it from the door.
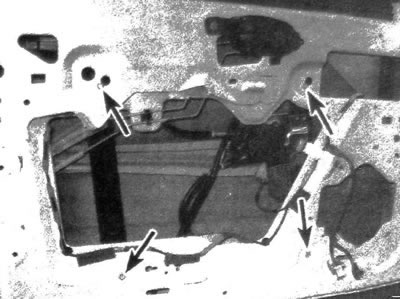
19.4. Location of window regulator mounting bolts
5. Installation is carried out in the reverse order of removal.
Back door
All vehicles except Trailblaizer EXT and Envoy XL
6. Remove the trim panel, moisture-proof shield and speaker of the acoustic system located in the door (see subsection 15 and chapter 12).
7. Remove the glass (see subsection 18).
8. Disconnect the window lift motor connector.
9. Unscrew the mounting bolts, lift the window regulator and remove it from the door.
10. Installation is carried out in the reverse order of removal.
Trailblaizer EXT and Envoy XL vehicles
11. If the glass can move, raise or lower it half way.
12. Remove the trim panel and the door moisture insulation shield (see subsection 15).
13. Loosen the clamp bolts that secure the glass to the window regulator. Pull the glass up completely. After this, it is necessary for an assistant to hold the glass. You can also attach the glass to the door with adhesive tape.
14. Disconnect the window lift motor connector.
15. Disconnect the window lift cable holder from the bracket located on the door. Remove the two lower bolts that secure the window regulator to the door. If the window regulator works, loosen the top bolt. If the window regulator does not work, remove the bolt completely.
16. Lift and guide the window regulator through the slot in the inner door panel.
17. Installation is carried out in the reverse order of removal.
[The original source of the article is the website CHEVYMAN]