


Contents: Removal procedure ↧ Installation procedure ↧
Removal procedure
1. Remove the upper decorative molding of the rear hatch glass. See "Upper decorative molding of the rear hatch glass" in this section.
2. Open and prop the rear hatch.
3. Disconnect the rear hatch wiring connectors.
4. Disconnect the rear window washer hose.
5. Pull the wiring grommet, connectors and rear window washer hose out of the rear bulkhead.
6. Remove the tailgate pillars. See "Rear Tailgate Post" in this section.
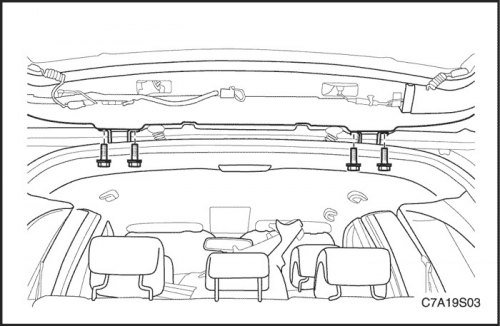
7. Mark the location of the rear hatch hinges on the body with a grease pencil.
8. Loosen the rear hatch hinge mounting bolts.
9. With the help of an assistant, remove the rear hatch from the vehicle.
Installation procedure
1. With the help of an assistant, position the rear hatch hinges in the marked places on the body.
Note: To ensure a secure seal, new hinge-to-body nuts must be used.
2. Tighten the rear hatch hinge mounting bolts.
Tighten
Tighten the tailgate hinge bolts to 25 Nm (18 lb-ft).
3. Check the alignment of the rear hatch and adjust if necessary.
4. Install the tailgate pillars. See "Rear Tailgate Post" in this section.
5. Insert the wiring grommet, connectors and rear window washer hose into the rear bulkhead.
6. Connect the rear hatch wiring connectors.
7. Connect the rear window washer hose.
8. Install the tailgate upper trim molding. See "Upper decorative molding of the rear hatch glass" in this section.