
ChevyMan.ru
Mazda Mitsubishi Toyota Land Rover Honda Kia Nissan
English Русский
Български
Беларускі
Український
Српски
Hrvatski
Română
Polski
Slovenský
Magyar
|
Articles | Sitemap | Contacts |


Home   Aveo   Captiva   Cruze   Lacetti   Lanos   Niva   Tahoe   Others  
Captiva 1 (2006-2018)
  • Home
  • Captiva
  • 1 (2006-2018)
  • Body
  • Doors and windows
  • Shaped upholstery of the passenger compartment ceiling

Shaped upholstery of the passenger compartment ceiling (Chevrolet Captiva 1)

            0

Contents: Removal procedure ↧ Installation procedure ↧

Necessary equipment


Upholstery remover KM-475-B

Removal procedure


1. Disconnect the cable from the negative battery terminal.
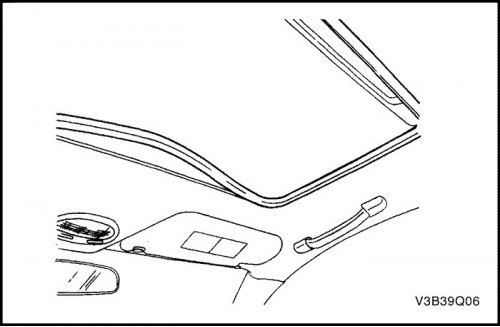
1. Disconnect the cable from the negative battery terminal.


2. Remove the sunroof molding, if present.

3. Remove the passenger assist handrails. Go to "Auxiliary handrails for the passenger" in this section.

4. Remove the plastic retaining clips in the driver's side headliner.

5. Remove sun visors. Go to "Sun visors with vanity mirror" in this section.

6. Remove the power sunroof control switch. Go to "Power Sunroof Control Switch" in this section.

7. Remove windshield trim molding, upper B-pillar trim molding, rear quarter glass trim molding. See Section 9G, Interior Trim.
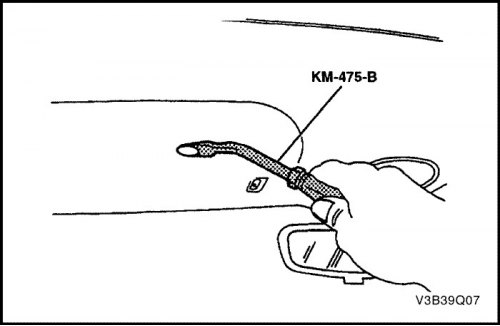
7. Remove windshield trim molding, upper B-pillar trim molding, rear quarter glass trim molding.…


8. Remove the plastic clips in the headlining using trim remover KM-475-B.


9. Fold both front seats back.

10. Remove the headliner through the rear door.
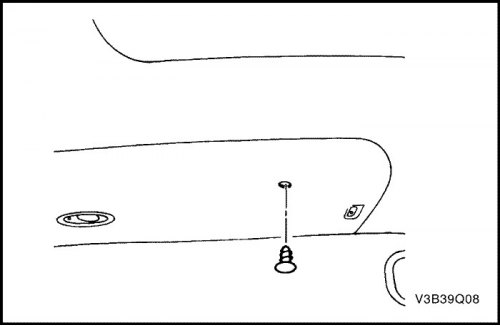
10. Remove the headliner through the rear door.


Installation procedure


1. Fold both front seats back.

2. Insert the headliner through the rear door.

3. Install headliner behind seats around doors.

4. Install plastic clips.
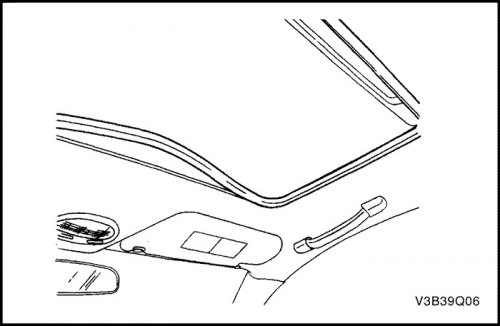
4. Install plastic clips.


5. Install windshield trim molding, upper center pillar trim molding, rear quarter glass trim molding. See Section 9G, Interior Trim.

6. Install the power sunroof control switch, if equipped. Go to "Power Sunroof Control Switch" in this section.

7. Install sun visors. Go to "Sun visors with vanity mirror" in this section.

8. Install plastic clips into the driver's side headliner.

9. Install auxiliary handrails for the passenger. Go to "Auxiliary handrails for the passenger" in this section.


10. Install the hatch molding, if present.

11. Connect the cable to the negative terminal of the battery.

For details, visit the website: ChevyMan

The article was checked: Vladimir Romannikov
This article is available at russian, bulgarian, belarusian, ukrainian, serbian, croatian, romanian, polish, slovak, hungarian

Share information:

Previous articles
Captiva 1: Doors and windows
Next articles

Electric sunroof
Sunroof Fault Diagnosis
Schematic diagrams of the sunroof with electric drive
General description of the roof and hatch
Lower door seal
Sun visors with vanity mirror
Auxiliary handrails for the passenger
Electric sunroof control switch
Rear drop door
Rear Tailgate Pillar


See similar articles on the topic of Chevrolet cars:
Removal and installation the front passenger airbag Chevrolet Aveo T300 (2012-2018)
Heating (air conditioning) and ventilation of the passenger compartment Chevrolet Cruze 1 (2008-2016)
Wiring diagram of the fuse box in the passenger compartment Chevrolet Lacetti 1 (2002-2009)
Removal car body upholstery Chevrolet Niva 1 (2002-2016)
Storage compartment Chevrolet Tahoe 1 (1992-2000)
Fuse and relay box in the passenger compartment Chevrolet Orlando 1 (2010-2018)
Link in different formats to this page


Visitor comments

No comments yet


How much will 47 + 20 =


Captiva 1 (2006-2018) 
  • Manual
  • Before leaving
  • Keys, doors and windows
  • Seats, protection systems
  • Instruments and controls
  • Lighting system
  • Information and entertainment
  • Navigation system
  • Climate control
  • Driving a car
  • Car care
  • Maintenance
  • Engine 2.0 l (diesel)
  • Engine device
  • Troubleshooting
  • Engine repair
  • Cooling system
  • Engine electrical equipment
  • Control and power systems
  • Exhaust system
  • Engine FAM II 2.4D
  • Engine device
  • Troubleshooting
  • Engine repair
  • Cooling system
  • Engine electrical equipment
  • Control and power systems
  • Exhaust system
  • Engine HFV6 3.2L
  • Engine device
  • Troubleshooting
  • Engine repair
  • Cooling system
  • Engine electrical equipment
  • Control and power systems
  • Exhaust system
  • Transmission
  • Front drive axle
  • Rear drive axle
  • Automatic gearbox - device
  • Automatic gearbox - service
  • Automatic gearbox - repair
  • Manual gearbox - device
  • Manual gearbox - service and repair
  • Clutch
  • Transfer case
  • Chassis
  • Car suspension
  • Brake system
  • Steering
  • Body
  • Heating and ventilation
  • Air conditioning (manual)
  • Air conditioning (automatic)
  • Seat belts
  • Airbags
  • Car seat
  • Interior (internal elements)
  • Exterior (external elements)
  • Doors and windows
  • Electrical equipment
  • Equipment and devices
  • Lighting and lamps
  • Windshield wipers and washers
  • Electrical circuits


ChevyMan.ru © 2017-2026 · Mobile version · Feedback · Site search · Interesting to read · Sitemap: EN BG BY UA RS HR RO PL SK HU

Aveo 2003-2008 · Aveo 2006-2011 · Aveo 2012-2018 · Captiva 2006-2018 · Cruze 2008-2016 · Lacetti 2002-2009 · Lanos 2002-2009 · Niva 2002-2016 · Tahoe 1992-2000 · Tahoe 2000-2014 · Lumina 1 1989-1994 · Trailblazer 1 2001-2008 · Orlando 1 2010-2018 ·
🛡️ For your security and to improve our service, this site uses cookies. You can disable them in your browser.