
ChevyMan.ru
Mazda Mitsubishi Toyota Land Rover Honda Kia Nissan
English Русский
Български
Беларускі
Український
Српски
Hrvatski
Română
Polski
Slovenský
Magyar
|
Articles | Sitemap | Contacts |


Home   Aveo   Captiva   Cruze   Lacetti   Lanos   Niva   Tahoe   Others  
Captiva 1 (2006-2018)
  • Home
  • Captiva
  • 1 (2006-2018)
  • Transmission
  • Rear drive axle
  • Wheel drive shaft — repair

Wheel drive shaft — repair (Chevrolet Captiva 1)

            0

Contents: Procedure for dismantling ↧ Assembly procedure ↧

Necessary equipment


J-8059 Snap Ring Pliers

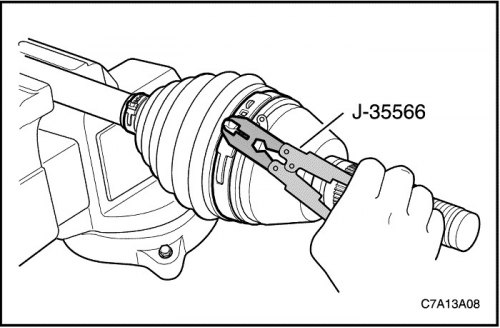
J-35566 Pliers for clamping the clamp on the casing

Procedure for dismantling


1. Remove the drive shaft from the vehicle. See "Drive shaft - rear" in this section.

2. Remove the large clamp securing the protective cover. Remove the clamp.
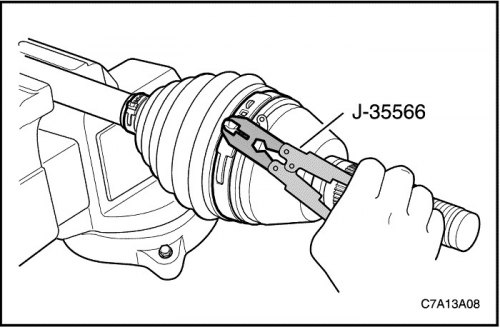
2. Remove the large clamp securing the protective cover. Remove the clamp.


3. Remove the small clamp securing the protective cover. Remove the clamp.

3. Remove the small clamp securing the protective cover. Remove the clamp.
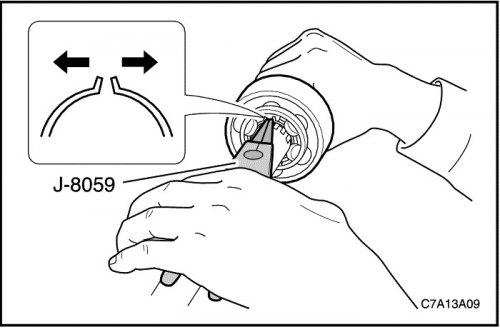

4. Remove grease from the joint.

5. Open the O-ring with J-8059 pliers and remove the outer joint from the drive shaft.

Caution! Do not disassemble the outer joint assembly. The parts are fitted together and are not intended to be separated. Incorrect reassembly may adversely affect both the power and safety of the vehicle.


6. Remove the cover from the hinge assembly.
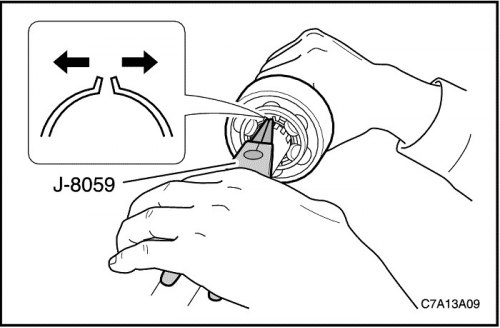
6. Remove the cover from the hinge assembly.


Assembly procedure


1. Install the seals on the drive shaft.

2. Open the sealing ring with J-8059 pliers and install the outer joint onto the drive shaft.

3. Pour 170 - 190 g into the protective casing of the hinge (6.0 - 6.7 oz) recommended lubricant. Protective cover with 170 - 190 g (6.0 - 6.7 oz) of the recommended lubricant and install it back onto the axle shaft.
3. Pour 170 - 190 g into the protective casing of the hinge (6.0 - 6.7 oz) recommended lubricant.…


4. Put on new clamps (big and small) for fastening the protective cover.

5. Crimp new clamps (big and small) fastening the protective cover with pliers J-35566.

6. Install the drive shaft onto the vehicle. See "Drive shaft - rear" in this section.

The original source of the article is the website «chevyman.ru»

The article was checked: Vladimir Romannikov
This article is available at russian, bulgarian, belarusian, ukrainian, serbian, croatian, romanian, polish, slovak, hungarian

Share information:

Previous articles
Captiva 1: Rear drive axle
Next articles

Rear Drive Unit — Removal and Installation
Wheel drive shaft — removal and installation
Cardan shaft — removal and installation
Diagnostic Trouble Codes (DTC)
Diagnostics of faults of the rear drive axle
Rear Drive Unit — Repair


See similar articles on the topic of Chevrolet cars:
Replacing the wheel drive shaft seal Chevrolet Aveo T250 (2006-2011)
Primary shaft repair Chevrolet Cruze 1 (2008-2016)
Replacing the front wheel drive oil seal Chevrolet Lacetti 1 (2002-2009)
Front wheel drive device Chevrolet Lanos T150 (2002-2009)
Removal and installation the front wheel drive shaft Chevrolet Niva 1 (2002-2016)
Front axle shaft with housing (all-wheel drive models) — removal and installation Chevrolet Tahoe 1 (1992-2000)
Replacement of protective covers of drive axle shafts and repair of CV joints Chevrolet Lumina 1 (1989-1994)
Link in different formats to this page


Visitor comments

No comments yet


How much will 25 + 44 =


Captiva 1 (2006-2018) 
  • Manual
  • Before leaving
  • Keys, doors and windows
  • Seats, protection systems
  • Instruments and controls
  • Lighting system
  • Information and entertainment
  • Navigation system
  • Climate control
  • Driving a car
  • Car care
  • Maintenance
  • Engine 2.0 l (diesel)
  • Engine device
  • Troubleshooting
  • Engine repair
  • Cooling system
  • Engine electrical equipment
  • Control and power systems
  • Exhaust system
  • Engine FAM II 2.4D
  • Engine device
  • Troubleshooting
  • Engine repair
  • Cooling system
  • Engine electrical equipment
  • Control and power systems
  • Exhaust system
  • Engine HFV6 3.2L
  • Engine device
  • Troubleshooting
  • Engine repair
  • Cooling system
  • Engine electrical equipment
  • Control and power systems
  • Exhaust system
  • Transmission
  • Front drive axle
  • Rear drive axle
  • Automatic gearbox - device
  • Automatic gearbox - service
  • Automatic gearbox - repair
  • Manual gearbox - device
  • Manual gearbox - service and repair
  • Clutch
  • Transfer case
  • Chassis
  • Car suspension
  • Brake system
  • Steering
  • Body
  • Heating and ventilation
  • Air conditioning (manual)
  • Air conditioning (automatic)
  • Seat belts
  • Airbags
  • Car seat
  • Interior (internal elements)
  • Exterior (external elements)
  • Doors and windows
  • Electrical equipment
  • Equipment and devices
  • Lighting and lamps
  • Windshield wipers and washers
  • Electrical circuits


ChevyMan.ru © 2017-2026 · Mobile version · Feedback · Site search · Interesting to read · Sitemap: EN BG BY UA RS HR RO PL SK HU

Aveo 2003-2008 · Aveo 2006-2011 · Aveo 2012-2018 · Captiva 2006-2018 · Cruze 2008-2016 · Lacetti 2002-2009 · Lanos 2002-2009 · Niva 2002-2016 · Tahoe 1992-2000 · Tahoe 2000-2014 · Lumina 1 1989-1994 · Trailblazer 1 2001-2008 · Orlando 1 2010-2018 ·
🛡️ For your security and to improve our service, this site uses cookies. You can disable them in your browser.