


Attention! The headlight adjustment should be checked every 12 months, when replacing a headlight or after repairing the front part of the body. It should be noted that the described procedure allows only approximate adjustment of the headlights, the exact adjustment is performed in a car service.
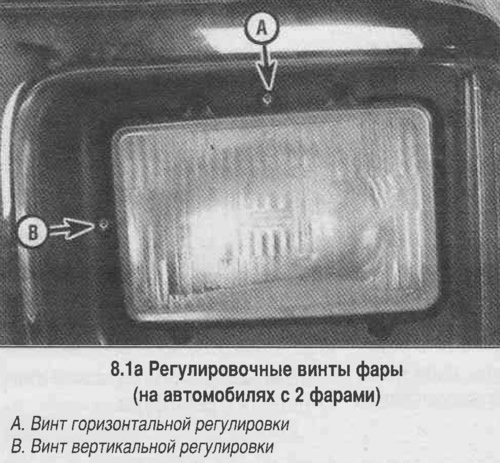
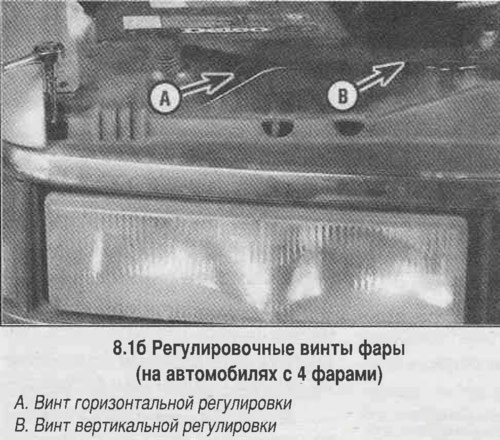
1. The headlight housing has 2 spring-loaded screws for adjustment in vertical and horizontal planes (see photo).
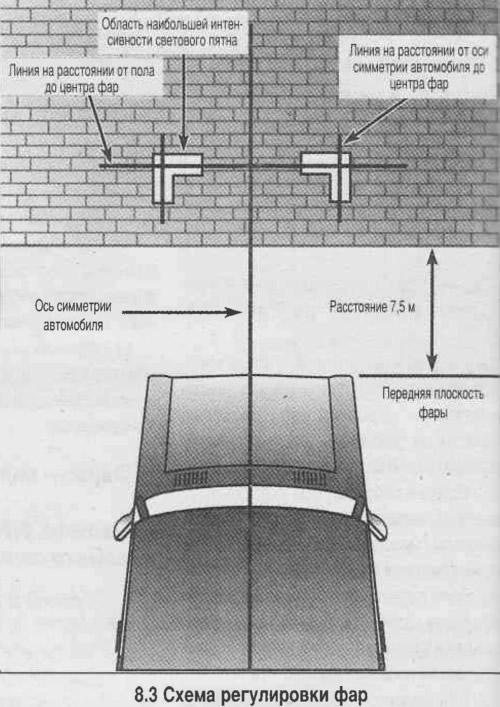
2. Place the car 7.5 m from a vertical wall.
3. Use adhesive tape to mark the crosshairs symmetrically to the vehicle's axis (see photo). For more precise marking, you should move up to the wall at a distance of about 20 cm.
4. Adjustment is performed with the vehicle normally loaded and the tank half empty.
5. Set the low beam headlights so that the light spot is located 5 cm below the horizontal and 5 cm to the right of the vertical. To raise the beam, turn the screw clockwise and vice versa. The same applies to left-right adjustment.
6. Turn on the high beam headlights and adjust the beam so that the spot is strictly on the vertical line, directly below the horizontal.
Attention! It may be impossible to precisely adjust the high and low beams in this way. In this case, try to more accurately adjust the low beam, which you have to drive with more often and on which traffic safety depends to a greater extent.