
Contents: Removal ↧ Installation ↧
Removal
Cadillac
1. Disable the passive safety system.
2. Remove the windshield decorative molding.
3. Remove the panel with the windshield defroster grilles.
4. Remove the side covers of the instrument panel.
5. Remove the deflector from the left side of the instrument panel.
6. Remove the instrument cluster.
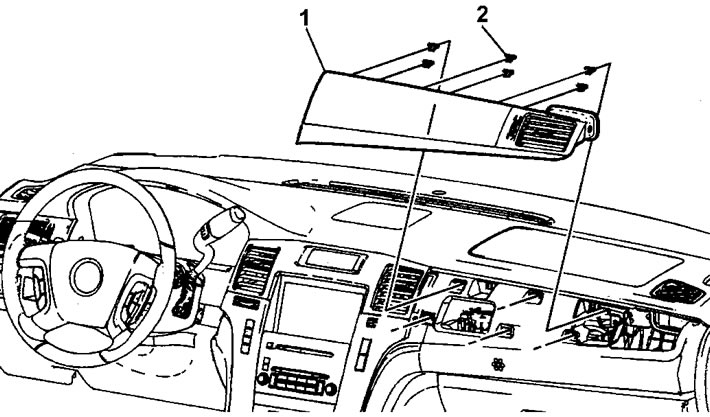
7. Remove the upper instrument panel trim.
- a) Using a screwdriver wrapped in protective tape, lift the upper trim (1) by the edges and detach the fastening clips (2) from the instrument panel.
- b) Disconnect the clips from the top trim.
8. Remove the center instrument panel trim.
- a) Remove the front center console trim (see section "Central console").
- b) Using a screwdriver wrapped in protective tape, lift the center trim (1) by the edges and detach the fastening clips (2) from the instrument panel.
- c) Disconnect the electrical connectors.
- d) Disconnect the clips from the center trim.
9. Remove the passenger airbag unit.
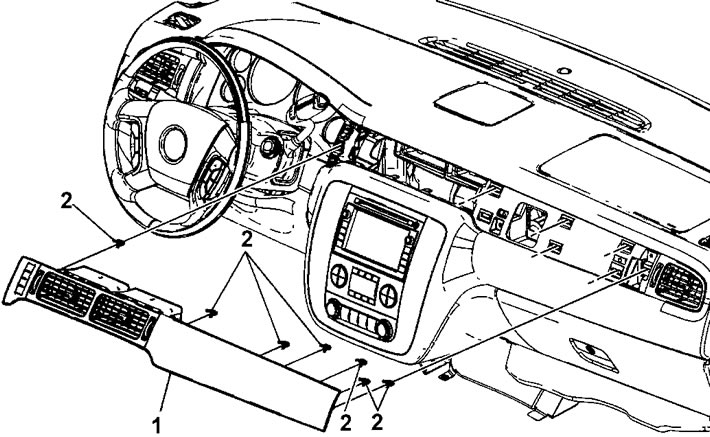
10. Remove the eight bolts (1) securing the instrument panel upper trim. Tightening torque 9 Nm.

11. Loosen the bolts (2) of the heater/air conditioner air ducts. Tightening torque 2 Nm.
12. Lift the trim and disconnect the wiring connectors.
13. Working together, release the trim from the clips (4).
14. Remove the instrument panel trim.
15. Installation is carried out in reverse order.
Besides Cadillac
1. Disable the passive safety system.
2. Remove the windshield decorative molding.
3. Remove the panel with the windshield defroster grilles.
4. Remove the front speaker of the audio system (if installed).
5. Remove the side covers of the instrument panel.
6. Remove the ventilation system deflector from the left side of the instrument panel.
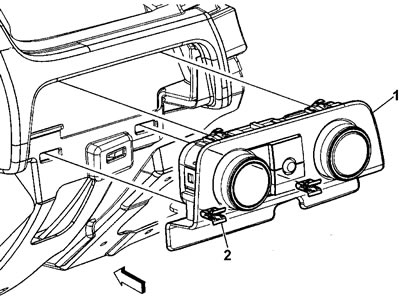
7. Remove the headlight switch bezel.
- a) Using a screwdriver wrapped in protective tape, lift the bezel (1) by the edges and detach the fasteners (2) securing the bezel to the instrument panel.
- b) Disconnect the connectors and remove the headlight switch bezel.
- c) Disconnect the clamps from the facet.
8. Remove the instrument cluster.
9. Remove the knee support.
10. Remove the upper instrument panel trim.
- a) Using a screwdriver wrapped in protective tape, lift the upper trim (1) by the edges and detach the fastening clips (2) from the instrument panel.
- b) Disconnect the electrical connectors.
- c) Disconnect the clips from the top trim.
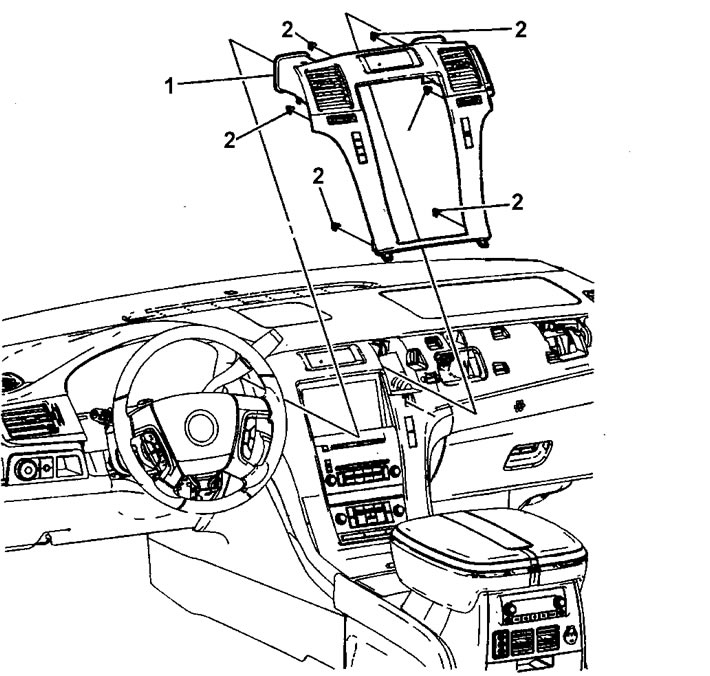
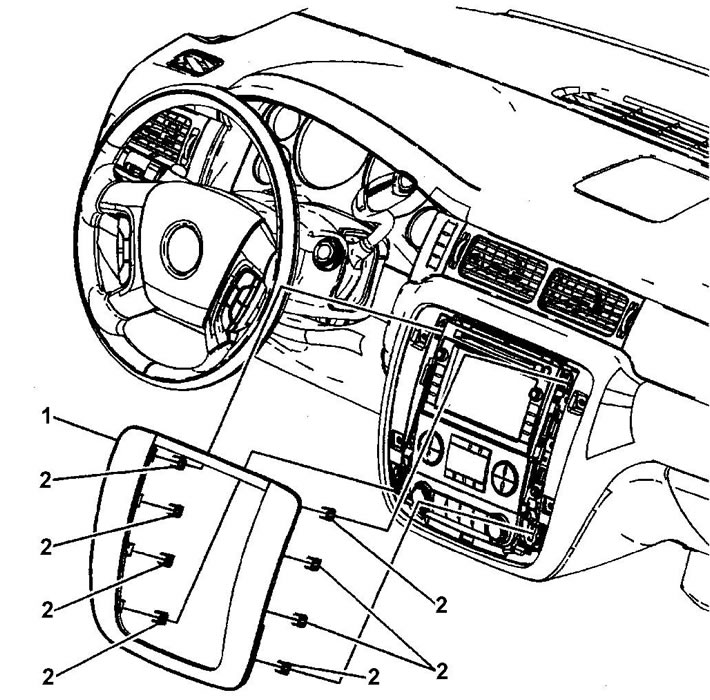
11. Remove the center instrument panel trim (see the picture on the next page).
- a) Using a screwdriver wrapped in protective tape, lift the center trim (1) by the edges and detach the fastening clips (2) from the instrument panel.
- b) Disconnect the clips from the center trim.
12. Remove the auxiliary equipment switch.
13. Remove the heater/air conditioner control unit.
14. Remove the radio.
15. Remove the passenger airbag unit.
Removing the central trim of the instrument panel
16. Remove the ventilation system deflector from the right side of the instrument panel.
17. Remove the instrument panel door
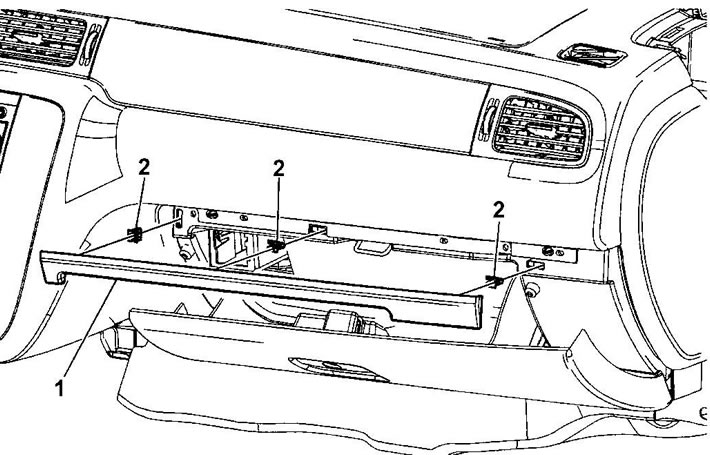
18. Remove the decorative trim of the glove compartment opening (1) by pulling it towards you and disconnecting the clips (2) from the instrument panel.
19. Remove the four bolts (1) securing the upper instrument panel trim. Tightening torque 9 Nm.
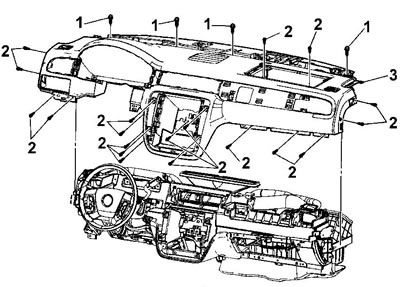
20. Remove the 18 bolts (2) securing the upper trim. Tightening torque 2 Nm.
21. Lift the trim and disconnect the wiring connectors.
Note: Remember the route of the wire bundles.
22. Using two people, remove the instrument panel trim.
Installation
23. Installation is carried out in reverse order.