
Contents: Examination ↧ Repair ↧
1. The heater consists of conductive tracks applied to the rear window.
2. Minor track breaks can be repaired without removing the rear window.
Examination
3. To check the operation of the heater, start the engine and turn on the heater.
4. Connect one wire of the test lamp to ground and carefully touch each track with the other wire.
5. The brightness of the lamp should increase as the wire moves along the element (see illustration). If the lamp is equally bright at both ends of the line, check the ground wire contact. Each track should be checked in at least two places.
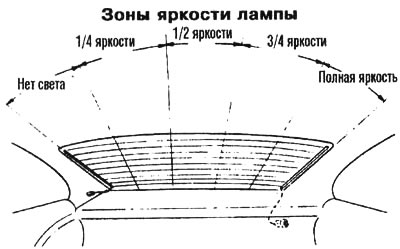
17.5a. When the rear window heating is working properly, the brightness of the lamp should change |
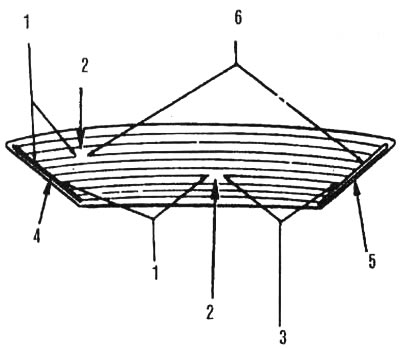
17.5b. When the heating threads are checked from the "ground" side, the lamp will light: 1 - No light; 2 - Damaged mesh; 3 - Full brightness; 4 - "Mass"; 5 - "+"; 6 - Full heat |
Repair
6. To repair a break in the track, it is recommended to use a special repair kit.
7. To repair, first turn off the heating and wait a few minutes.
8. Lightly polish the element to be repaired, then wipe it thoroughly with alcohol.
9. Use the repair kit according to the instructions.
10. Mix the hardener and conductive compound thoroughly.
11. Using a small wooden stick or spatula, apply the mixture between the strips of tape, lightly grabbing the undamaged areas at both ends (see illustration).
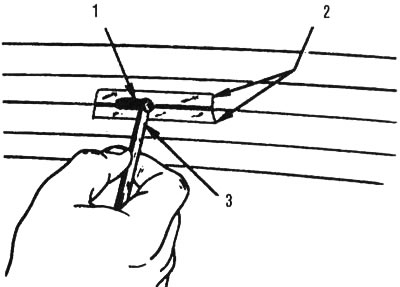
11/17 To repair damaged tracks, stick a strip of tape on both sides of the mesh, then apply the conductive compound using a small wooden stick or spatula: 1 - Repair material; 2 - Two strips of tape; 3 - Wooden spatula
12. Carefully remove the tape and direct the hot air stream directly onto the repaired area. It is recommended to use a hair dryer that provides a temperature of 260-375°C. Hold the hair dryer one inch away from the glass for two minutes.
13. If the composition changes color, you can use iodine infusion to clean it and restore the color. This mixture should not remain on the repaired area for more than 30 seconds.
14. Although the heating system is fully operational, it should not be turned on for at least 24 hours.
The original article can be found on the resource: chevyman.ru