
Contents: Removal ↧ Installation ↧
Removal
1. Relieve the fuel pressure (see section 2).
2. Disconnect the cable from the negative terminal of the battery.
3. Remove the fuel tank (see section 6).
4. The fuel pump and sensor are located inside the tank. The pump is secured with a ring clamp, which consists of an inner ring with three locking latches and an outer ring with three locking tails.
5. To disconnect the fuel pump and sensor, turn the inner ring counterclockwise until the retaining tabs are released from the tails (see illustration).
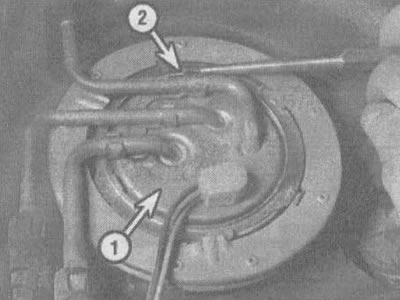
7.5 To remove the fuel sensor and fuel pump (1), turn the inner retaining ring (2) counterclockwise and remove the pump and O-ring from the fuel tank. Be especially careful not to damage the float mechanism
Note: If the rings are too tightly pressed together and cannot be released by hand, lightly tap a brass punch or wooden dowel with a hammer.
Warning! Do not use a steel punch, as a spark during operation may cause an explosion of gasoline vapors.
6. Remove the fuel pump and sensor from the tank (see illustration).
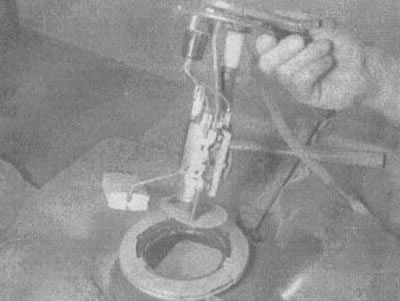
7.6 Remove the fuel pump from the fuel tank
Caution! The float and sensor are sensitive devices, do not hit them against the retaining rings when removing, otherwise the sensor may be damaged.
7. Replace the sealing ring around the inlet hole of the ring clamp.
8. Check the filter at the bottom end of the fuel pump (see illustration) If it is dirty, remove it, clean it in solvent and blow it out with compressed air. If the filter is too dirty to be cleaned, replace it.
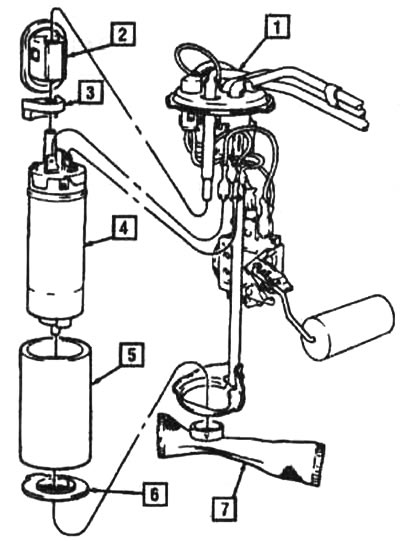
7.8. Fuel pump and sensor parts: 1 - sensor, 2 - pulsator (only on 3.8L engine), 3 - damper, 4 - fuel pump, 5 - soundproof sleeve, 6 - soundproofer, 7 - filter
9. If you need to separate the fuel pump and sensor, pull the fuel pump into the rubber connector and slide the pump off the lower mount. Care must be taken not to damage the rubber insulator and fuel filter during removal. After removing the pump from the bottom of the support, pull the pump out of the rubber connector.
Installation
10. Place the rubber gasket around the fuel tank opening and install the fuel pump and sensor into the tank.
11. Turn the inner locking ring clockwise until the locking pins are fully engaged with the shanks.
Note: Since you have installed a new O-ring, you may need to push down on the inner retaining ring so that the retaining tabs fit under the shanks.
12. Install the fuel tank (see section 5).
The article is reprinted from the website: «CHEVYMAN.ru»