
Note: Do not begin this work until the fuel gauge shows the tank is empty or nearly empty. If the tank has to be removed when full (for example, if the fuel pump is not working properly), pump out the remaining fuel from the tank.
1. If the fuel was not completely used up during the trip, then the remaining fuel can be pumped out before removing the tank from the car.
Caution! Do not suck gasoline with your mouth. Use special hoses.
2. Relieve the fuel pressure (see section 2)
3. Disconnect the cable from the negative terminal of the battery.
4. Raise the vehicle and support it securely on stands.
5. Locate the electrical connector for the fuel pump and fuel level sensor at the front of the tank and disconnect it. If your vehicle does not have this electrical connector, see item 9 below.
6. Disconnect the fuel feed and drain lines, vent line, filler tubes and vent tubes (see illustration).
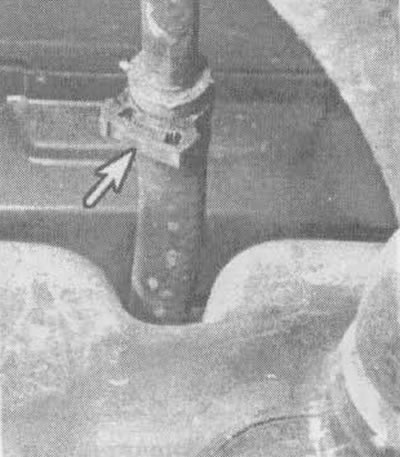
5.6 To disconnect the clamp (indicated by the arrow) on the ventilation tube, use a small screwdriver to press the locking tab on one side
7. Support the fuel tank with a wooden block and a trolley jack.
8. Disconnect both fuel tank mounting brackets (see illustrations).
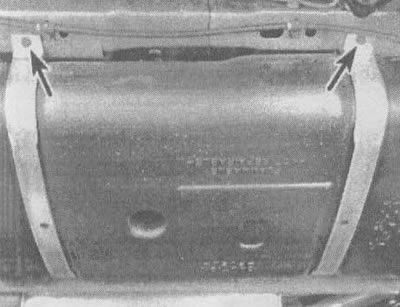
5.8a. Unscrew the bolts (indicated by arrows) from the fuel tank mounting brackets
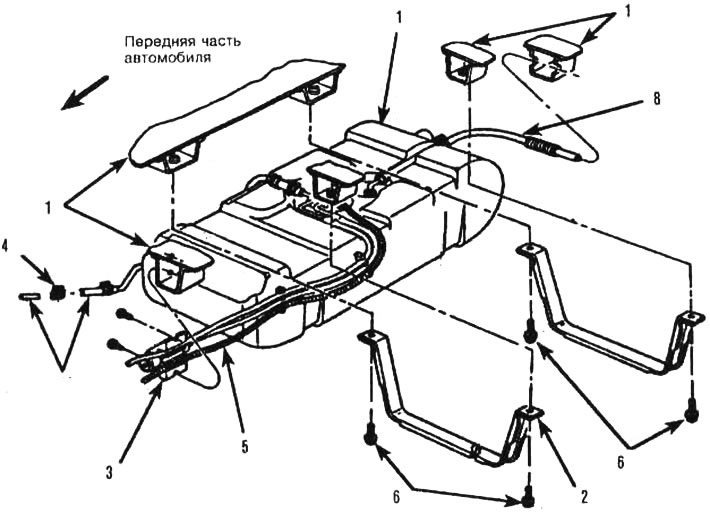
5.86. Fuel tank details: 1 - car bottom, 2 - clamp, 3 - ASM ventilation pipe, 4 - fuel pipe clamp, 5 - electrical wiring (aSM fuel tank), 6 - bolt, 7 - bracket, 8 - fuel tank ventilation pipe
9. Lower the gas tank enough to be able to disconnect the wires and ground harness from the fuel pump/sender if you have not already done so.
10. Remove the fuel tank from the vehicle.
11. Installation is carried out in reverse order.
(The text of the article was obtained from the website: CHEVYMAN.ru)