
1. We prepare the car for maintenance and repair.
2. Turn counterclockwise and remove the cover of the master brake cylinder reservoir. We add brake fluid to the reservoir.
3. Clean the clutch slave cylinder nipple from dirt. Remove the protective rubber cap from the bleed nipple.
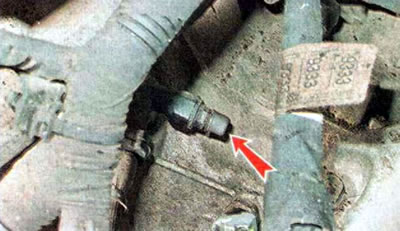
4. Place a transparent tube on the bleed nipple.
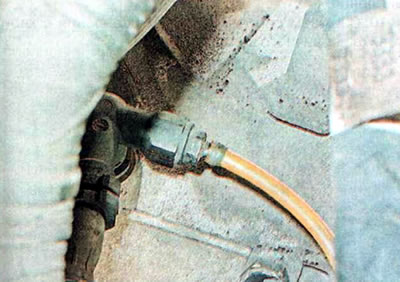
5. Lower the other end of the tube into the container.
6. The assistant presses the clutch pedal 5-6 times and holds it pressed.
7. Using an 11 mm wrench, turn it counterclockwise to loosen the bleed nipple.

8. As a result, liquid will begin to flow out through the bleed nipple.
9. After the brake fluid stops coming out of the hose, close the bleed nipple.
10. After waiting 5-10 seconds, repeat operations 6, 7, 8 and 9. Repeat the work until air bubbles stop coming out.
11. Disconnect the hose, remove the key and put the protective cap on the bleed nipple.
12. Check the brake fluid level and top it up to normal if necessary.