1. We prepare the car for maintenance and repair.
2. Remove the manual gearbox.
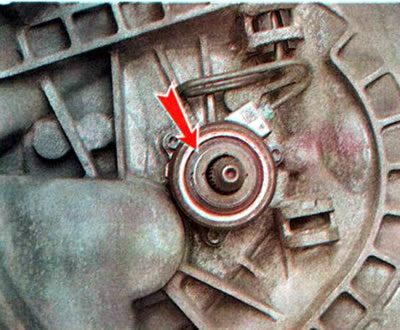
3. Check the ease of rotation and absence of play in the release bearing, as well as the absence of traces of brake fluid leakage at the clutch slave cylinder. If the above faults are detected, the clutch slave cylinder must be replaced (see below). The presence of traces of oil leaks along the gearbox primary shaft indicates a faulty gearbox primary shaft seal, oil leaks between the clutch slave cylinder and the gearbox housing indicate a faulty clutch slave cylinder housing sealing ring (see below).
4. To replace the clutch release slave cylinder, use a special key for 10 mm pipe fittings to unscrew the slave cylinder tube fitting.
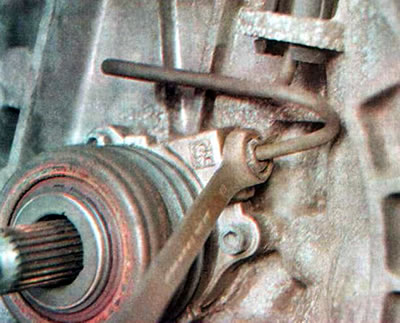
Warning! If the tube starts to rotate together with the nozzle, it must be replaced.
5. If it is necessary to replace the tube, use pliers with narrow jaws to squeeze the plastic sleeve clamps.
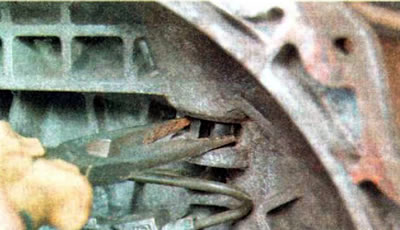
6. While holding the clamps in a compressed state, use a slotted screwdriver to push the sleeve upwards.
7. Using two slotted screwdrivers, hold the plastic sleeve in the upper position and push the tube down.

8. Remove the clutch release slave cylinder tube.
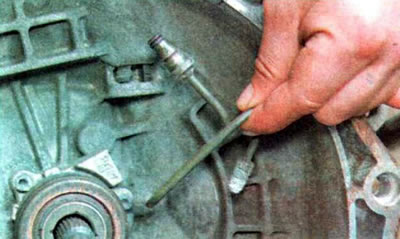
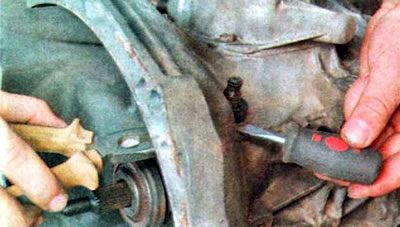
9. Using a 5 mm Allen key, unscrew the three bolts securing the clutch release slave cylinder.
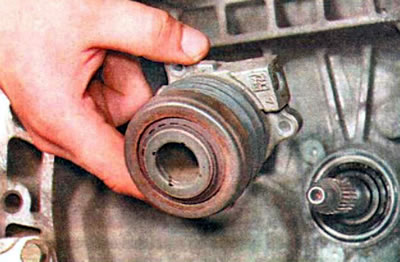
10. Remove the clutch slave cylinder from the primary shaft end.
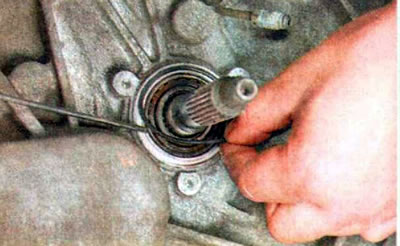
11. Using a thin slotted screwdriver, remove the sealing ring from the clutch slave cylinder housing.
Recommendation. When replacing the clutch release slave cylinder, be sure to replace the sealing ring.
12. Install the parts in reverse order.
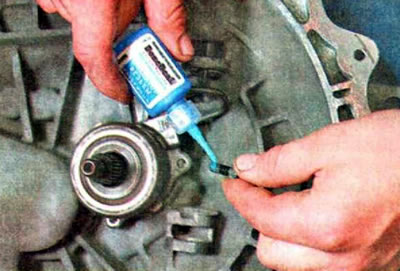
Recommendation. When assembling, apply anaerobic thread locker to the slave cylinder mounting bolts.