
2. Remove the drive belt (see chapter 1).
3. Remove the bolt from the air conditioning line bracket located on the engine mounting hook(see illustration).
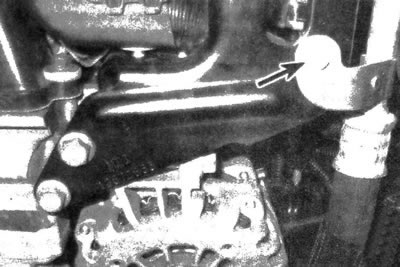
10.3. Remove the bolt that secures the air conditioning line bracket to the engine mounting hook
4. Remove the right engine mounting hook and, having unscrewed the mounting bolts, remove the generator from the engine (see illustrations).
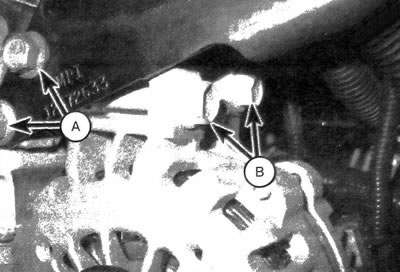
10.4a. Remove the engine mounting hook bolts (A) and the upper generator mounting bolts (B)...
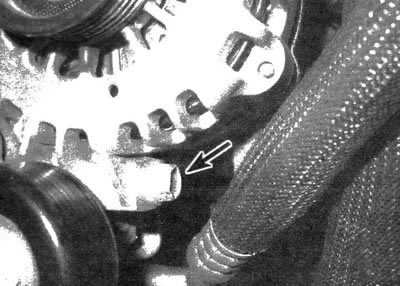
10.4b...then unscrew the bottom bolt
5. Disconnect the wiring from the generator connectors (see illustration).
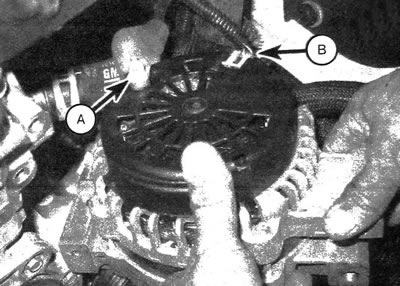
10.5 Lift the generator from the support, unscrew the nut and disconnect the wire from the output terminal (A), then disconnect the generator connector (B)
6. If replacement is planned, take the removed unit with you when you go to the store to purchase a new generator. Make sure the generators look the same. Inspect the connectors - their number, location and size must match. Also inspect the identification numbers stamped on the generator housings. The numbers must match on both nodes.
7. Frequently replaced generators (new and refurbished) supplied without pulley. In this case, it is necessary to move the pulley from the removed generator to the new unit. When purchasing a generator, ask the store if they offer a free pulley installation service.
8. Installation is carried out in the reverse order of removal. Tighten the generator mounting bolts to the specified torque.
9. Install the drive belt (see chapter 1).
10. To confirm the functionality of the installed generator, check the charging voltage (see subsection 9).