


Contents: Materials recommended for… ↧ Technical characteristics of water… ↧ Water leak diagnostics ↧ General tests ↧ Localized testing (spot check) ↧ Water Hose Test ↧ Air Hose Test ↧ Eliminating water leaks ↧
Materials recommended for eliminating water leaks
|
Flow zones
|
Restorative materials
|
|
Windshield, rear window
|
Urethane adhesive, putty kit or similar
|
|
Metallic connections
|
Brushable, paintable joint sealant
|
|
Ventilation ducts
|
3M™ Automotive Sealing and Glazing Compound or equivalent
|
|
Small cracks and holes
|
3M™ Anti-Condensation Sealant or equivalent
|
|
Large holes
|
3M™ Automotive Joint and Seam Sealant
|
|
Seals
|
3M™ 08011 Seal Adhesive or equivalent
|
|
Bolts, studs and screws
|
Sealing putty
|
Technical characteristics of water test bench
|
PROGRAM
|
Description
|
|
Nozzle type
|
Full jet spray nozzle No.1/2 GG-25 or similar with an internal angle of 60°.
|
|
Height of nozzle
|
Approximately 1600mm (63 inches) from the floor
|
|
Consumption
|
14 l (3.7 gallons) per minute
|
|
Pressure
|
155 kPa (22.5 psi) on the nozzle
|
|
Windshield and A-pillar test stand position
|
Approximately 30° down, 45° back, aimed at the corner of the windshield
|
|
Position of the B-pillar test stand
|
Approximately 30° down, 45° back, aimed at the center of the rear door
|
|
Position of the test stand for the rear window and rear end door
|
Approximately 30° down, 30° forward and pointed at approximately 610mm (24.0 inches) from the corner of the rear window
|
Water leak diagnostics
Correcting water leaks into the body requires proper testing and diagnosis. Water leaks should be corrected by adjusting unrelated parts and using proper repair materials. First, the conditions that cause the leak should be identified. For example, the leak may only occur when the vehicle is parked on an incline, or water may only appear in the spare tire compartment. Second, the area should be inspected for the source of the leak using the following techniques. If a general area of leakage is found, the exact point of leakage should be located using a water or air hose. If the general area of leakage is not obvious, water test stands should be used to locate it. It may be necessary to remove some interior trim panels or parts to locate the leak.
Important: Before any repair work begins, the source of all leaks must be located. Indiscriminate repair work may only stop the leak temporarily and make further repairs more difficult. Localized testing should be continued in the general area to locate all leaks.
General tests
1. Assemble water test rigs.
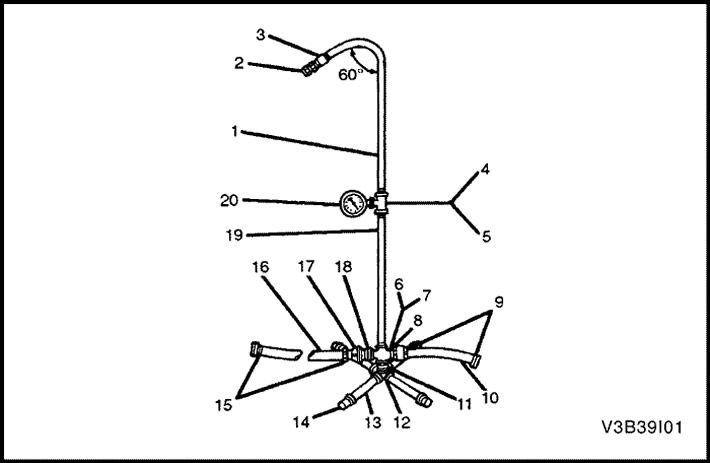
- 1/2" x 36" pipe
- Full jet spray nozzle No.1/2 GG-25 or similar, at a height of 1600 mm from the floor
- 1/2-inch coupling
- Step-down tee 1/2 inch by 1/2 inch by 1/4 inch (only on the right)
- 1/2-inch coupling (only on the left)
- 1/2-inch crosspiece (only on the right)
- 1/2-inch tee (only on the left)
- 1/2-inch pipe-to-hose connection (only on the right)
- 5/8-inch hose coupling with internal thread
- 5/8-inch supply hose (length 61 cm (2 ft), right side only)
- 1/2-inch closed spigot
- 1/2" Cross with Welded 1/2" End
- 1/2" x 12" nipple
- 1/2 inch tip
- 5/8-inch hose coupling with internal thread
- 5/8-inch cross hose (3.66 m (12 ft) long)
- 5/8-inch quick-release hose connection
- 1/2-inch pipe-to-hose connection
- 1/2" x 30" pipe (straight)
- 1/4-inch water pressure indicator (only on the right)
2. Prepare for water rig testing.
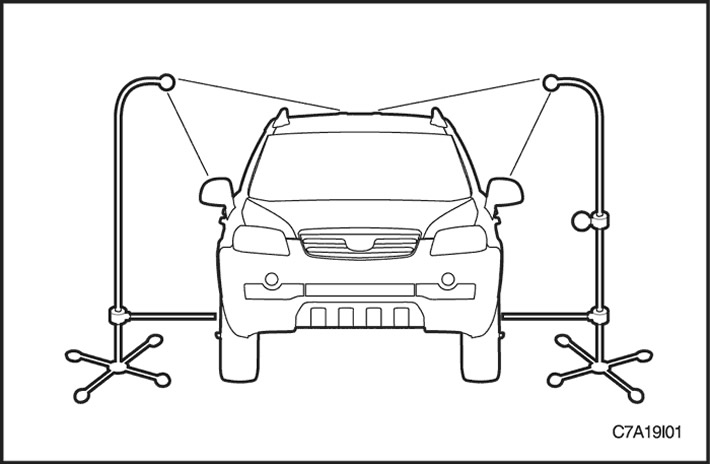
3. Conduct a test on water stands. See "Technical characteristics of the water test bench" in this section.
4. If the local water pressure does not reach the required value of 155 kPa (22.5 psi), both stands should be moved closer to the car so that the water jets overlap each other.
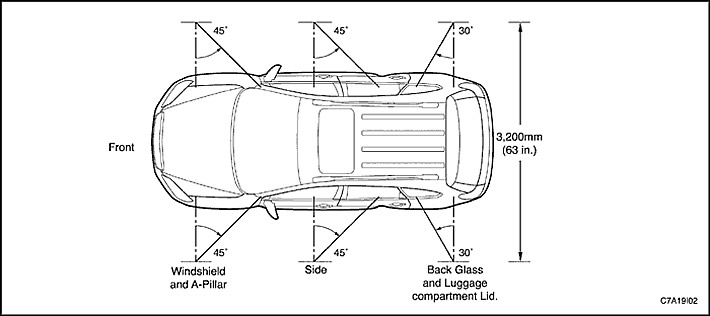
Localized testing (spot check)
1. Perform a localized test with a water or air hose.
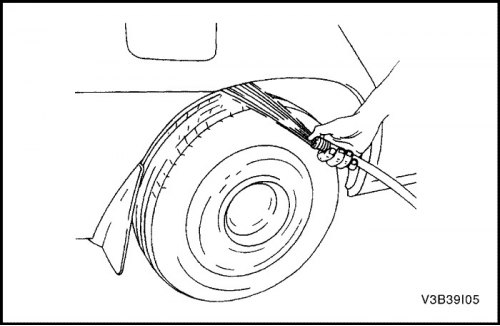
2. Begin the test by spraying air or water at the base of the suspected leak area. Continue spraying air or water, moving upward, until the leak is found.
Water Hose Test
1. Ask another person to get into the car to locate the leak.
2. Use a water hose without a nozzle.
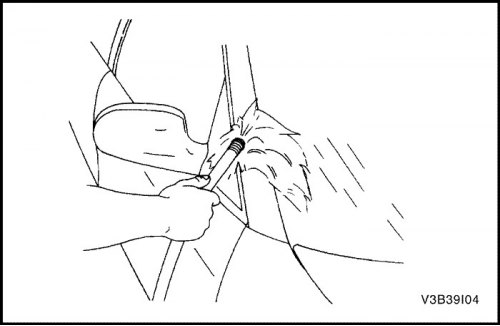
3. Start spraying water at the base of the suspected leak area. Continue spraying water, moving upward, until the leak is found.
Air Hose Test
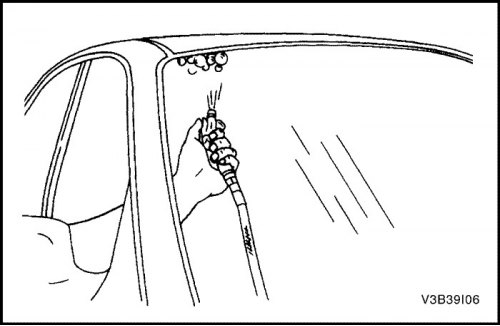
1. Apply soapy water to the exterior surface of the vehicle in the suspected leak area.
2. Bring air from inside the car. The air pressure should not exceed 205 kPa (29.7 psi).
3. Determine the location of the leak by the bubbles that form in the soapy water.
Eliminating water leaks
Some leaks around glass can be repaired without removing the glass.
Important: This repair can only be performed on glass installed on urethane.
1. Remove protective molding in the area of the leak. It may be necessary to remove decorative molding or some interior trim panels to locate the leak.
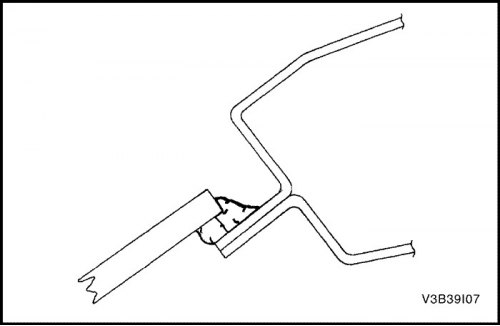
2. While spraying water onto the leaking area, gently press on the glass, pushing it outward, to determine the size of the leak.
3. Mark the location of the leak.
4. Clean the dirt in this area with water. Dry this area with an air hose.
5. Using a sharp knife, trim off any uneven edges of the adhesive putty around the leak at a distance of 75 to 100 mm (from 3 to 4 inches) on both sides of the leak.
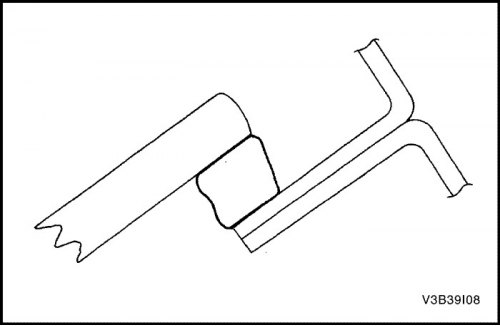
6. Using a sharp knife, trim off any uneven edges of the adhesive material around the leak at a distance of 75 to 100 mm (from 3 to 4 inches) on both sides of the leak.
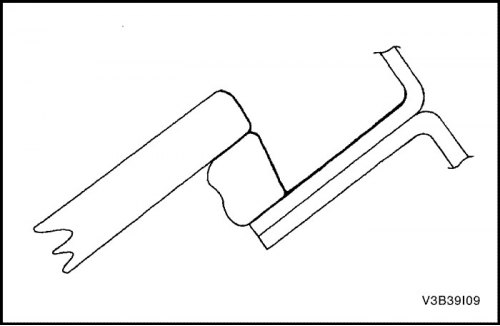
7. Prime the cut area with primer.
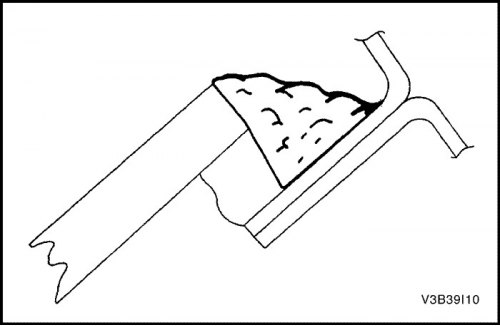
8. Allow the primer to dry for 5 minutes.
9. Apply glue to the leak and at a distance of 75 to 100 mm (from 3 to 4 inches) on both sides of the leak.
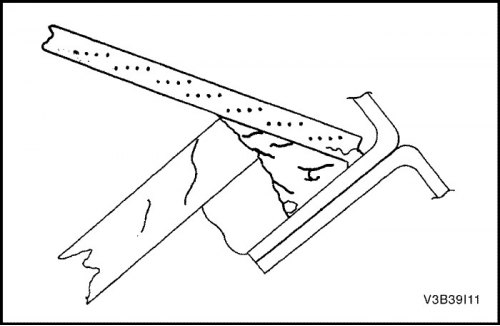
10. Immediately after applying the adhesive, use a flat stick or similar tool to ensure that the adhesive penetrates into the leak area and into the joints between the original material and the vehicle body to ensure a tight seal.
11. Spray warm or hot water on the repaired area to determine if the leak has been fixed. Do not spray high pressure water on freshly applied adhesive.
12. Install trim panels if they were removed.
13. Install the decorative molding if it was removed.
14. Install protective molding.
Important: When the water leak has been eliminated, repeat the test using water test benches. Do not perform localized testing of freshly repaired areas, as the repair material may shift under the influence of unnatural pressure.
The article was borrowed from the website: ChevyMan