
ChevyMan.ru
Mazda Mitsubishi Toyota Land Rover Honda Kia Nissan
English Русский
Български
Беларускі
Український
Српски
Hrvatski
Română
Polski
Slovenský
Magyar
|
Articles | Sitemap | Contacts |


Home   Aveo   Captiva   Cruze   Lacetti   Lanos   Niva   Tahoe   Others  
Lacetti 1 (2002-2009)
  • Home
  • Lacetti
  • J200 (2002-2009)
  • Power unit
  • Cooling system
  • Removal and checking the thermostat

Removal and checking the thermostat (Chevrolet Lacetti J200)

            0

We replace the thermostat when the engine's thermal conditions are disrupted, when the engine either overheats or does not heat up enough.

When checking the thermostat on a vehicle after starting a cold engine, the lower hose that comes off the radiator should remain cold for a while. The thermostat valve is closed, and the fluid circulates in the small circuit, bypassing the radiator. After the fluid temperature reaches 87°C, the lower radiator hose should begin to heat up quickly, indicating that the coolant has begun to circulate in the large circuit.

Drain the liquid from the engine cooling system (see Replacing the coolant).
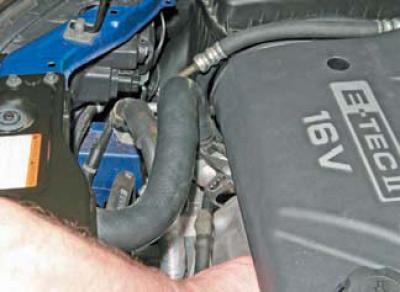
Drain the liquid from the engine cooling system (see Replacing the coolant).


Using sliding pliers, squeeze the ends of the clamp securing the radiator supply hose and slide the clamp along the hose.
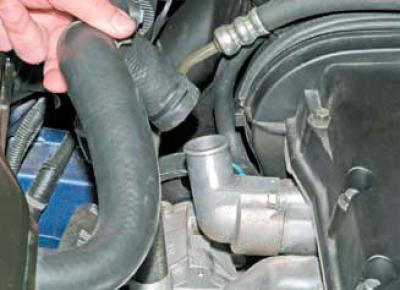
Using sliding pliers, squeeze the ends of the clamp securing the radiator supply hose and slide the…


We remove the hose from the thermostat cover branch pipe.
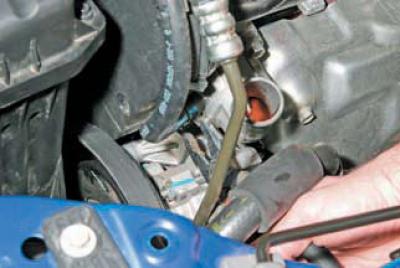


We remove the hose from the thermostat cover branch pipe.


Using pliers, squeeze the ends of the clamp securing the hose for supplying fluid to the throttle heating unit and slide the clamp along the hose.
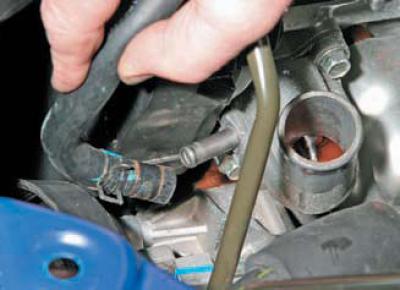
Using pliers, squeeze the ends of the clamp securing the hose for supplying fluid to the throttle…


We remove the hose from the thermostat housing fitting.
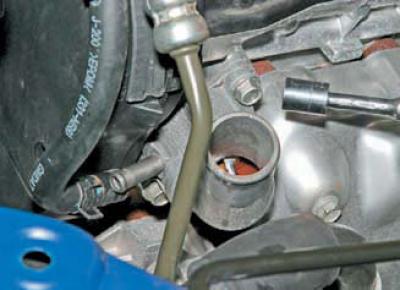
We remove the hose from the thermostat housing fitting.


Using a 12 mm socket head, unscrew the two bolts securing the thermostat housing to the cylinder head.
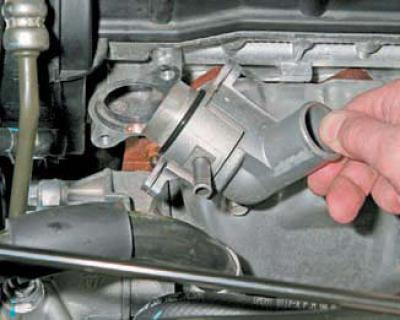


Using a 12 mm socket head, unscrew the two bolts securing the thermostat housing to the cylinder…


We remove the housing with the thermostat cover.
We remove the housing with the thermostat cover.


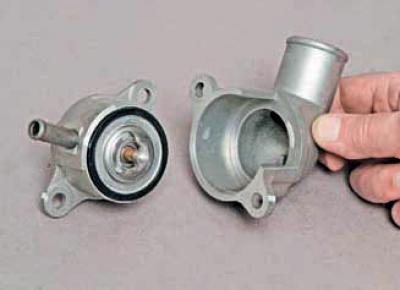
Remove the cover from the thermostat housing.
Remove the cover from the thermostat housing.


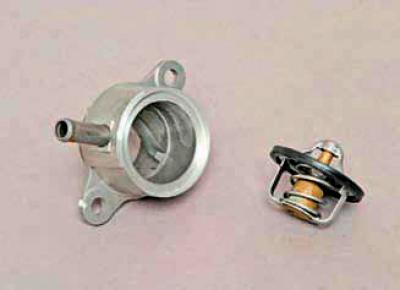
We remove the thermostat from the housing.
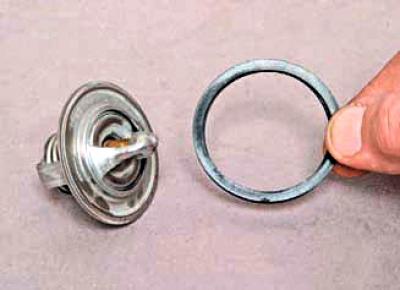
We remove the thermostat from the housing.


We remove the rubber gasket from the thermostat.
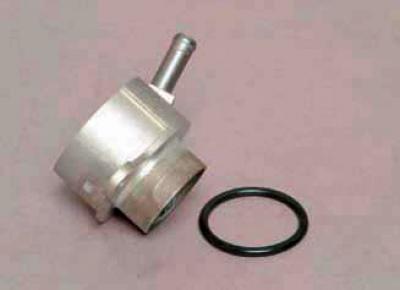


We remove the rubber gasket from the thermostat.


The connection between the thermostat housing and the cylinder head is sealed with a rubber ring.

If the gasket and sealing ring are damaged or have lost elasticity, they must be replaced with new ones.

To check the thermostat, lower it into a vessel with coolant. Heat the vessel, stirring the liquid at the same time and monitoring the start of the valve opening with a thermometer. The valve stem should start to extend at a temperature of 87°C…
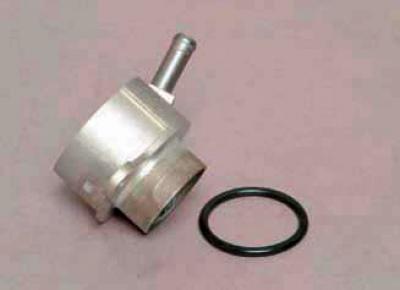
To check the thermostat, lower it into a vessel with coolant. Heat the vessel, stirring the liquid…


…which is indicated on the thermostat flange.

At a liquid temperature of 102°C, the valve should be fully open - the stem stroke should be at least 7 mm.

When installing a thermostat…
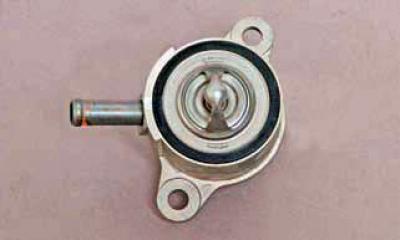
When installing a thermostat…


…we insert it into the case, orienting it as shown in the photo.


We install the thermostat in the reverse order.

We fill the cooling system with liquid.

The article was checked: Vladimir Romannikov
This article is available at russian, bulgarian, belarusian, ukrainian, serbian, croatian, romanian, polish, slovak, hungarian

Share information:

Previous articles
Lacetti 1: Cooling system
Next articles

Engine cooling system device
Removal the expansion tank
Removal the radiator fan
Removal the radiator
Removal the coolant pump
Removal the low speed fan resistor


See similar articles on the topic of Chevrolet cars:
Thermostat — Removal, Checking and Installation Chevrolet Aveo T250 (2006-2011)
Checking oil pressure Chevrolet Captiva 1 (2006-2018)
Checking the wheels Chevrolet Cruze 1 (2008-2016)
Removal and checking the thermostat Chevrolet Lanos T150 (2002-2009)
Checking the engine on a car after repair Chevrolet Niva 1 (2002-2016)
Checking the air filter with thermostat Chevrolet Tahoe 1 (1992-2000)
Checking and replacing the thermostat Chevrolet Lumina 1 (1989-1994)
Link in different formats to this page


Visitor comments

No comments yet


How much will 35 + 49 =


Lacetti 1 (2002-2009) 
  • General information
  • User manual
  • Maintenance
  • Power unit
  • Engine repair
  • Control system
  • Supply system
  • Cooling system
  • Exhaust system
  • Transmission
  • Clutch
  • Manual gearbox
  • Front wheel drives
  • Chassis
  • Front suspension
  • Rear suspension
  • Steering
  • Brake system
  • Body
  • Repair of body elements
  • Heating and air conditioning
  • Electrical equipment
  • Engine electrics
  • Lighting and lamps
  • Equipment and devices
  • Electrical circuits


ChevyMan.ru © 2017-2026 · Mobile version · Feedback · Site search · Interesting to read · Sitemap: EN BG BY UA RS HR RO PL SK HU

Aveo 2003-2008 · Aveo 2006-2011 · Aveo 2012-2018 · Captiva 2006-2018 · Cruze 2008-2016 · Lacetti 2002-2009 · Lanos 2002-2009 · Niva 2002-2016 · Tahoe 1992-2000 · Tahoe 2000-2014 · Lumina 1 1989-1994 · Trailblazer 1 2001-2008 · Orlando 1 2010-2018 ·
🛡️ For your security and to improve our service, this site uses cookies. You can disable them in your browser.