
ChevyMan.ru
Mazda Mitsubishi Toyota Land Rover Honda Kia Nissan
English Русский
Български
Беларускі
Український
Српски
Hrvatski
Română
Polski
Slovenský
Magyar
|
Articles | Sitemap | Contacts |


Home   Aveo   Captiva   Cruze   Lacetti   Lanos   Niva   Tahoe   Others  
Cruze 1 (2008-2016)
  • Home
  • Cruze
  • J300 (2008-2016)
  • General information
  • Maintenance
  • Checking the wheels

Checking the wheels (Chevrolet Cruze J300)

            0

You will need: a pump or compressor with a pressure gauge, a caliper.

Helpful Hints: Check your tire pressure regularly (Table 4.2). High or low pressure will cause premature tire wear and poor vehicle handling and stability.

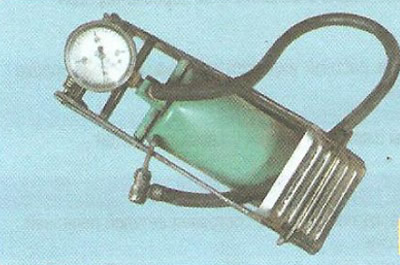
Helpful Hints: Check your tire pressure regularly (Table 4.2). High or low pressure will cause…

Helpful Hints: Check your tire pressure regularly (Table 4.2). High or low pressure will cause…


We recommend using a foot pump with a built-in pressure gauge.


To ensure that the tires wear evenly, rotate the wheels every 15,000 km in accordance with the diagram in Fig. 4.1.
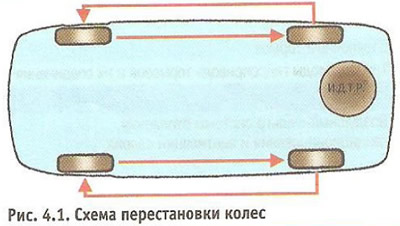

To ensure that the tires wear evenly, rotate the wheels every 15,000 km in accordance with the…


In addition, balance the wheels and check the front wheel alignment angles every 30,000 km. To do this, contact a specialized workshop.


Note: There is a sticker on the B-pillar in the driver's door opening that indicates the recommended tire pressure for different vehicle loads.
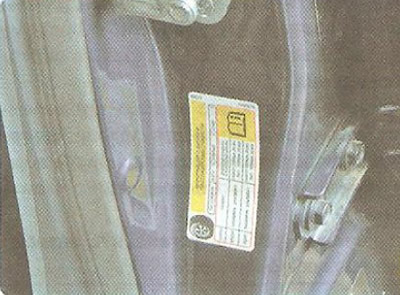

Note: There is a sticker on the B-pillar in the driver's door opening that indicates the…


Warnings: All wheel repair work should be carried out in specialized workshops. Check that the wheel is balanced after repair.


Operating tires with worn treads can lead to an accident.


1. Carefully inspect the tires and wheel rims. Make sure there are no cuts, cracks, delamination of the tires that expose the cord, or foreign objects stuck in the rubber. If the cuts reach the cord, the steel cord will corrode from penetrating moisture. Check for dents and cracks on the edges of the wheel rims.
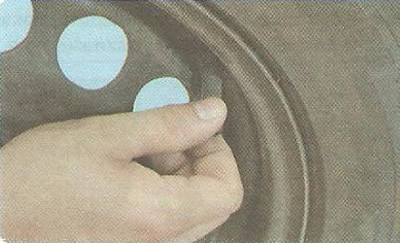
1. Carefully inspect the tires and wheel rims. Make sure there are no cuts, cracks, delamination of…


2. Unscrew the cap from the valve...

2. Unscrew the cap from the valve...
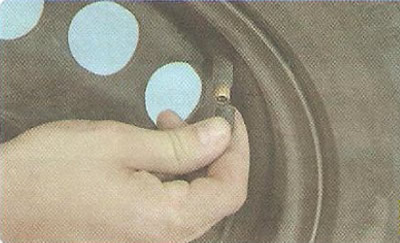

3. ...and remove the cap.
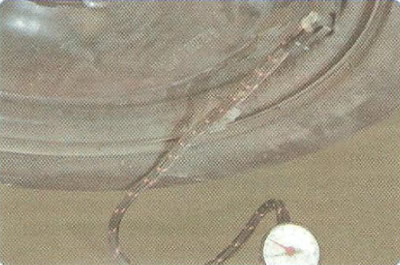


3. ...and remove the cap.


4. Check the air pressure in the tire. To do this, use a pump with a built-in pressure gauge. Connect the pump hose to the valve and check the pressure.

5. If the pressure is less than required, add air, monitoring the pressure on the pressure gauge.

6. If the pressure is higher than required, press the special cap projection with the key onto the valve tip and release air from the tire. Measure the pressure with a pressure gauge. Repeat these operations until the pressure is normal.
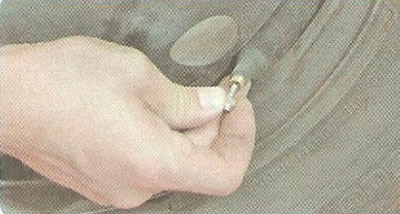
6. If the pressure is higher than required, press the special cap projection with the key onto the…


7. If you notice that the air pressure in your tires is constantly dropping; try to tighten the valve valve more tightly using a cap and a key.

Note: This is what the protective cap A looks like with the key for tightening the valve core B.
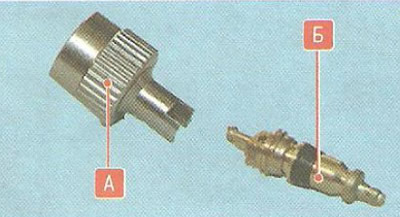


Note: This is what the protective cap A looks like with the key for tightening the valve core B.


Warning: To avoid contamination of the valve stems, do not operate the vehicle without the protective caps. If the caps have been lost, be sure to install new ones.
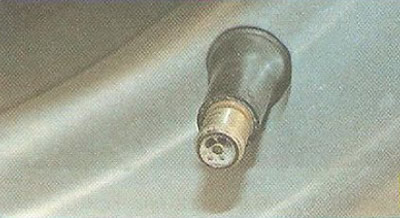

Warning: To avoid contamination of the valve stems, do not operate the vehicle without the…


8. To check the valve for leaks, wet the valve opening. If bubbles of escaping air appear.
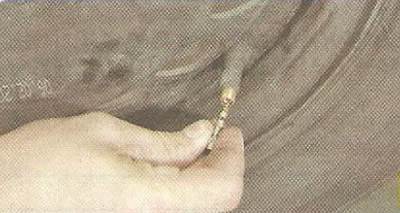
8. To check the valve for leaks, wet the valve opening. If bubbles of escaping air appear.


9. Replace the valve core by unscrewing the faulty one using a cap with a key.


9. Replace the valve core by unscrewing the faulty one using a cap with a key.


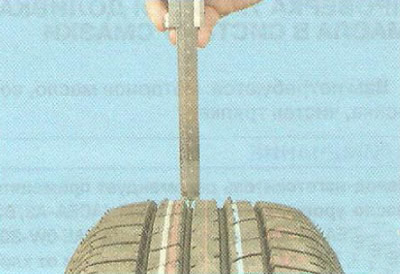
10. Measure the remaining tread depth with a caliper. If the tread depth is 1.6 mm or less, replace the tire.
10. Measure the remaining tread depth with a caliper. If the tread depth is 1.6 mm or less, replace…


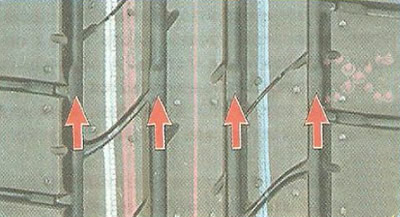
11. If you don't have a caliper at hand, you can check the tread depth visually using the tire wear indicators in the form of solid transverse stripes on the tread.

Note: The locations of the indicators are marked on the sidewall of the tire with a triangle...
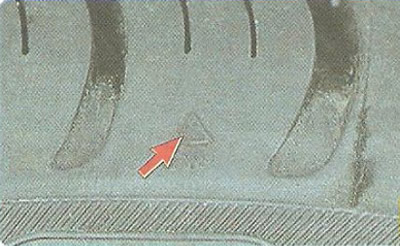

Note: The locations of the indicators are marked on the sidewall of the tire with a triangle...


...or the letters "TWI".
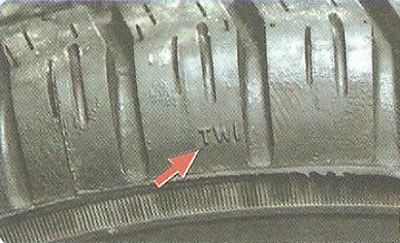


...or the letters «TWI».


12. Check the tightness of the wheel nuts and, if necessary, tighten them to a torque of 90-120 N·m.

12. Check the tightness of the wheel nuts and, if necessary, tighten them to a torque of 90-120 N·m.


13. Tighten the wheel nuts gradually in a crisscross pattern.

[The original article can be found on the resource «CHEVYMAN.RU»]

The article was checked: Vladimir Romannikov
This article is available at russian, bulgarian, belarusian, ukrainian, serbian, croatian, romanian, polish, slovak, hungarian

Share information:

Previous articles
Cruze 1: Maintenance
Next articles

Safety Rulestechnics
Vehicle maintenance regulations
Checking the level and adding oil to the lubrication system
Checking the level and adding coolant
Checking the level and adding fluid to the brake master cylinder reservoir
Checking the level and adding fluid to the power steering reservoir
Checking the level and adding fluid to the washer reservoir


See similar articles on the topic of Chevrolet cars:
Checking the wheels Chevrolet Aveo T300 (2012-2018)
Checking the installation angles (wheels). Checking the alignment (adjustment) Chevrolet Captiva 1 (2006-2018)
Checking the condition of wheels and tires Chevrolet Lacetti 1 (2002-2009)
Checking the condition of wheels and tires Chevrolet Lanos T150 (2002-2009)
Checking the engine on a car after repair Chevrolet Niva 1 (2002-2016)
Checking the engine compartment Chevrolet Tahoe 1 (1992-2000)
Checking the technical condition of the wheels Chevrolet Orlando 1 (2010-2018)
Link in different formats to this page


Visitor comments

No comments yet


How much will 48 + 16 =


Cruze 1 (2008-2016) 
  • General information
  • User manual
  • Troubleshooting
  • Maintenance
  • Power unit
  • Engine repair
  • Lubrication system
  • Cooling system
  • Exhaust system
  • Supply system
  • Control system
  • Transmission
  • Clutch
  • Car gearbox
  • Front wheel drives
  • Chassis
  • Front suspension
  • Rear suspension
  • Steering
  • Brake system
  • Body
  • Exterior (external elements)
  • Interior (internal elements)
  • Doors, covers and windows
  • Heating and air conditioning
  • Security systems
  • Electrical equipment
  • Equipment and devices
  • Power devices
  • Lighting and signaling
  • Electrical circuits


ChevyMan.ru © 2017-2026 · Mobile version · Feedback · Site search · Interesting to read · Sitemap: EN BG BY UA RS HR RO PL SK HU

Aveo 2003-2008 · Aveo 2006-2011 · Aveo 2012-2018 · Captiva 2006-2018 · Cruze 2008-2016 · Lacetti 2002-2009 · Lanos 2002-2009 · Niva 2002-2016 · Tahoe 1992-2000 · Tahoe 2000-2014 · Lumina 1 1989-1994 · Trailblazer 1 2001-2008 · Orlando 1 2010-2018 ·
🛡️ For your security and to improve our service, this site uses cookies. You can disable them in your browser.