ChevyMan.ru
Mazda Mitsubishi Toyota Land Rover Honda Kia Nissan
English Русский
Български
Беларускі
Український
Српски
Hrvatski
Română
Polski
Slovenský
Magyar
|
Articles | Sitemap | Contacts |


Home   Aveo   Captiva   Cruze   Lacetti   Lanos   Niva   Tahoe   Others  
Aveo T300 (2012-2018) Aveo T250 (2006-2011) Aveo T200 (2003-2008)
  • Home
  • Aveo
  • T300 (2012-2018)
  • General information
  • Maintenance
  • Checking the wheels

Checking the wheels (Chevrolet Aveo T300)

            0

You will need: a pressure gauge, a pump, and a caliper.

Maintaining the correct tire pressure ensures the best combination of vehicle control, tire durability, and your comfort. Low tire pressure causes rapid and uneven tread wear, impairs vehicle control, increases fuel consumption, and also increases the likelihood of tire failure due to overheating. Tires with excessively high air pressure impair the smoothness of the vehicle and are more susceptible to damage from impacts with road bumps, potholes, etc., and, in addition, excessively high tire pressure causes uneven tread wear. It is recommended to visually check the tire pressure daily. If you determine by eye that the tire pressure has dropped, check the air pressure with a tire pressure gauge. Check the air pressure in the tires of all wheels with a tire pressure gauge at least once a month. Even in completely serviceable tires, the air pressure can drop by 10-20 kPa per month (0.1-0.2 kgf/cm²). Remember to check the air pressure in the spare tire at the same time as checking the other tires. Check the air pressure only on cold tires. Tires can be considered cold if at least three hours have passed since the car was stopped or if you have driven no more than 1.5 km after a long period of parking. Inflate the tire if necessary or release some air from it to bring the pressure to the standard indicated on the plate attached to the door pillar on the driver's side. After the car has run for several kilometers, the tires have time to warm up, and the air pressure in them increases by 30-40 kPa (0.3-0.4 kgf/cm²) compared to the cold state. This is not a sign of malfunction. Do not reduce the air pressure in warm tires to bring it to the nominal value that is set for cold tires. Otherwise, the tires will be used with reduced air pressure.


RECOMMENDATIONS: Check the air pressure in the tires regularly (Table 4.2). Maintaining the nominal air pressure in the tires ensures the best combination of tire durability, controllability and vehicle comfort.
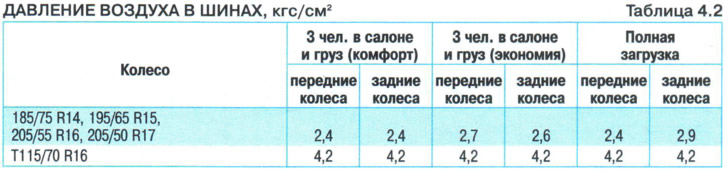
RECOMMENDATIONS: Check the air pressure in the tires regularly (Table 4.2). Maintaining the nominal…

RECOMMENDATIONS: Check the air pressure in the tires regularly (Table 4.2). Maintaining the nominal…


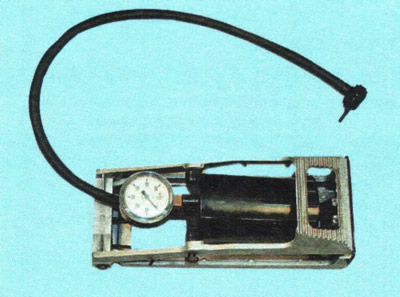
We recommend using a foot or electric pump with a built-in pressure gauge.

Every time you check the air pressure in your tires, carefully inspect them for mechanical damage to the tread and sidewalls, small stones, nails stuck in the tread, signs of severe tread wear. Be especially attentive to the following tire defects:
  • local swelling or bulging of the carcass in the tread area or on the sidewalls. A tire with such a defect is subject to replacement;
  • cuts, cracks or delamination of the sidewall carcass. Replace the tire if the carcass cord is exposed.

To ensure that the tires wear evenly, rotate the wheels every 10,000 km in accordance with the diagram in Figure 4.1.
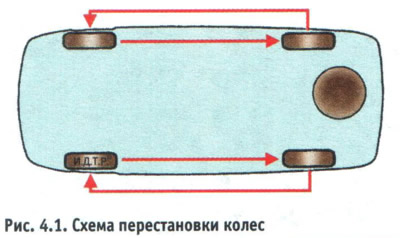


To ensure that the tires wear evenly, rotate the wheels every 10,000 km in accordance with the…


In addition, balance the wheels and check the front wheel alignment angles every 20,000 km. To do this, contact a specialized workshop.
In addition, balance the wheels and check the front wheel alignment angles every 20,000 km. To do…


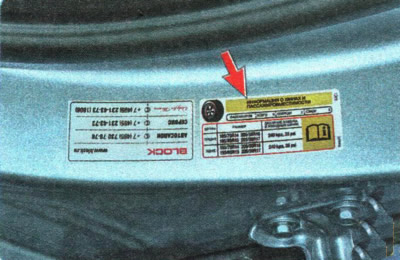
NOTE: There is a sticker located on the B-pillar in the driver's door opening that indicates the tire pressure for different vehicle loading conditions.

NOTE: There is a sticker located on the B-pillar in the driver's door opening that indicates the…


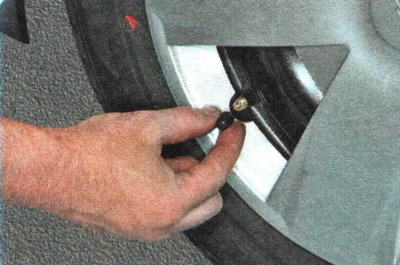
1. Unscrew the cap from the valve.


1. Unscrew the cap from the valve.


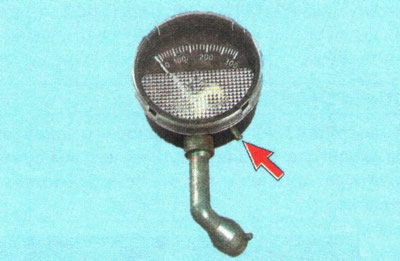
2. Check the air pressure in the tire. To do this, reset the pressure gauge readings to zero by pressing the special button on the pressure gauge body...
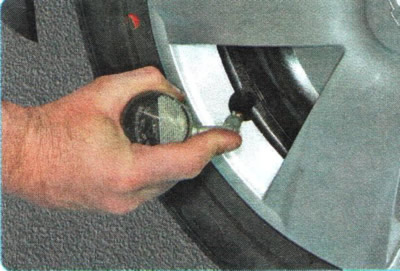
2. Check the air pressure in the tire. To do this, reset the pressure gauge readings to zero by…


3. ...connect the pressure gauge to the valve and press the valve spool with the tip of the pressure gauge.
3. ...connect the pressure gauge to the valve and press the valve spool with the tip of the…


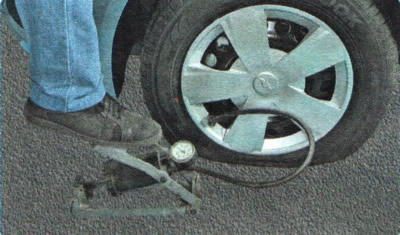
4. If the pressure is less than required, connect the pump hose tip to the valve and pump air, monitoring the pressure on the pressure gauge on the pump.
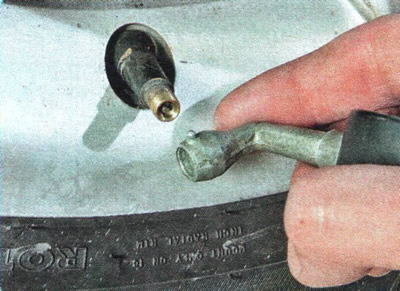


4. If the pressure is less than required, connect the pump hose tip to the valve and pump air,…


5. If the pressure is higher than required, press the special protrusion of the pressure gauge onto the valve tip and release air from the tire. Measure the pressure with the pressure gauge. Repeat these operations until the pressure reaches the norm.

NOTE: Remember to check the spare tire pressure at the same time as you check the other tire pressures.
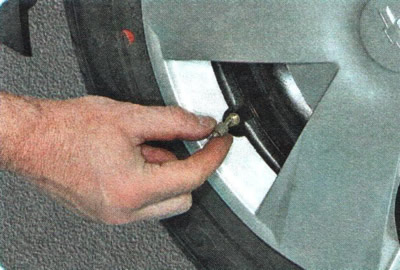

NOTE: Remember to check the spare tire pressure at the same time as you check the other tire…


6. If you notice that the air pressure in your tires is constantly dropping, try tightening the valve core more tightly using the cap and key.
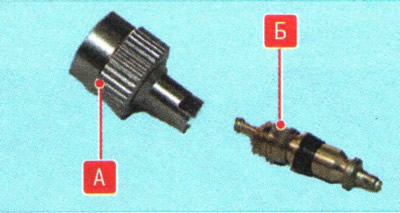
6. If you notice that the air pressure in your tires is constantly dropping, try tightening the…


NOTE: This is what the protective cap A with the valve core tightening key and the valve core B of the wheel valve look like.


WARNING: To avoid contamination of the valve cores, do not operate the vehicle without the protective caps. If the caps are lost, be sure to install new ones.
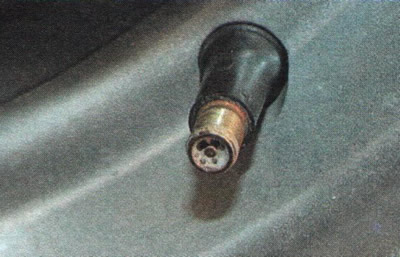

WARNING: To avoid contamination of the valve cores, do not operate the vehicle without the…


7. Apply liquid to the valve so that it fills its cavity.
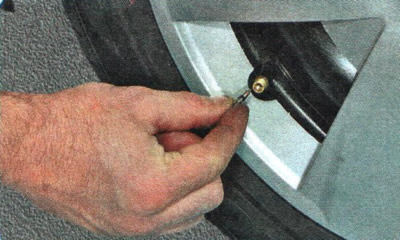
7. Apply liquid to the valve so that it fills its cavity.


8. If bubbles continue to form and the valve cannot be tightened further, replace it. If replacement does not help, replace the valve.
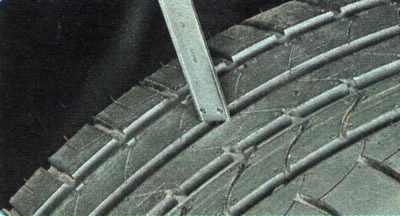
8. If bubbles continue to form and the valve cannot be tightened further, replace it. If…


9. Measure the remaining tread depth with a caliper. If the tread depth is 1.6 mm or less, replace the tire.
9. Measure the remaining tread depth with a caliper. If the tread depth is 1.6 mm or less, replace…


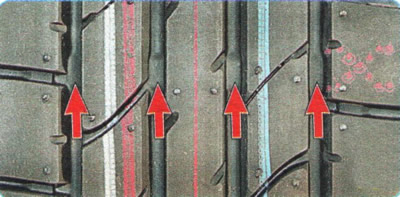
10. If you don't have a caliper at hand, you can check the tread depth visually using the tire wear indicators in the form of solid transverse stripes that appear on the tread when it is at its maximum wear.

WARNING: The tires that your vehicle is equipped with are equipped with wear limit indicators molded into the tread. When the tread is significantly worn, smooth transverse stripes about 10 mm wide appear on its surface, located at a certain pitch around the circumference of the tire. Their appearance indicates a decrease in the tread depth to 1.6 mm. Worn tires do not create sufficient traction when driving on wet road surfaces. Therefore, if three wear indicators are visible on the tread (or more than three), the tire must be replaced.

WARNING: The tires that your vehicle is equipped with are equipped with wear limit indicators…


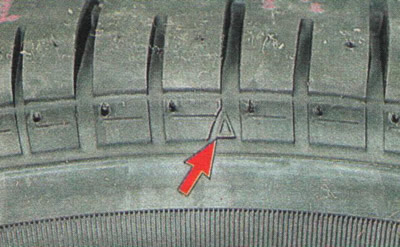
The locations of the indicators are marked on the sidewall of the tire with a triangular symbol...
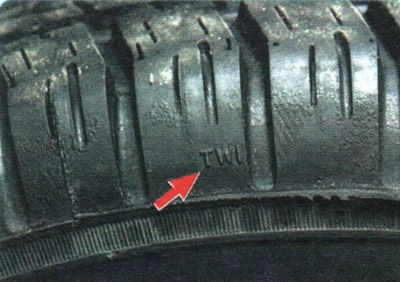
The locations of the indicators are marked on the sidewall of the tire with a triangular symbol...


...or the letters "TWI" (tread wear index).
...or the letters «TWI» (tread wear index).


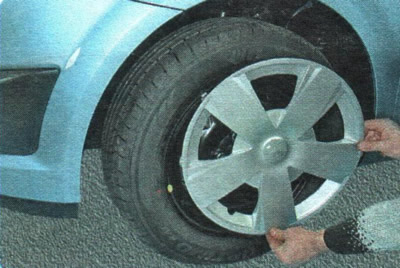
11. Remove the decorative cap...

NOTE: Vehicles equipped with alloy wheels do not have a wheel trim.

NOTE: Vehicles equipped with alloy wheels do not have a wheel trim.


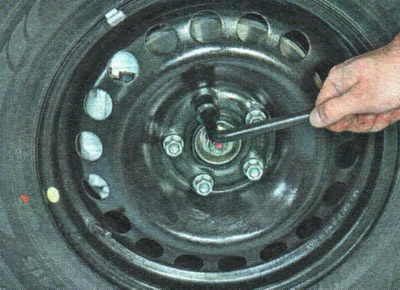
12. ...check the tightness of the wheel nuts and, if necessary, tighten them to a torque of 90 Nm.

[The original article is on the website: «chevyman»]

The article was checked: Vladimir Romannikov
This article is available at russian, bulgarian, belarusian, ukrainian, serbian, croatian, romanian, polish, slovak, hungarian

Share information:

Previous articles
Aveo T300: Maintenance
Next articles

Safety regulations
General provisions for vehicle maintenance
Checking the level and adding oil to the lubrication system
Checking the level and adding coolant
Checking the level and adding brake fluid to the brake system and clutch reservoir
Checking the level and adding working fluid to the power steering reservoir
Checking the level and adding fluid to the washer reservoir


See similar articles on the topic of Chevrolet cars:
Checking the installation angles (wheels). Checking the alignment (adjustment) Chevrolet Captiva 1 (2006-2018)
Checking the wheels Chevrolet Cruze 1 (2008-2016)
Checking the condition of wheels and tires Chevrolet Lacetti 1 (2002-2009)
Checking the condition of wheels and tires Chevrolet Lanos T150 (2002-2009)
Checking the engine on a car after repair Chevrolet Niva 1 (2002-2016)
Checking the engine compartment Chevrolet Tahoe 1 (1992-2000)
Checking the technical condition of the wheels Chevrolet Orlando 1 (2010-2018)
Link in different formats to this page


Visitor comments

No comments yet


How much will 13 + 30 =


Aveo T300 (2012-2018) 
  • General information
  • Vehicle device
  • User manual
  • Main malfunctions
  • Maintenance
  • Power unit
  • Engine
  • Lubrication system
  • Cooling system
  • Supply system
  • Exhaust system
  • Transmission
  • Clutch
  • Manual gearbox
  • Automatic gearbox
  • Front wheel drives
  • Chassis
  • Front suspension
  • Rear suspension
  • Steering
  • Brake system
  • Body
  • Exterior
  • Interior
  • Doors and trunk
  • Security systems
  • Electrical equipment
  • Engine electrics
  • Equipment and devices
  • Heating and air conditioning
  • Electrical circuits


Aveo T250 (2006-2011) 
  • Manual
  • Driver's workplace
  • Salon equipment
  • Vehicle characteristics
  • Maintenance
  • Engine 1.5 SOHC
  • Engine repair
  • Fuel supply system
  • Control system
  • Cooling system
  • Engine 1.6 DOHC
  • Engine repair
  • Control system
  • Transmission
  • Clutch
  • Manual gearbox
  • Automatic gearbox
  • Wheel drive
  • Chassis
  • Wheel suspension
  • Steering
  • Brake system
  • Body
  • Exterior
  • Interior


Aveo T200 (2003-2008) 
  • General information
  • User manual
  • Power unit
  • Engine repair 1.5L SOHC
  • Fuel system
  • Control system
  • Cooling system
  • Transmission
  • Clutch
  • Manual gearbox
  • Automatic gearbox
  • Drive shafts
  • Chassis
  • Front suspension
  • Rear suspension
  • Steering
  • Brake system
  • Body
  • Exterior (external elements)
  • Interior (internal elements)
  • Electrical equipment
  • Equipment and devices
  • Electrical circuits


ChevyMan.ru © 2017-2026 · Mobile version · Feedback · Site search · Interesting to read · Sitemap: EN BG BY UA RS HR RO PL SK HU

Aveo 2003-2008 · Aveo 2006-2011 · Aveo 2012-2018 · Captiva 2006-2018 · Cruze 2008-2016 · Lacetti 2002-2009 · Lanos 2002-2009 · Niva 2002-2016 · Tahoe 1992-2000 · Tahoe 2000-2014 · Lumina 1 1989-1994 · Trailblazer 1 2001-2008 · Orlando 1 2010-2018 ·
🛡️ For your security and to improve our service, this site uses cookies. You can disable them in your browser.