


Contents: Removal ↧ Installation ↧
Removal
1. Remove all hinge related panels and parts.
2. Remove excess sealant around the hinge and use a scriber to draw the outline of the hinge installation on the rack.
3. Using 100 mesh or finer sandpaper, sand the hinge surface until the four weld spots are exposed.
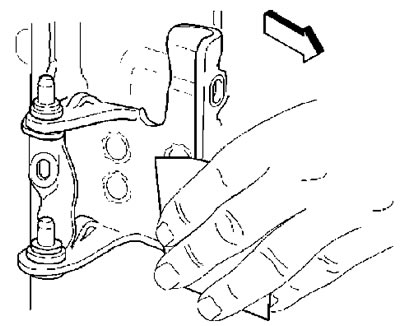
4. Use a center punch to mark the centers of the welding points.
5. Using a 13mm countersink, drill out the welding points in the hinge base.
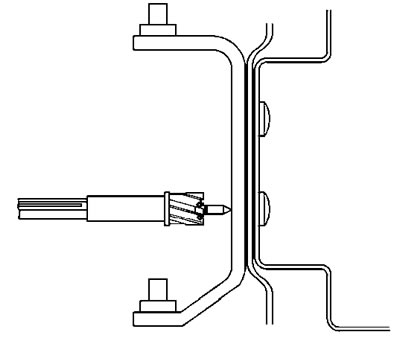
Caution: Do not drill into the body pillar.
6. Remove the hinge. If necessary, knock the hinge off with a chisel.
7. Remove any welding residue from the body pillar.
Installation
1. Repair any damage to the rack caused by removing the hinge.
2. Place the new hinge onto the post using the marks made before removing the old hinge.
3. Use a center punch to mark the centers of the loop holes.
4. Using a 3mm drill, make pilot holes in the post.
5. Using a 11.5mm drill bit, make the final holes in the post.
Note: The drill diameter must be exactly 11.5 mm.
6. Clean the hinge seat.
7. Apply anti-corrosion primer to the seat.
8. Pass the thick fishing line (1) through the access hole in the post, through the hole for the loop fastening pin and through the hole in the pin (2). Secure the fishing line with a knot.
Note: Hinge mounting studs and nuts are supplied with the hinge.
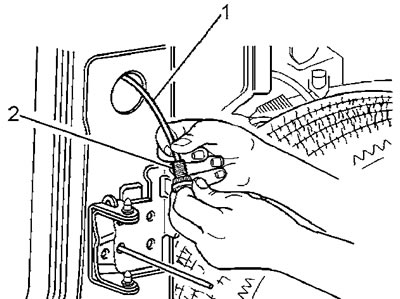
9. Pull the line, insert the pin (2) into the hole in the stand for installing the loop.
10. Holding the stud (4), screw the nut (1) onto it.
11. Insert the pin tightly into the stand, tightening the nut. Untie the fishing line.
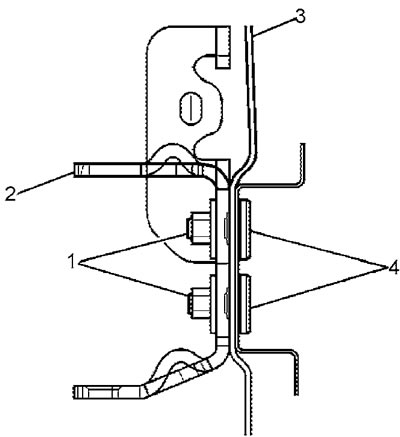
12. Repeat steps 8-11 for the remaining mounting studs.
13. Remove the nuts.
14. Apply sealant to the hinge seat.
15. Install the loop (2) on the rack (3). Tighten the nuts (1). Tightening torque 25 Nm.
16. If necessary, paint the new hinge.
17. Reinstall the removed panels and parts.